Webflow is a popular platform for building websites, but one common issue that many users face is the bandwidth limit on their plans. In this article, we'll explore the bandwidth limit problem in Webflow and provide three effective solutions to overcome it.
Understanding the Webflow bandwidth limit
Before we dive into the solutions, let's first understand what the bandwidth limit is and why it can be a problem for some users.
What is the bandwidth limit?
On Webflow's top self-serve plan (the Business plan), users get 400 GB of bandwidth per month. This means you have 400 GB to distribute your website's traffic, which depends on the size of your site. For example, if your site is 2 MB in size, you could potentially serve around 200,000 page views per month before hitting the limit.
Why is this a problem?
Compared to other hosting services, 400 GB of bandwidth is relatively low, especially considering the monthly cost of $49 for the Business plan. For instance:
- Vultr offers 4 TB (4000 GB) of transfer on their $40/month plan
- DigitalOcean's 8 GB droplet, which costs $48/month, offers 5 TB (5000 GB) of transfer
Moreover, many hosting providers allow you to pay for additional bandwidth usage beyond your plan's limit. Unfortunately, this isn't the case with Webflow's plans.
Webflow's Enterprise plan
If you exceed the 400 GB bandwidth limit on the Business plan, Webflow requires you to upgrade to their Enterprise plan, which is significantly more expensive:
- The starting cost for Enterprise plans is around $15,000 per year (approximately $1,250 per month)
- This is about 32 times more expensive than the Business plan
- Enterprise plans are billed annually, which can be a significant upfront cost for many businesses
While Enterprise plans offer additional features like enhanced security and SLAs, the price jump can be challenging for smaller companies or startups to justify, especially when compared to the bandwidth costs of other hosting providers. It's worth noting that these features can be of great value for big enterprises, as they can be very helpful for their operations. However, the cost may be prohibitive for bootstrapped businesses or small startups.
Now that we understand the problem, let's explore three solutions to overcome the Webflow bandwidth limit, ranging from simple optimizations to more advanced techniques.
Solution 1: Optimize your site's speed
While it may sound obvious, the first and simplest approach to reducing bandwidth usage is to optimize your website's loading speed. By reducing the overall weight of your site, you may be able to bring your bandwidth usage back under the monthly limit. Here's how to do it:

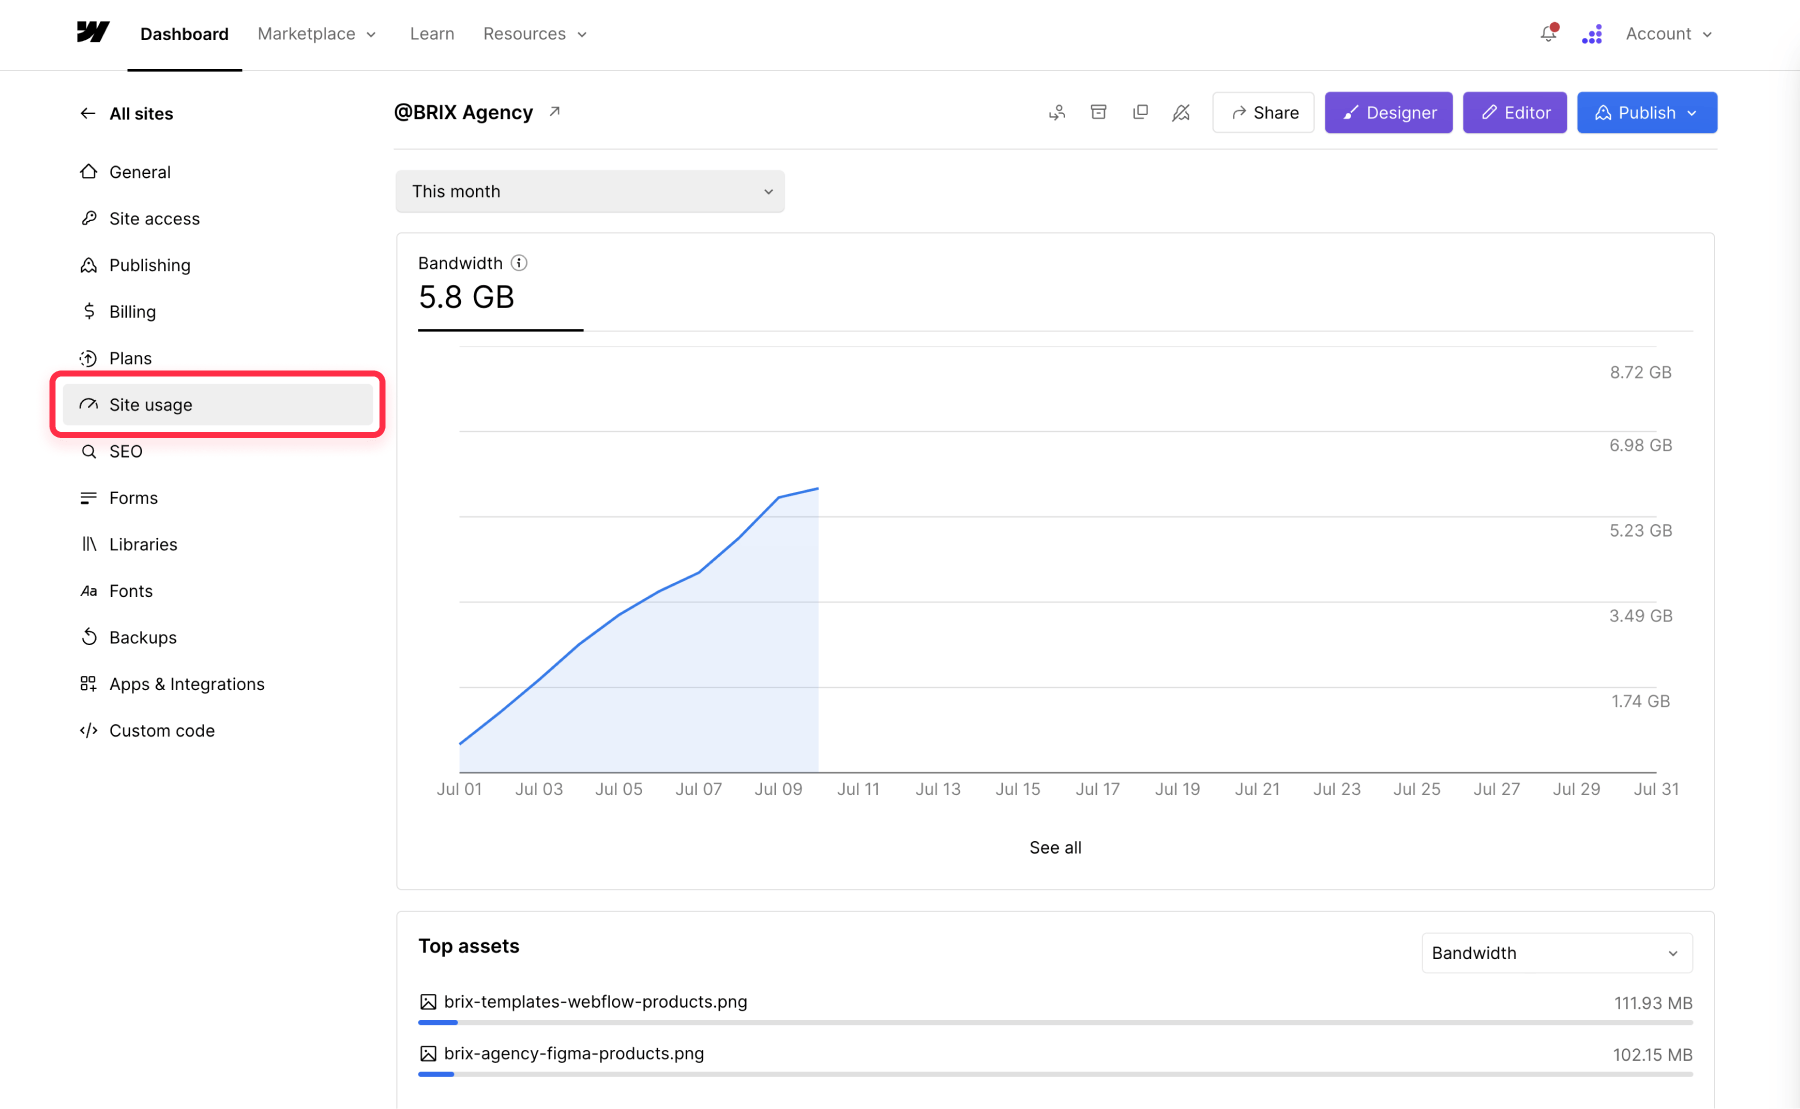
Step 1: Analyze your site usage
- Log in to your Webflow account
- Navigate to your Webflow project
- Click on "Project Settings" in the left sidebar
- Select "Site Usage" from the options
Here, you'll see a graph showing your bandwidth usage throughout the month and which assets (like images and videos) are consuming the most bandwidth. This information will help you identify which elements to focus on for optimization.
Step 2: Verify image sizes
Ensure all your images are correctly sized for their display dimensions:
- Review each image on your site, especially those loading the most in the Site Usage section
- Check if the image dimensions match their display size (accounting for retina displays)
- If an image is significantly larger than needed, resize it to the appropriate dimensions
For example, if an image is displayed at 200x200 pixels (for retina displays) but the original file is 1000x1000 pixels, you're using an image five times larger than necessary.
Step 3: Compress images to WebP format
WebP is a modern image format that offers better compression and faster loading times. Webflow provides a built-in tool to convert your images to WebP:
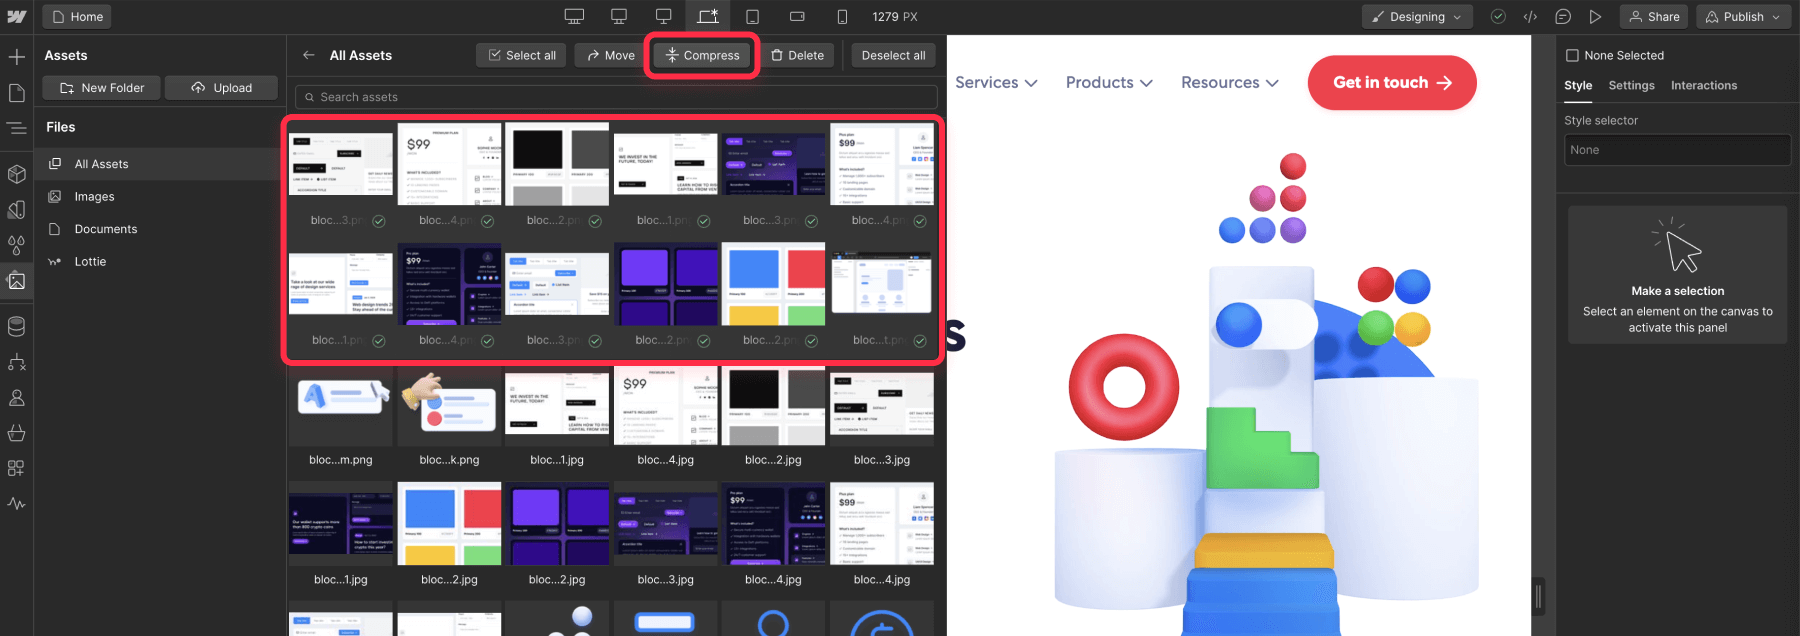
For static pages
- Go to the Assets Panel in Webflow
- Expand the Assets Panel
- Select all the images
- Click on "Compress"
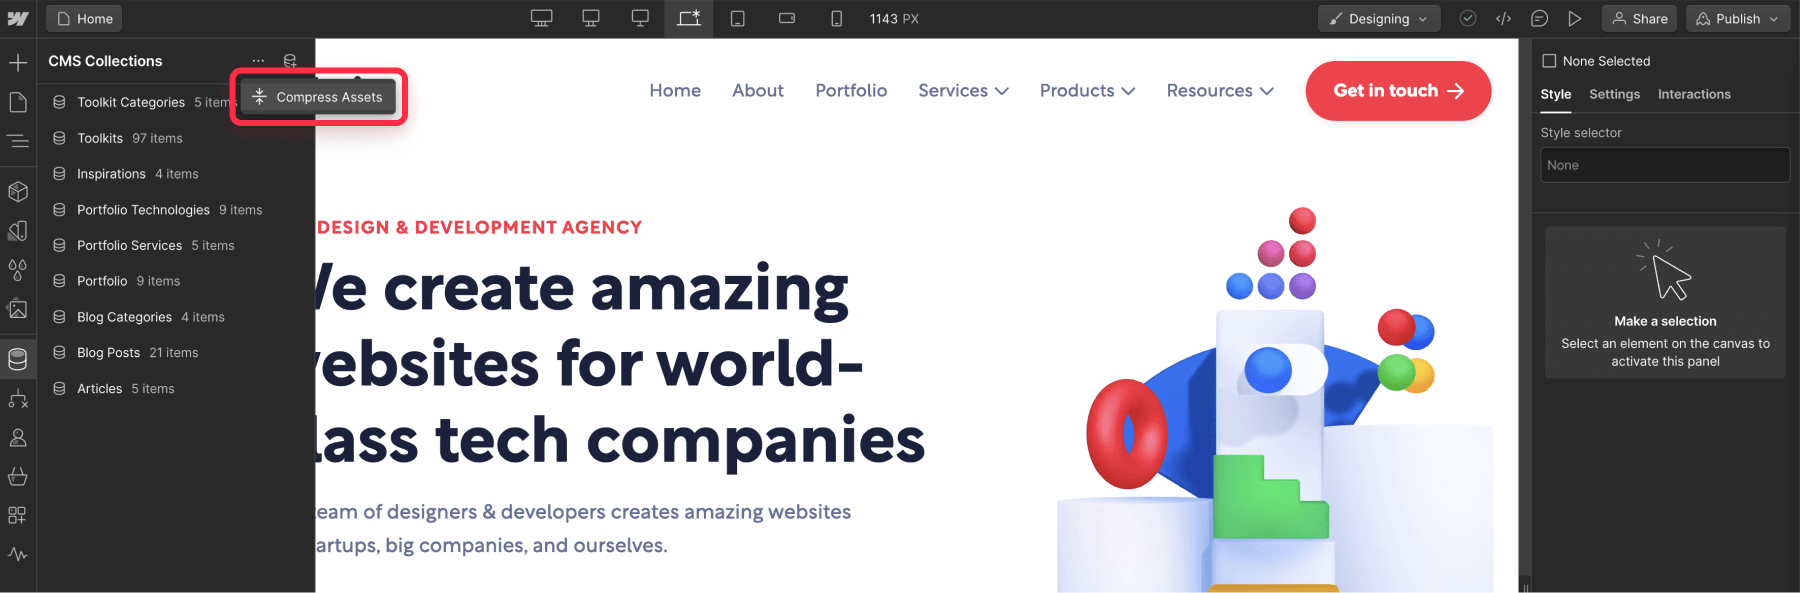
For images in the Webflow CMS
- Go to the Collections section in Webflow
- Click on "More Options" (looks like a 3 docts icon)
- Select "Compress Assets"
These processes may take a few minutes, depending on the number of images.
Step 4: Use icon fonts and SVGs
For logos and icons, consider using SVGs or icon fonts instead of bitmap images:
- If your logo is available in SVG format, use it instead of a PNG or JPG
- For small icons, use an icon font (like Font Awesome) instead of individual files
By implementing these optimizations, you can significantly reduce your site's bandwidth usage without compromising on quality.
With these optimizations implemented, your next step is to keep a watchful eye on your monthly bandwidth consumption. Make it a point to check your Site Usage regularly, perhaps weekly or bi-weekly. This will give you a clear picture of whether your optimizations are having the desired effect. If you see your usage consistently staying well below the limit, you're on the right track. However, if you're still hovering near the threshold, you might need to explore the more advanced solutions we'll discuss in the following sections.
Solution 2: Divide your Webflow site into multiple projects
If optimizing your site's speed doesn't sufficiently reduce bandwidth usage, consider splitting your site into multiple Webflow projects. This approach takes advantage of the fact that the 400 GB bandwidth limit applies to each individual project, not your entire Webflow account.
How to split your site
- Identify logical divisions in your site content. For example:
- Marketing pages and static content in one project
- Blog or news section in a second project
- Sales and landing pages, including PPC or ad pages, in a third project
- Create separate Webflow projects for each division
- Build out each section of your site on its respective project
Connecting multiple projects to one domain
To make this solution work seamlessly, you'll need to connect all these projects under a single domain. This can be achieved using Cloudflare Workers as a reverse proxy. Here's a high-level overview of the process:
- Set up a Cloudflare account and add your domain
- Create a Cloudflare Worker
- Write a script in the Worker to route requests to the appropriate Webflow project based on the URL path
- Deploy the Worker and assign it to your domain
This process requires some technical knowledge, but it's not overly complex. For a detailed guide, you can refer to our article on How to Connect Multiple Webflow Projects to the Same Domain where you can find a reverse proxy script that you can copy and paste.
Alternatively, if you'd prefer professional assistance, our Webflow agency would be happy to handle this for you — just get in touch, and we'll take care of the implementation in one week or less.
Considerations
- This approach works best when your bandwidth usage is fairly evenly distributed across different parts of your site
- It may require some duplication of elements like headers and footers across projects
By splitting your site into multiple projects, you can effectively double or triple your available bandwidth without incurring much higher additional costs. You will indeed need to pay for hosting the other sites, but this will still be significantly less expensive than upgrading to the Enterprise plan.
Solution 3: Implement edge caching functionality
The most advanced and effective solution to overcome the Webflow bandwidth limit is to implement a caching system using Cloudflare. This method involves caching Webflow's assets on Cloudflare's CDN, effectively bypassing Webflow's bandwidth limitations.
How it works
- Cloudflare acts as a reverse proxy for your website
- It caches your site's content and distributes it globally
- A custom setup allows Cloudflare to cache assets from Webflow's CDN (cdn.prod.website-files.com)
- Asset URLs are rewritten to serve from your domain via Cloudflare instead of Webflow.
All of this happens in a fraction of a second using a set of carefully configured Cloudflare Workers, and the best of all is that this solution not only solves the bandwidth issue but can also significantly improve your site's loading speed.
Considerations
- This is a technically complex solution that requires expertise in Cloudflare and web development
- It provides the most comprehensive solution to the bandwidth limit problem
- The ongoing costs for the usage of Cloudflare Workers are typically much lower than upgrading to Webflow's Enterprise plan, typically in the $10 - $20/month range
- It can significantly improve your site's performance due to Cloudflare's global CDN
Implementation steps
While the exact implementation can be complex and may vary based on your specific setup, here's a general overview:
- Set up a Cloudflare account and add your domain
- Disable Webflow SSL to enable full SSL/TLS encryption on Cloudflare
- Configure Cloudflare's caching settings for your domain
- Set up a Cloudflare Worker to intercept requests for Webflow assets
- Write a script in the Worker to:
- Fetch assets from Webflow's CDN
- Cache these assets on Cloudflare
- Rewrite asset URLs to serve from your domain
- Deploy the Worker and update your DNS settings
If you're looking for a more detailed and technically in-depth tutorial, we recommend checking out the guide published by Milk Moon Studio. Their article provides a comprehensive walkthrough of this process, including sample scripts and advanced configurations.
However, be aware that their tutorial is quite complex and may require a solid understanding of web development and Cloudflare's systems. If you're not comfortable with advanced technical implementations, it might be best to get help from an agency with advanced expertise in Webflow (like us!).
Conclusion
Overcoming Webflow's bandwidth limit is possible through various methods, each with its own level of complexity and effectiveness:
- Optimize your site's speed: A simple, yet effective first step that can often solve the problem for many sites.
- Divide your site into multiple projects: A moderate solution that can effectively multiply your available bandwidth.
- Implement caching functionality: The most advanced and comprehensive solution, offering both increased bandwidth and improved performance.
Choose the solution that best fits your technical capabilities and site requirements. If you're unsure or need assistance, don't hesitate to reach out to our Webflow agency for help. With these strategies, you can continue to enjoy Webflow's powerful features without being constrained by bandwidth limitations.