

In today's digital landscape, SEO (Search Engine Optimization) remains one of the primary channels for acquiring users and customers. As Webflow developers, we're constantly seeking ways to improve our SEO to increase organic traffic. One effective method to enhance your site's visibility in search results is by integrating Schema.org markup into your Webflow site.
This article will guide you through the process of implementing Schema.org rich snippets in Webflow, a question frequently asked by many of our clients.
Understanding Schema markup and rich snippets
Before diving into the implementation process, let's briefly explain what Schema markup is, its purpose, and how it relates to Google's rich snippets.
Schema.org markup is a standardized system for structuring content on your website. It uses predefined structures created by the Schema organization to help search engines and other content consumers better understand your site's information.
For example, if you have an article on your site, Schema markup allows you to provide additional details such as:
- Article title
- Description
- Author
- Publication date
- Update date
Similarly, for other content types like movies, you can include information such as:
- Actor
- Location
- Director
- Duration
- Producer
Google often displays some search results more visually, known as "rich snippets." These snippets provide more information than just a title and description. For instance, if you search for a chocolate chip cookie recipe, you might see not only the title and description but also:
- A photo of the cookies
- Cooking time
- User ratings

By implementing Schema.org markup on your site, you help search engines better understand your content, potentially leading to more visually prominent search results. This can increase your CTR (click-through rate), bringing more traffic to your site and, consequently, more potential sales.
Types of Schema.org markup
There are various types of Schema.org markup, including:
- Product Schema
- Article Schema
- Breadcrumb Schema
- Event Schema
- Local Business Schema
- Job Posting Schema
- And (many) more!

Although the integration process is similar for all types, we'll concentrate on implementing Article Schema in this guide because it's widely used and frequently requested by our clients.
How to integrate Schema.org rich snippets in Webflow
Follow these steps to add Schema.org markup to your Webflow site:
Step 1: Log in to Webflow and access the Designer
- Log in to your Webflow account.
- Open your project and enter the Webflow Designer.
Step 2: Configure your Webflow CMS
- In the Webflow Designer, go to the left sidebar and click on "CMS."
- Select your article or blog post collection.
- Click on the small gear icon (Settings) next to your collection.
- You will see the Blog Post Settings.
- Scroll down to "Custom Fields."
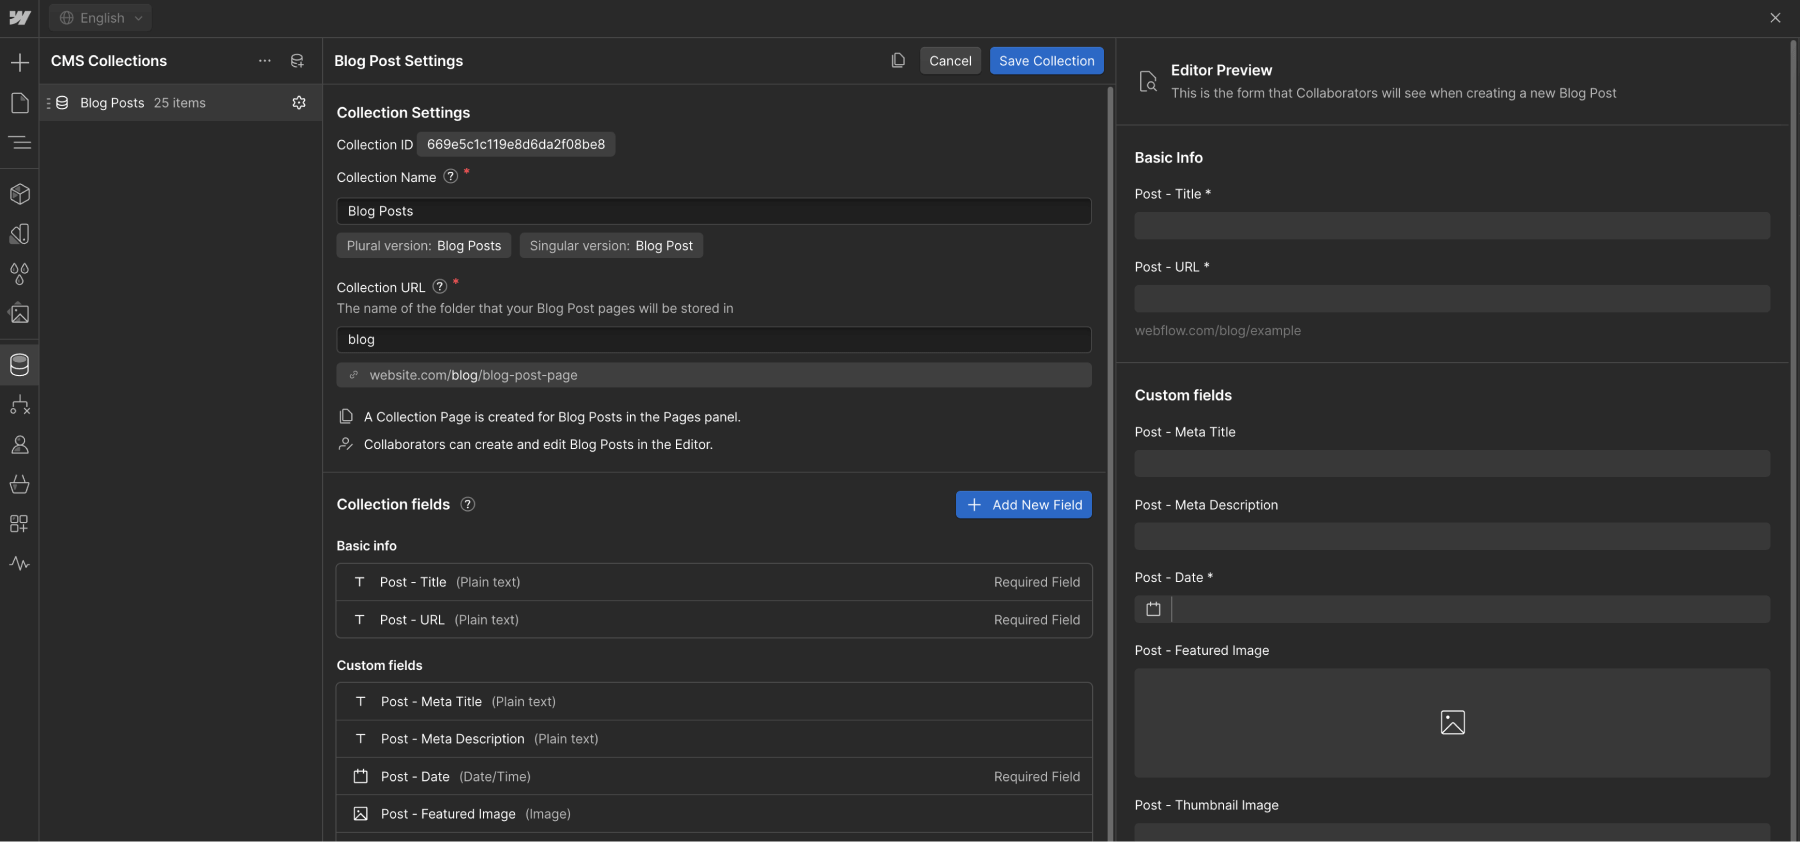
Ensure that all the fields you need for your Schema markup (e.g., author, image, title, publication date, etc.) are already created in your CMS. If not, you can create them by clicking "Add New Custom Field" and selecting the appropriate data type.
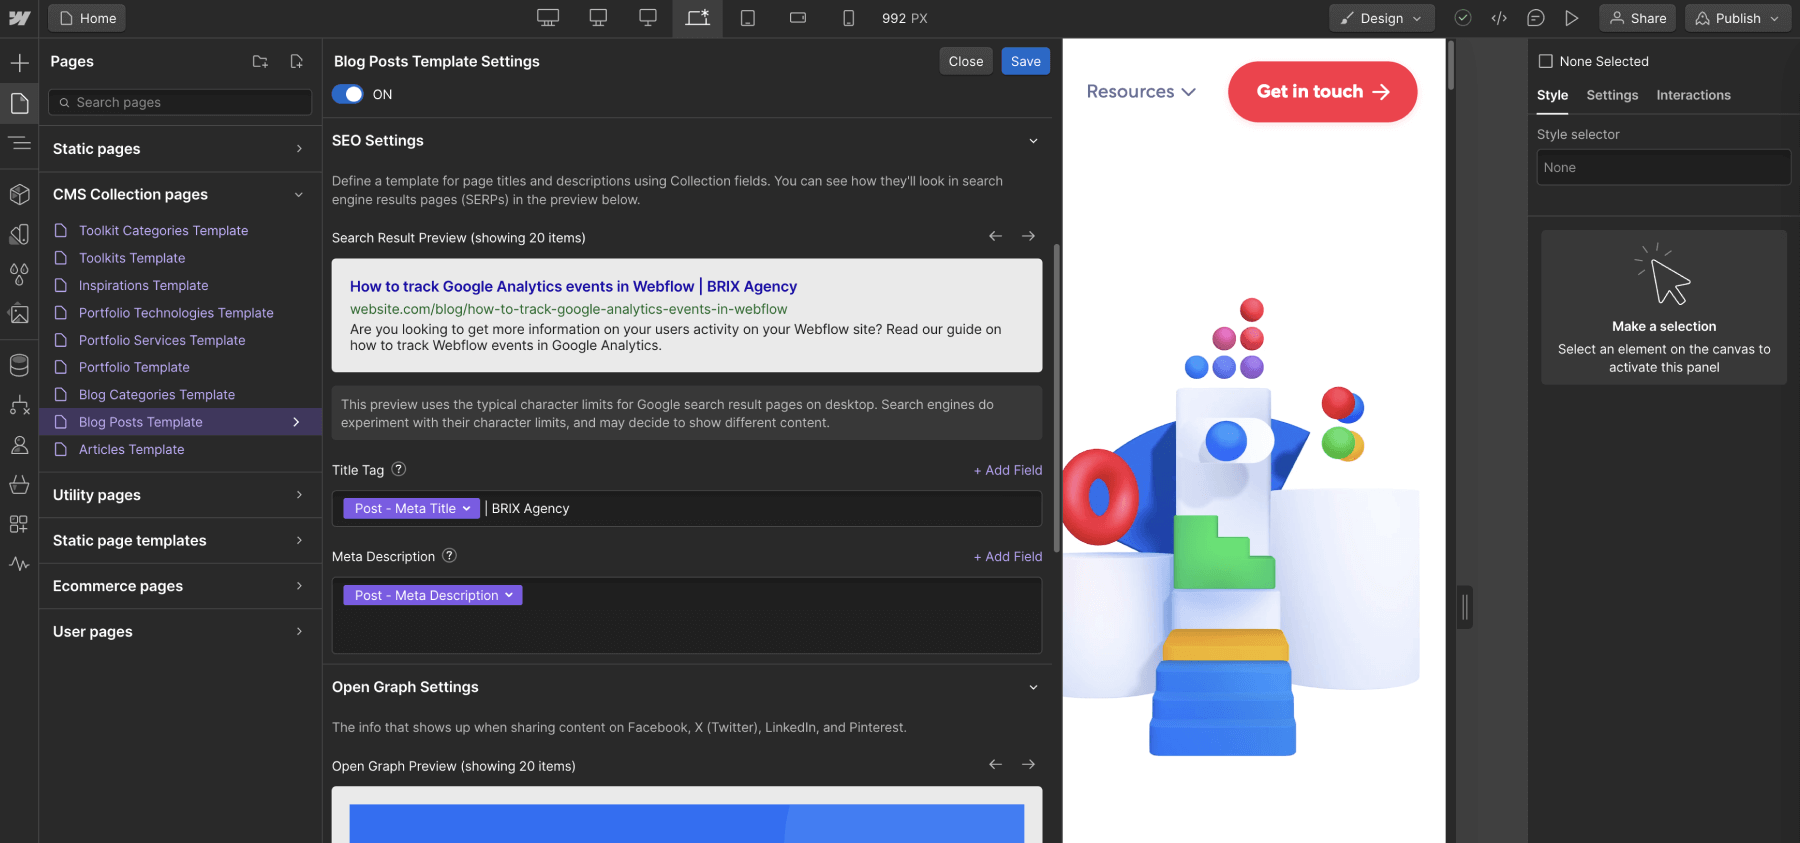
Step 3: Distribute CMS data for Rich Snippets
- In the left sidebar, go to the "Pages" section.
- Find the "CMS Collection Pages" area (highlighted in purple).
- Select your blog post / article CMS collection.
- Click on the Settings icon and choose "View Page Settings."
- In the Page Settings, locate the "SEO Settings" section.
- Ensure that the Title Tag and Meta Description are correctly filled in. If not, click the purple "Add Field" text to pull dynamic data from your CMS (While this is not the schema.org setting, it is also important to make sure you have your Meta Title and Meta Description dynamically configured)
Step 4: Add Schema markup
- Scroll down to the "Custom Code" section.
- Select the "Inside <head> tag" area.
- Paste your Schema markup code. Here's an example for Article Schema:
Step 5: Make the Schema markup dynamic
After pasting the code, you need to make it dynamic:
- For each property (e.g., headline, image, datePublished), select the placeholder (e.g., [Article Title]) and click on "Add Field."
- Select the corresponding CMS field from the dropdown menu.
- A small purple box will appear, indicating that the field is now dynamically mapped.
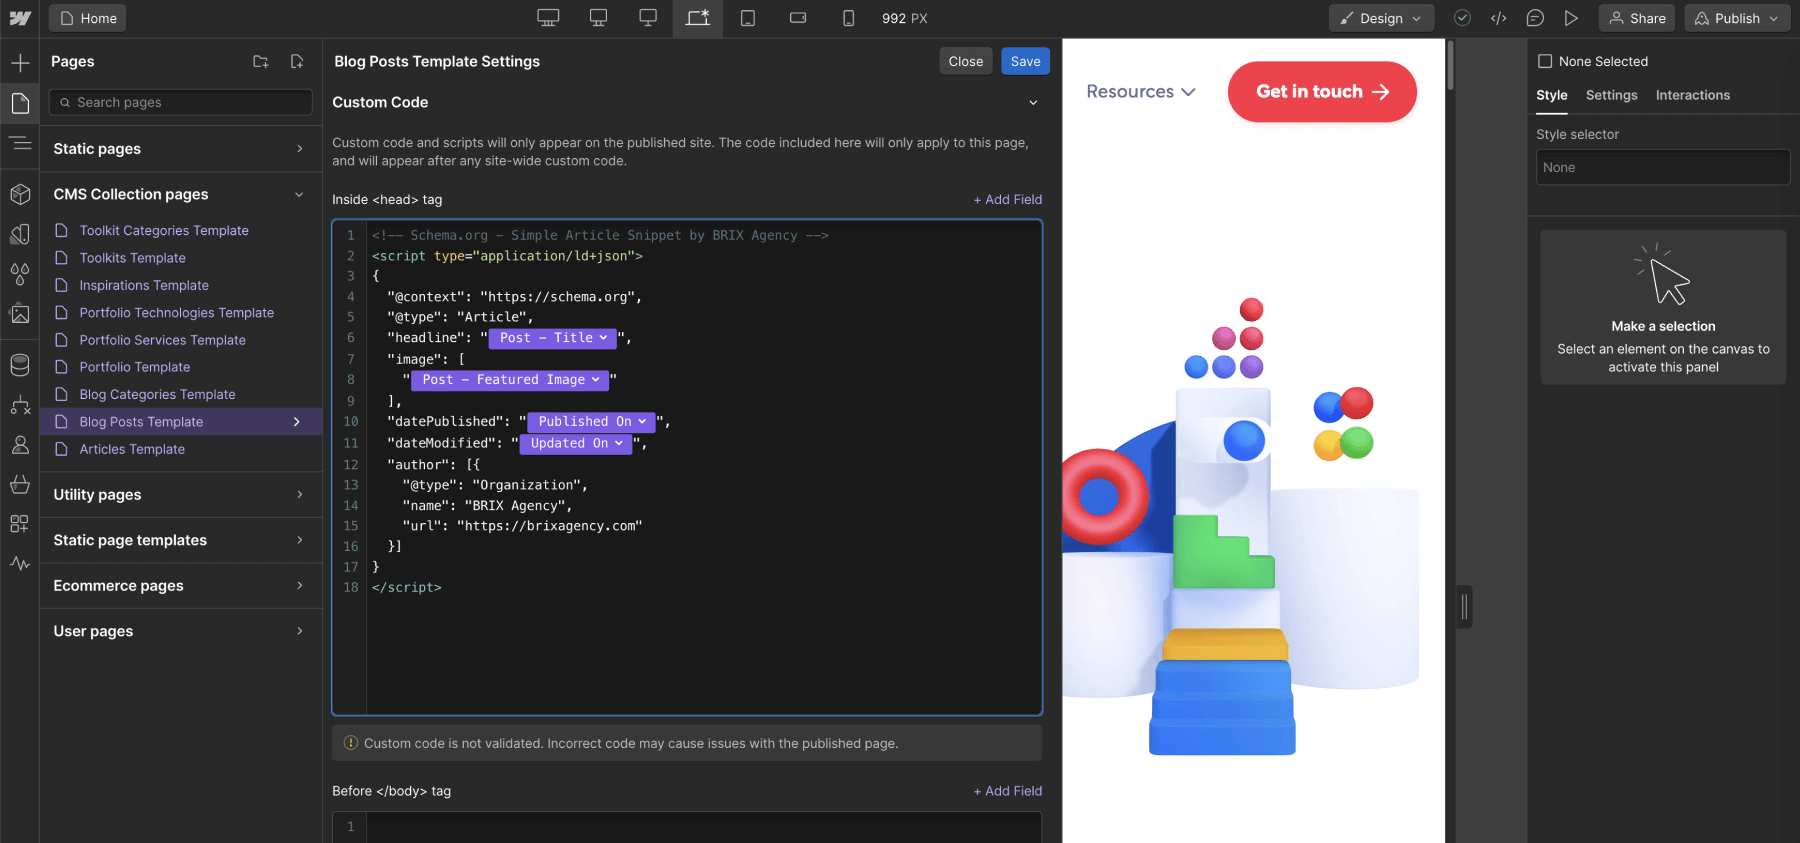
Repeat this process for all relevant Schema properties. Some properties, like the author type (Person or Organization), can remain static if they don't change across articles.
Step 6: Save and publish
- Click "Save" to store your changes.
- Publish your site. It's recommended to publish to the staging version (webflow.io) first to verify everything works correctly before updating the live site.
Step 7: Verify your Schema markup
- Go to Google's Rich Results Test tool (formerly known as the Schema Markup Validator).
- Enter the URL of one of your articles.
- Run the test to check if your Schema markup is valid.
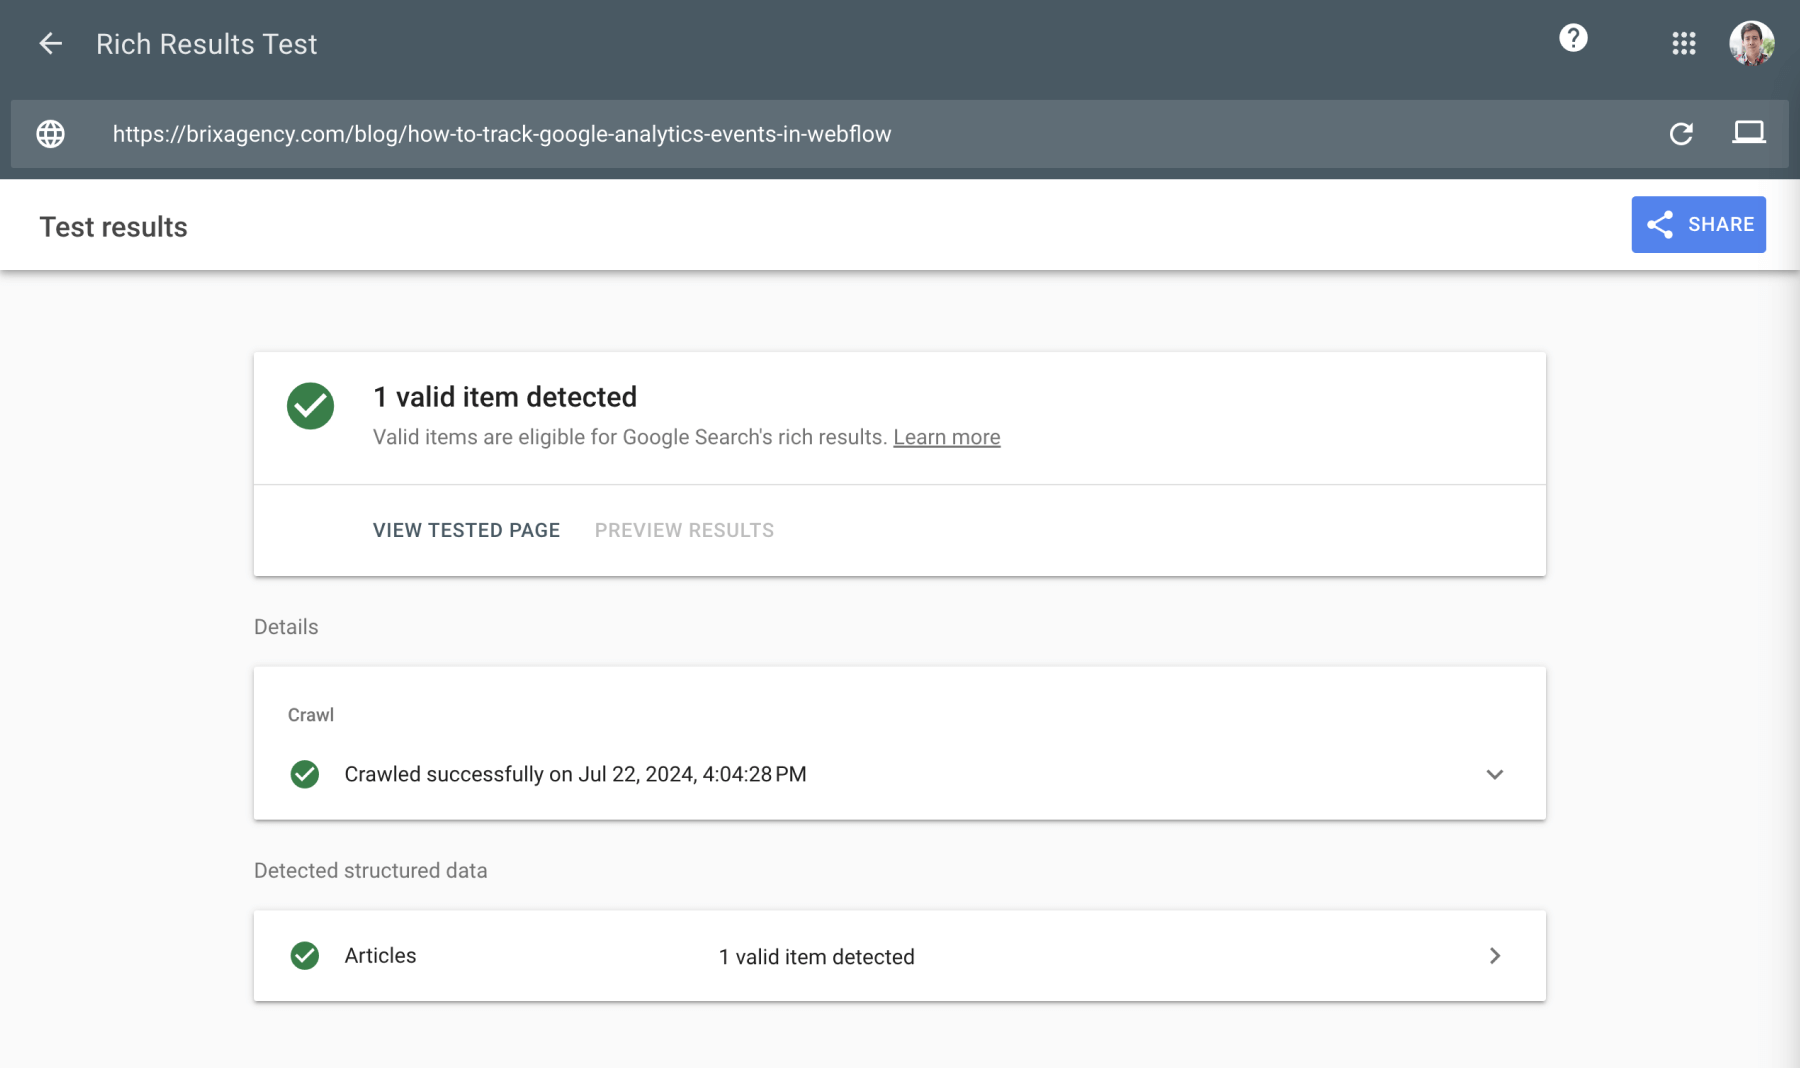
If the test shows errors, read the error message carefully and adjust your markup accordingly. Usually, errors occur due to incorrect data formats or missing required fields.
Best practices and additional tips for implementing rich snippets in Webflow
- Implement Schema markup for all relevant content types on your site, not just articles. This is a low-hanging fruit for SEO improvement with no downsides.
- Keep your Schema markup up-to-date as you make changes to your site structure or content.
- Regularly check Google Search Console to monitor how your rich snippets are performing in search results.
- Consider implementing more advanced technical SEO functionalities alongside Schema markup for comprehensive optimization.
Conclusion
Integrating Schema.org rich snippets into your Webflow site is an effective way to enhance your SEO efforts and potentially increase your visibility in search results. While this guide focused on Article Schema, remember that there are many other types of Schema markup you can implement depending on your content.
If you find the process challenging or need assistance with more complex SEO implementations in Webflow, don't hesitate to reach out to our dedicated Webflow agency — We can help you navigate the challenges of technical SEO and ensure your site is fully optimized for search engines.
By taking advantage of Schema.org markup, you're giving search engines a clearer understanding of your content, which can lead to more prominent visual appearances in search results, higher click-through rates, and ultimately, more organic traffic to your site.


Join readers commenting on this post!