Salesforce is a widely-used CRM software, and for good reason. It is packed with a robust set of marketing tools, enabling sales and marketing teams to manage all customer relationships in one place.
Because of this, we often receive messages from clients looking to integrate their Webflow forms to Salesforce so all their website leads are automatically added to their funnel and CRM without extra manual data entry work.
And that is what this article is all about. We will show you 3 different ways to connect your Webflow forms to Salesforce, so your website works for you, not the other way around.
The 3 different ways are the following, in case you want to scroll directly to the one you are looking for.
- Embed your Salesforce form in Webflow
- Connect your Webflow form to Salesforce using Zapier
- Connect your Webflow form to Salesforce using Pardot form handlers
1. Embed your Salesforce form in Webflow
The easiest way of adding a form to your Webflow website that is connected to Salesforce is to use the embedded HTML code that Salesforce provides; however, this option comes with several downsides, so it's not the method we recommend.
The main downside is that if you embed your Salesforce form directly, the design is going to be the default design from Salesforce, which unfortunately is not very customizable, and it doesn’t look great.
To take this route, you just need to follow the steps below:
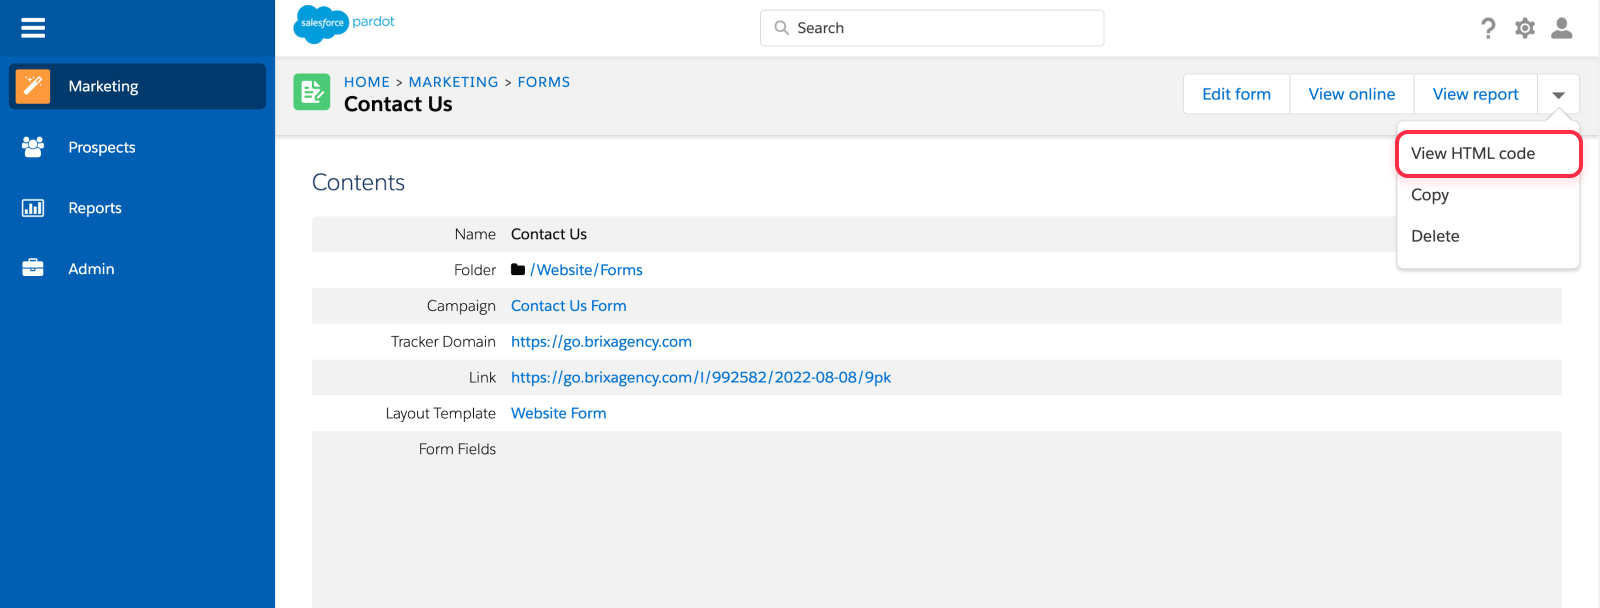
1. On Salesforce, go to Marketing > Forms > Forms

2. Open the form you want to embed
3. Click on the dropdown arrow and select 'View HTML code'
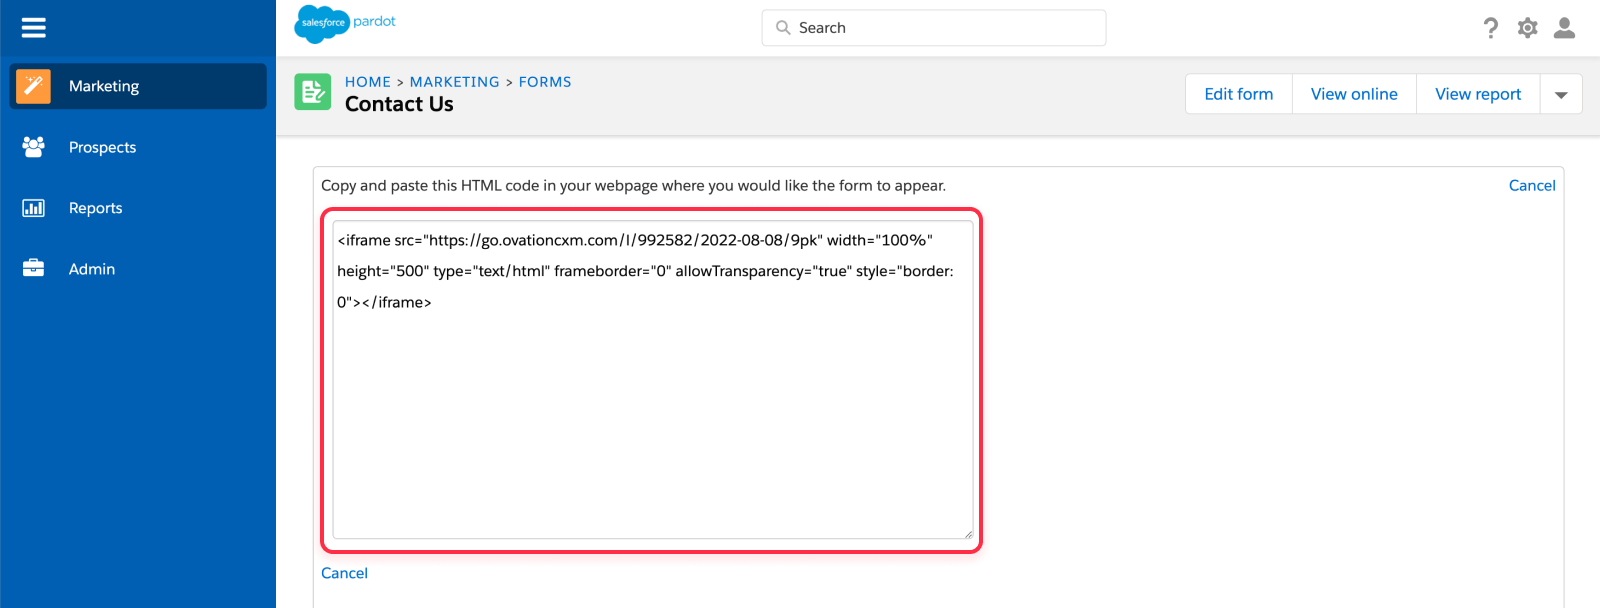
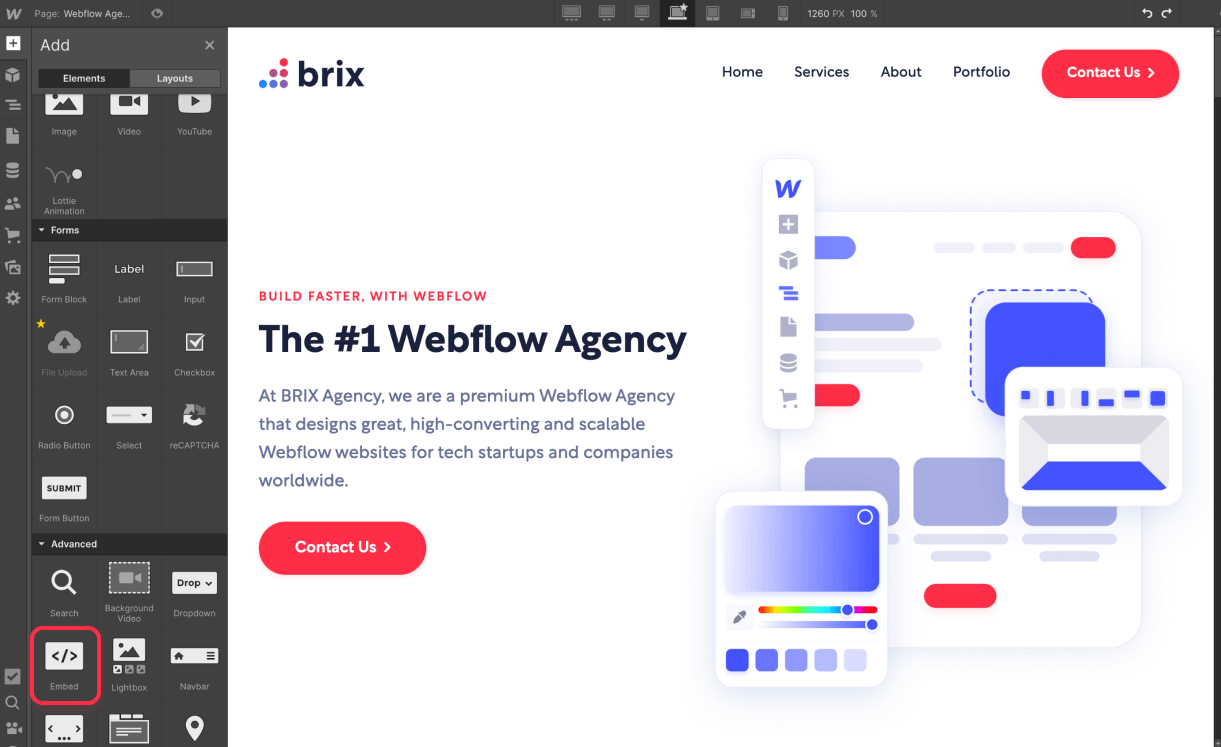
4. Copy the iframe code and paste it on Webflow using the HTML embed element
In case you are not familiar with it, you can find the Embed element under the Advanced tab at the bottom of all the items in the Elements tab.
5. Publish your Webflow website and your form will be live 🚀.
If you've already tried this method and weren't happy with the result because you want your Salesforce form to match your website's branding, continue reading for the other two options. We'll help you get the look you want 😉.
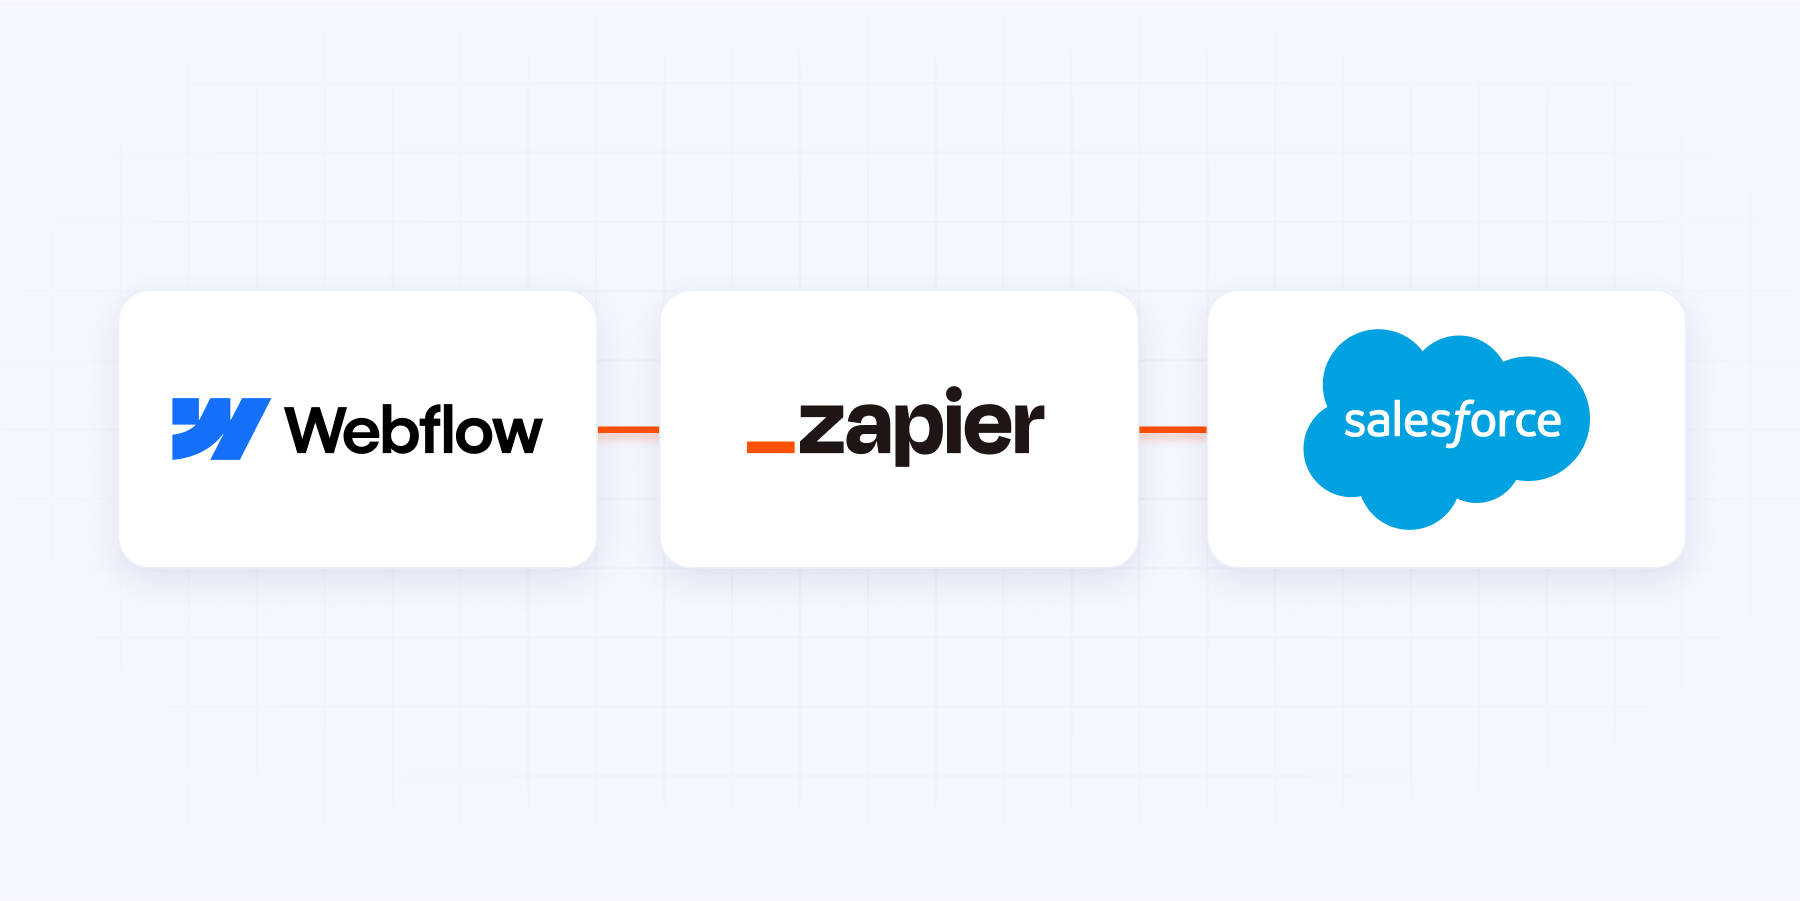
2. Connect your Webflow form to Salesforce using Zapier
The second way of connecting your Webflow forms to Salesforce is using the famous automation service Zapier.
This approach allows your Webflow form to look and behave like a completely native Webflow form, but using a webhook from Zapier.
However, the main downside of this approach is that Zapier charges by the number of tasks per month, so if you have thousands of leads every month, it can be quite expensive to keep this Webflow <> Salesforce integration running.
If you are going to take this approach, you just need to follow the steps below:
1. Create a Zapier account
2. Use the ‘Add new leads on Salesforce for new Webflow form submissions’ Zapier template
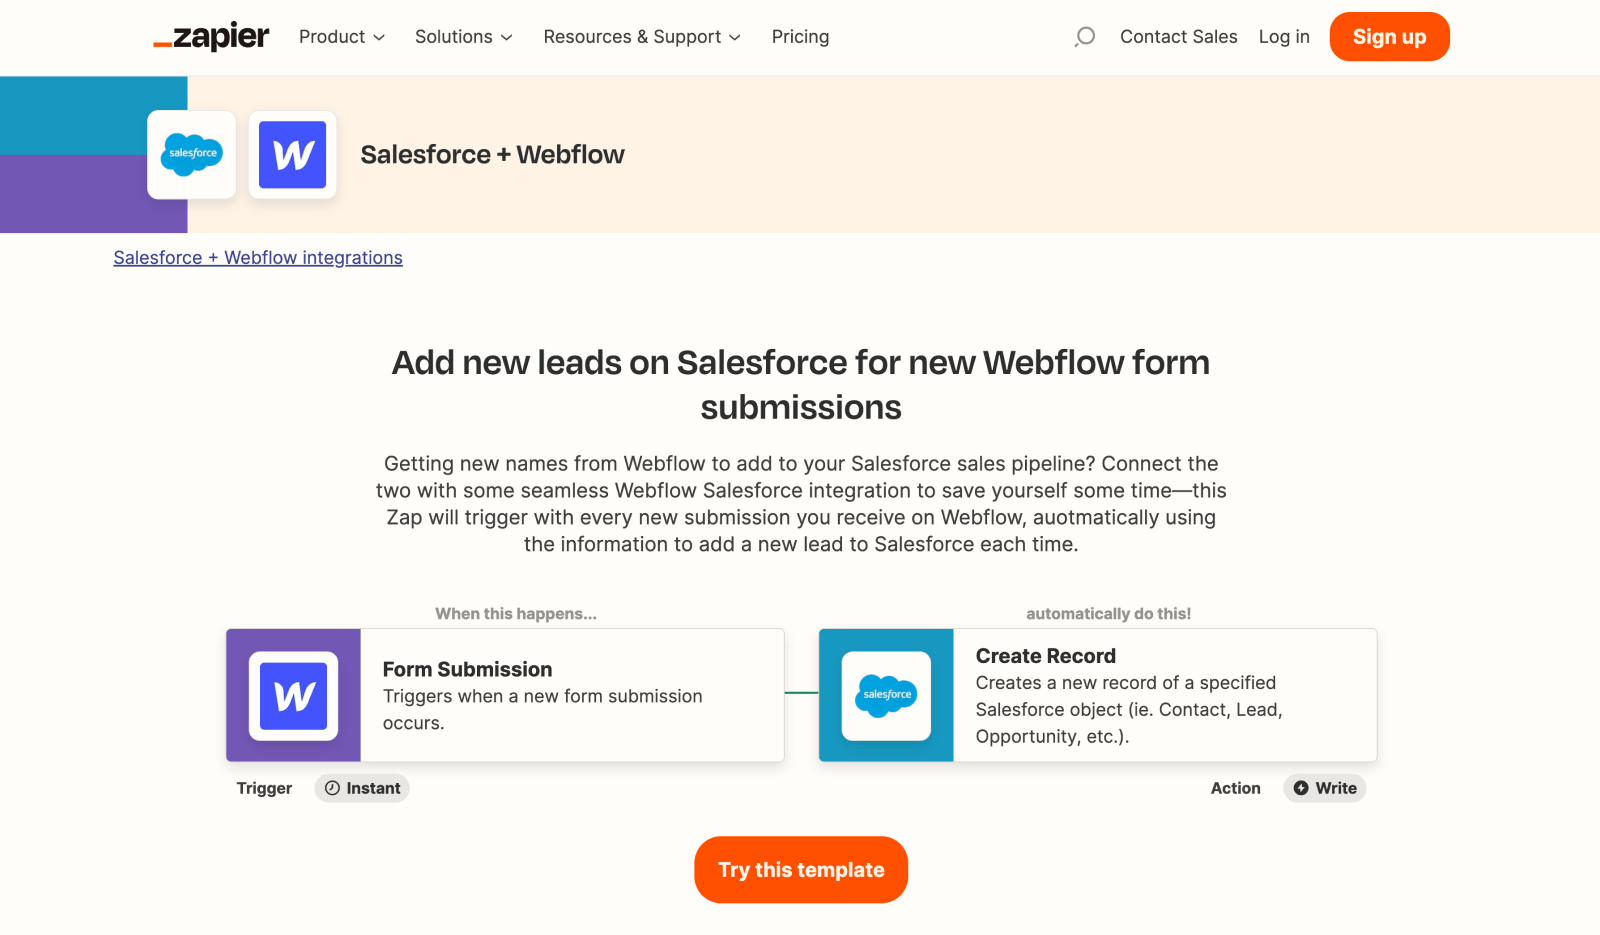
3. Connect your Webflow and Salesforce account to Zapier
4. Configure the Steps of the Zap
5. Publish your new Zap and you are done!
ℹ️ Quick tip: If Zapier can't find your Webflow form when setting it up, you can easily solve it by publishing your Webflow form and submitting a test form submission.
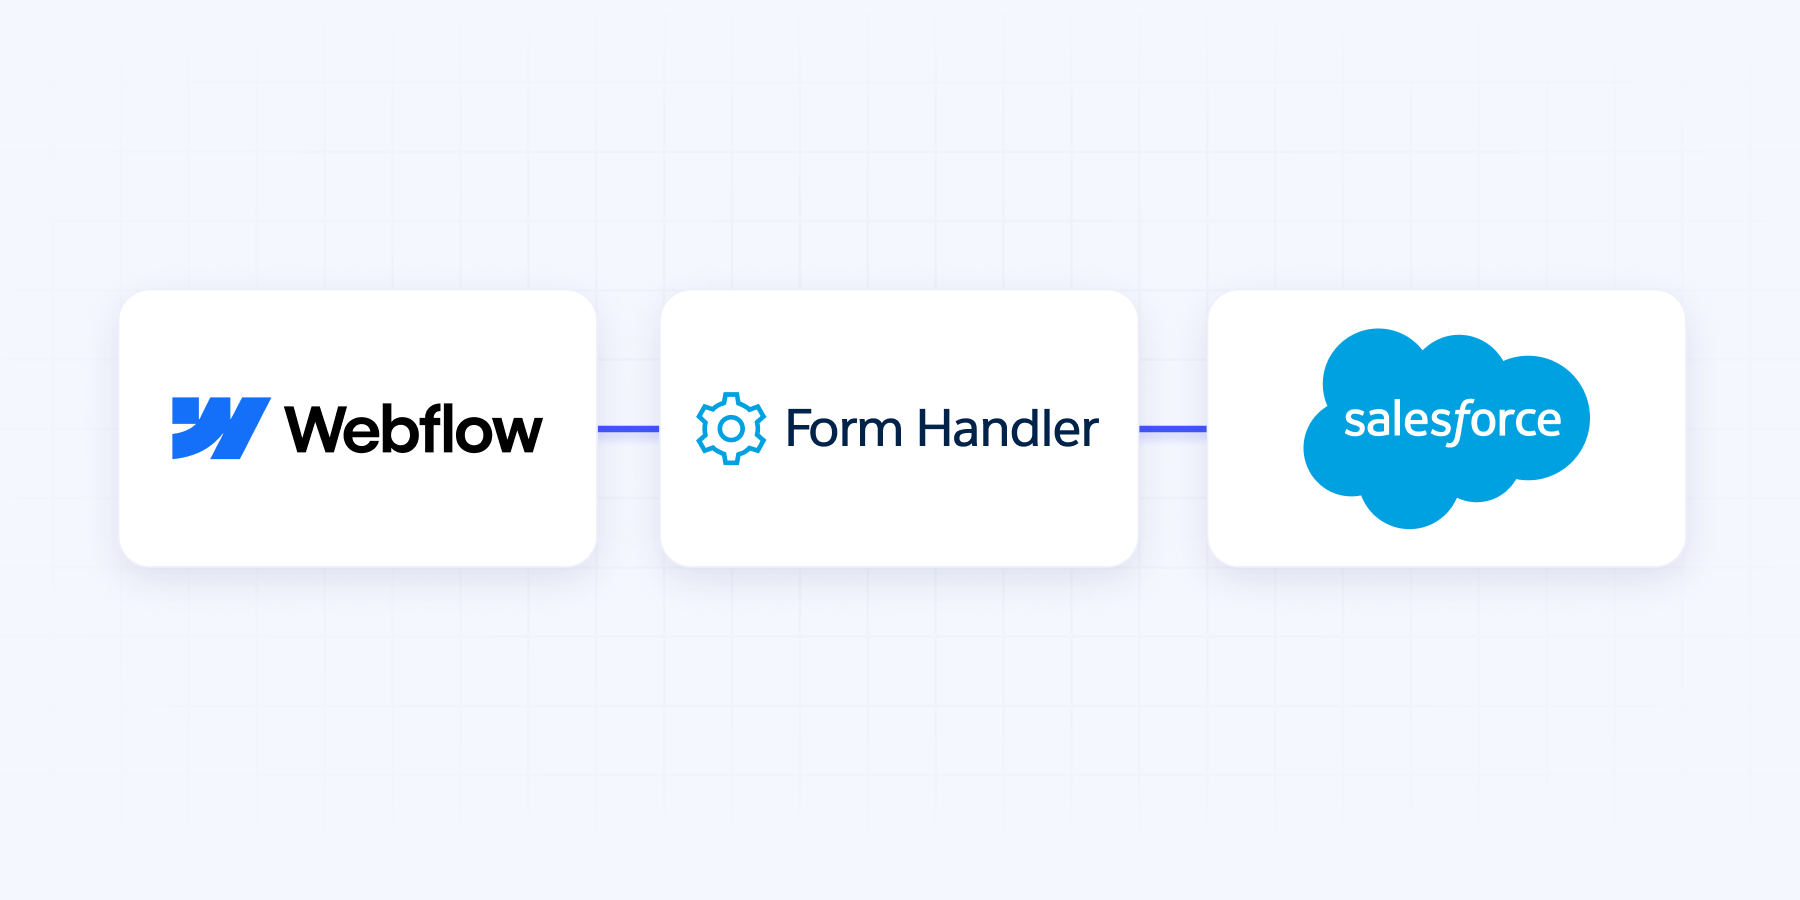
3. Connect your Webflow form to Salesforce using form handlers
Last but not least, we have a 3rd way to connect your Webflow forms to Salesforce: using Salesforce Pardot form handlers.
This is our recommended way ✅ to connect Webflow forms to Salesforce because it doesn’t have any downsides, as by using this method you can customize your forms to look and feel completely native, while also integrating them with Salesforce without the need of a paid third-party service like Zapier.
Before starting with the steps for this option, let’s define what is a form handler. In simple terms, a form handler is an API endpoint (aka a link that receives data) that you add to your form of choice and any data that is sent through the form will be automatically saved in the database or CRM of the form handler (in this case, Salesforce).
Now, everything sound amazing, right 🙌🏻? Well, it is! The only small downside is that the setup can be slightly technical, however, we will explain it with screenshots so it shouldn’t take you more than 5 minutes to complete, even if you are not a technical person.
The steps you need to complete are the following:
1. On Salesforce, go to Marketing > Forms > Form Handlers
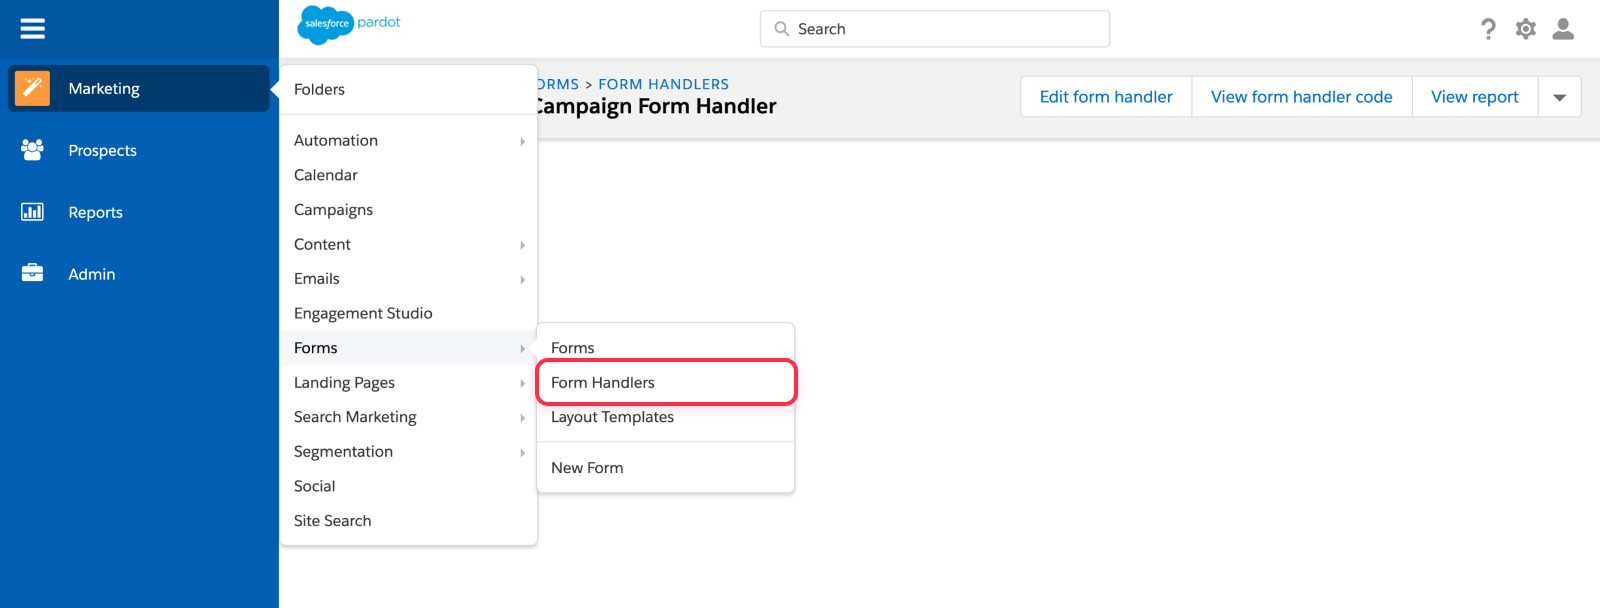
2. Click on the Add Form Handler button
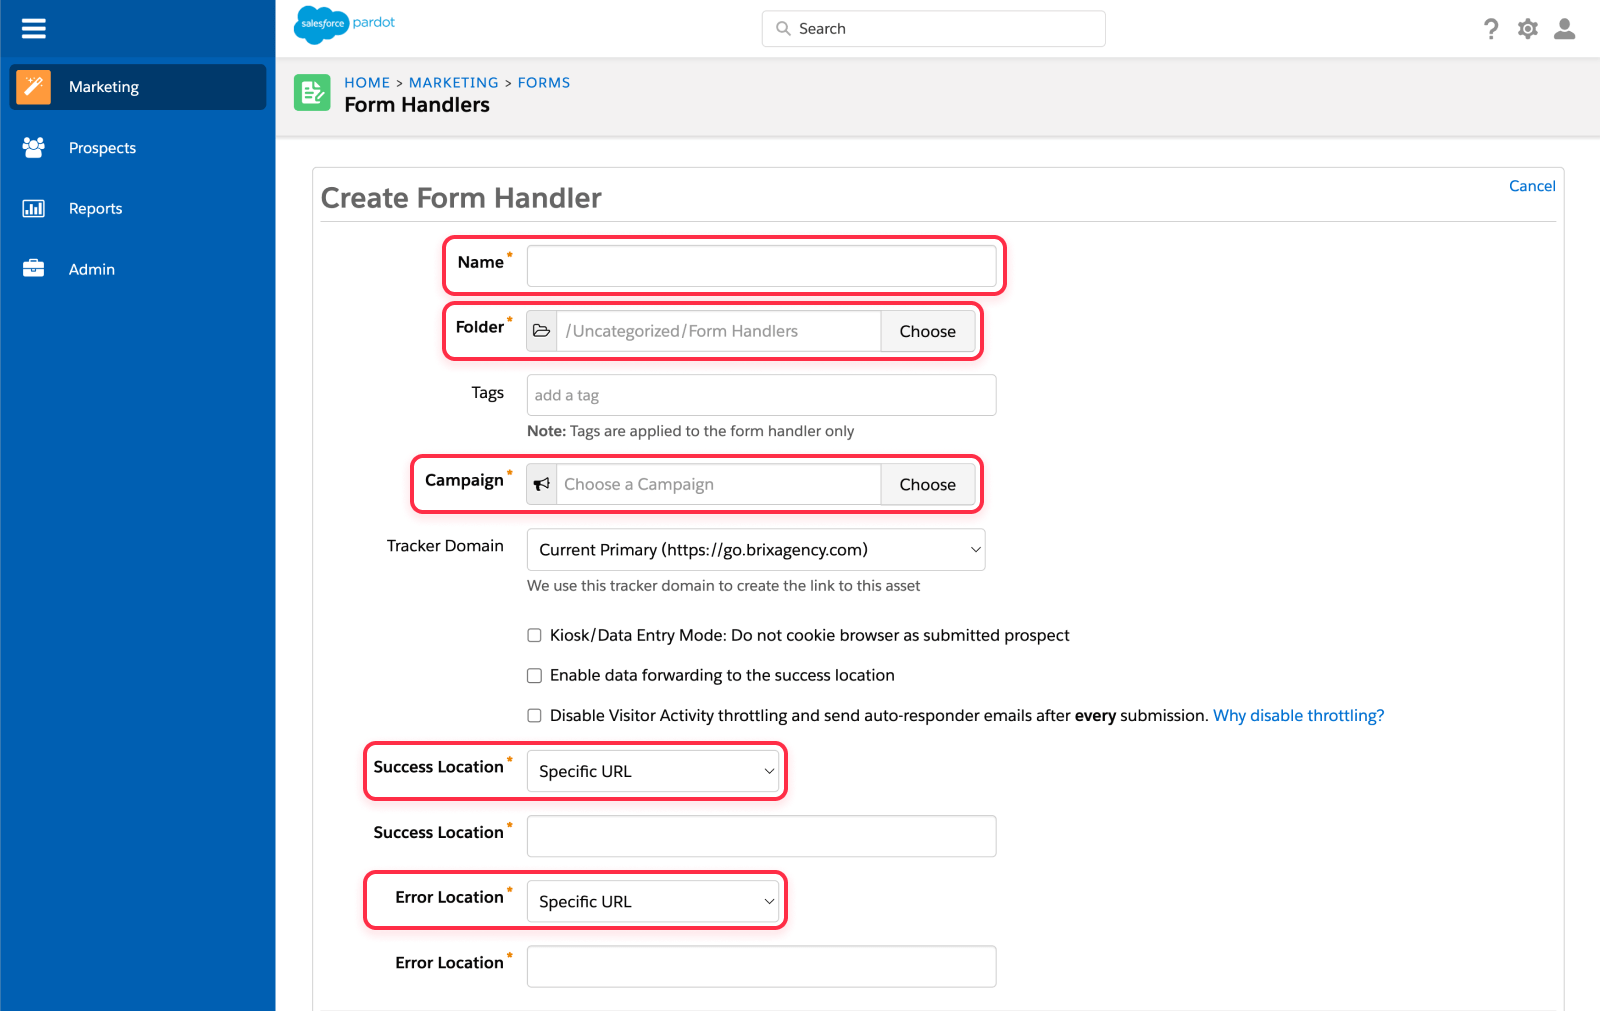
3. You will arrive at the Create Form Handler screen, in which you will need to fill out the following inputs:
Name: Add any name to your form handler. It won’t be visible to the user, so you can just add descriptive text to remember what that form handler is for.
Folder: Choose the folder you would like the form handler to be located in.
Campaign: Choose the Marketing Campaign to which you want to assign the form handler to.
Success Location: For the success location, you must add a Specific URL, otherwise the user will be returned to the same page that contains the form handler.
Ideally you can add a simple /thank-you/ page so users are redirected there. You can even use that for conversion tracking purposes on other marketing platforms such as Facebook Ads, Google Ads, etc.
Error Location: Similar to the Success Location, you just need to add the page where users will be redirected in case there is an error. However, if the setup is done properly, users will never actually arrive on this page, so don’t worry about that!
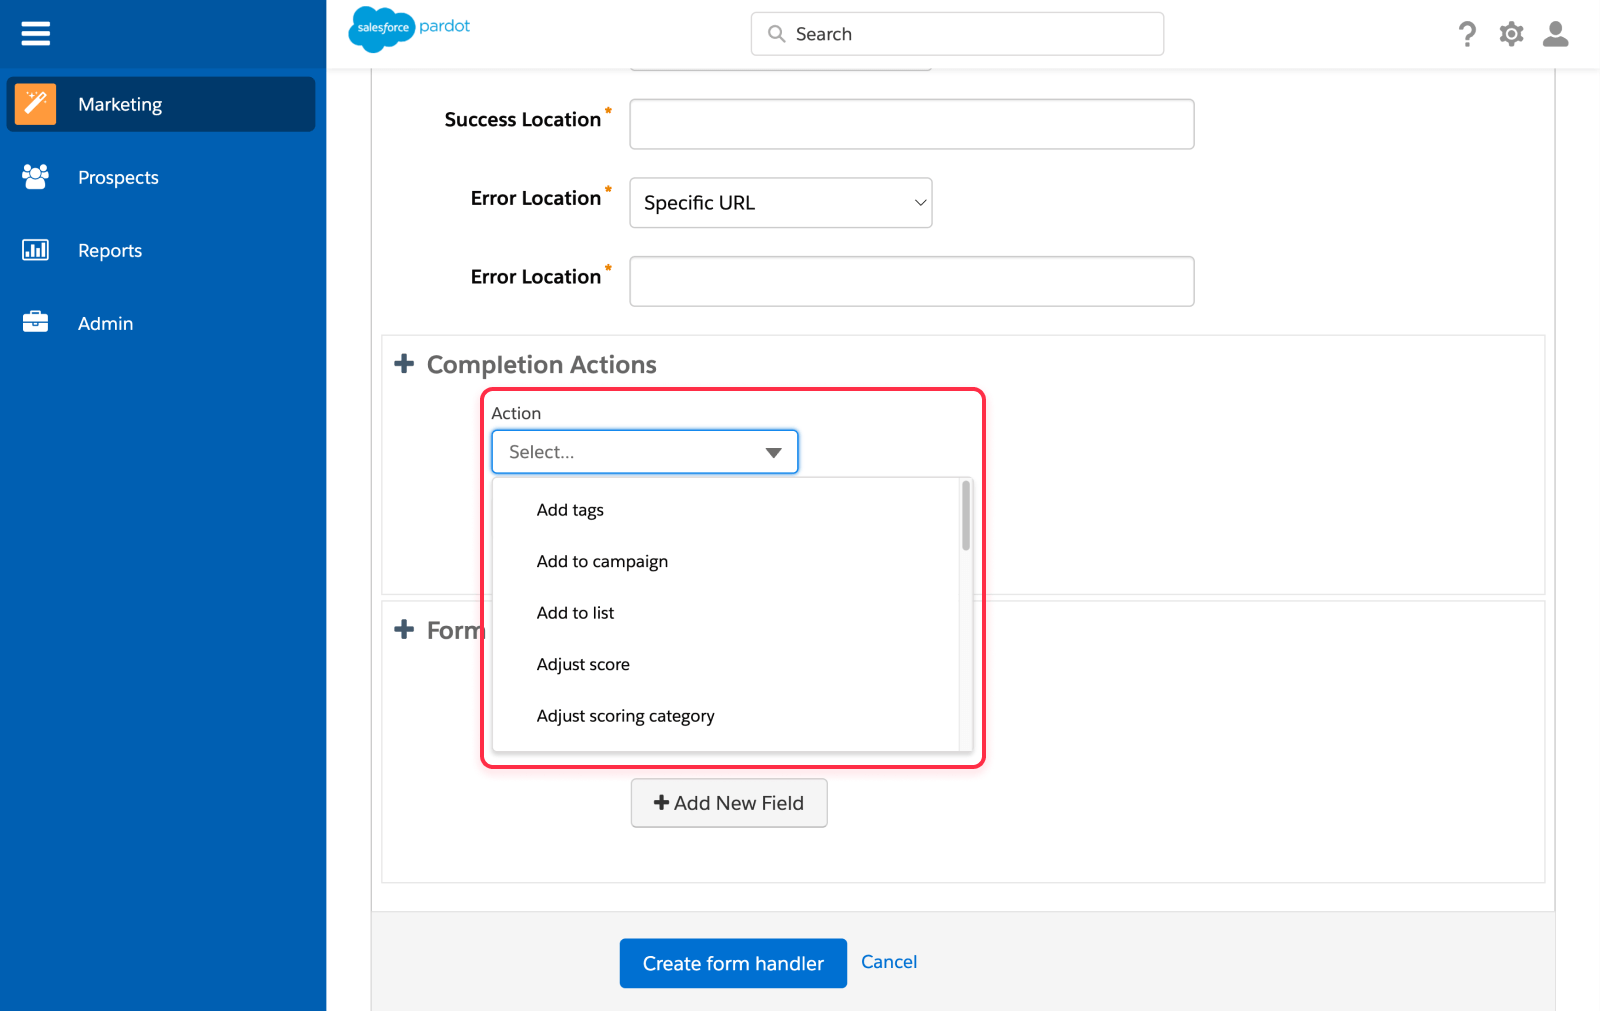
Once you are done with this inputs, we need to continue to the completion actions.
4. Fill out the Completion Actions based on your desired funnel for the leads that go through that form handler.
5. Create the Form Fields that are going to be mapped out from Webflow to Salesforce.
This part is important for all the data mapping to work properly, so we recommend you keep in mind the following:
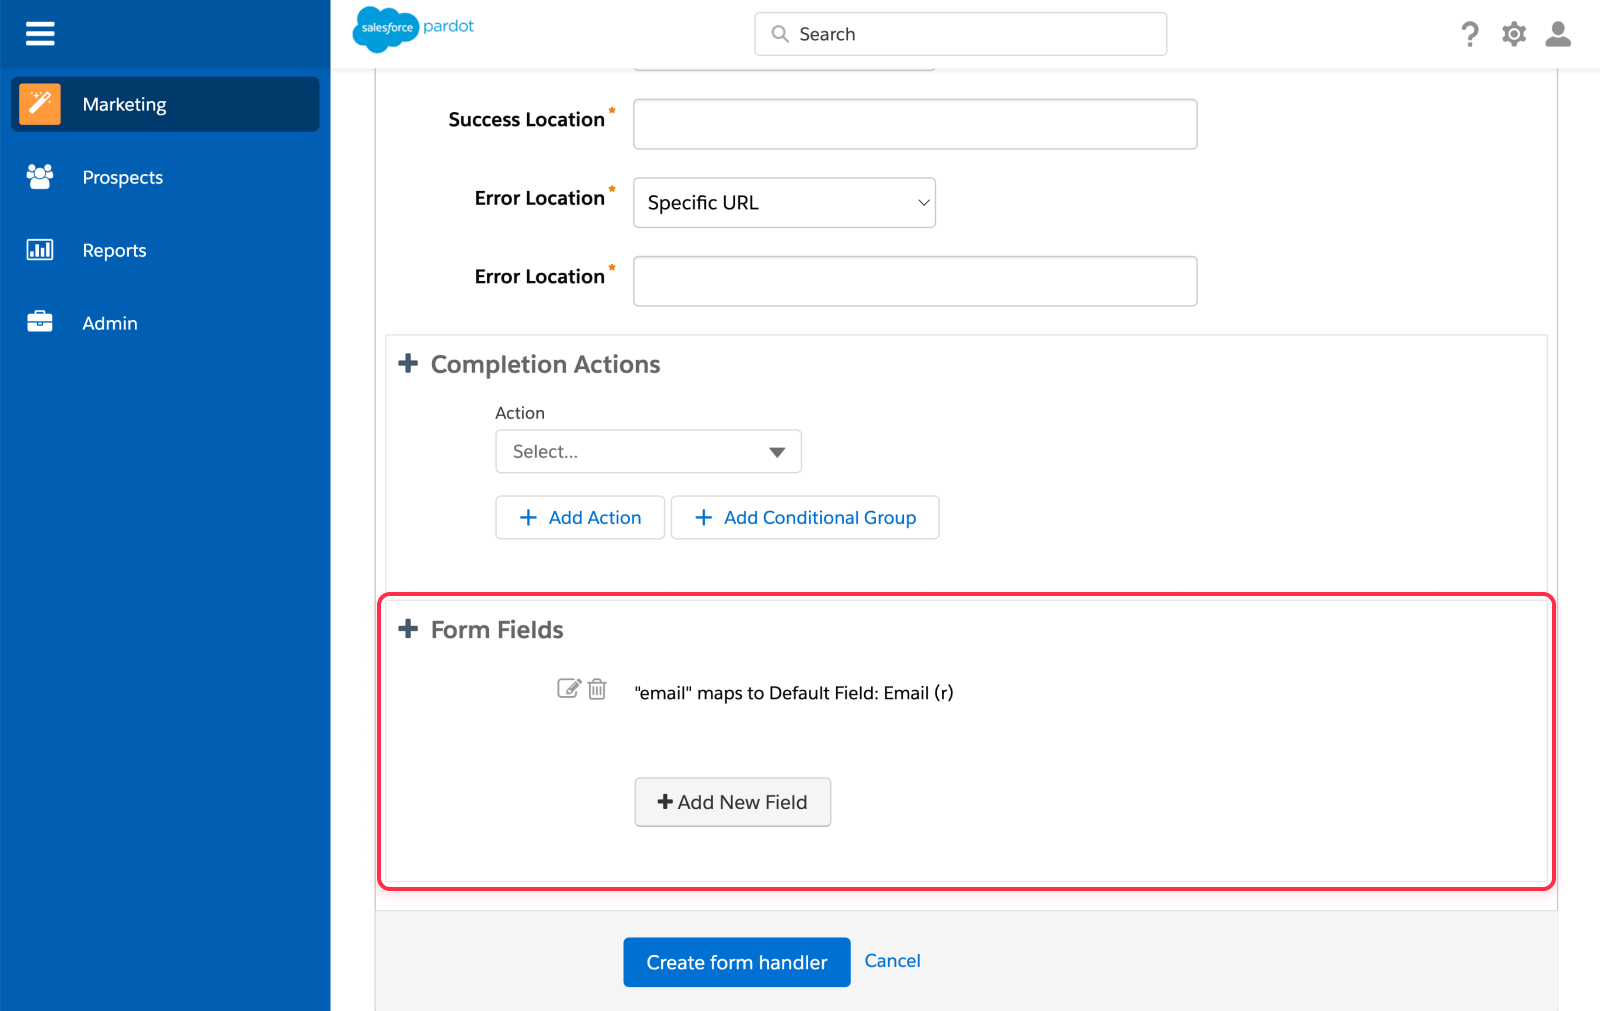
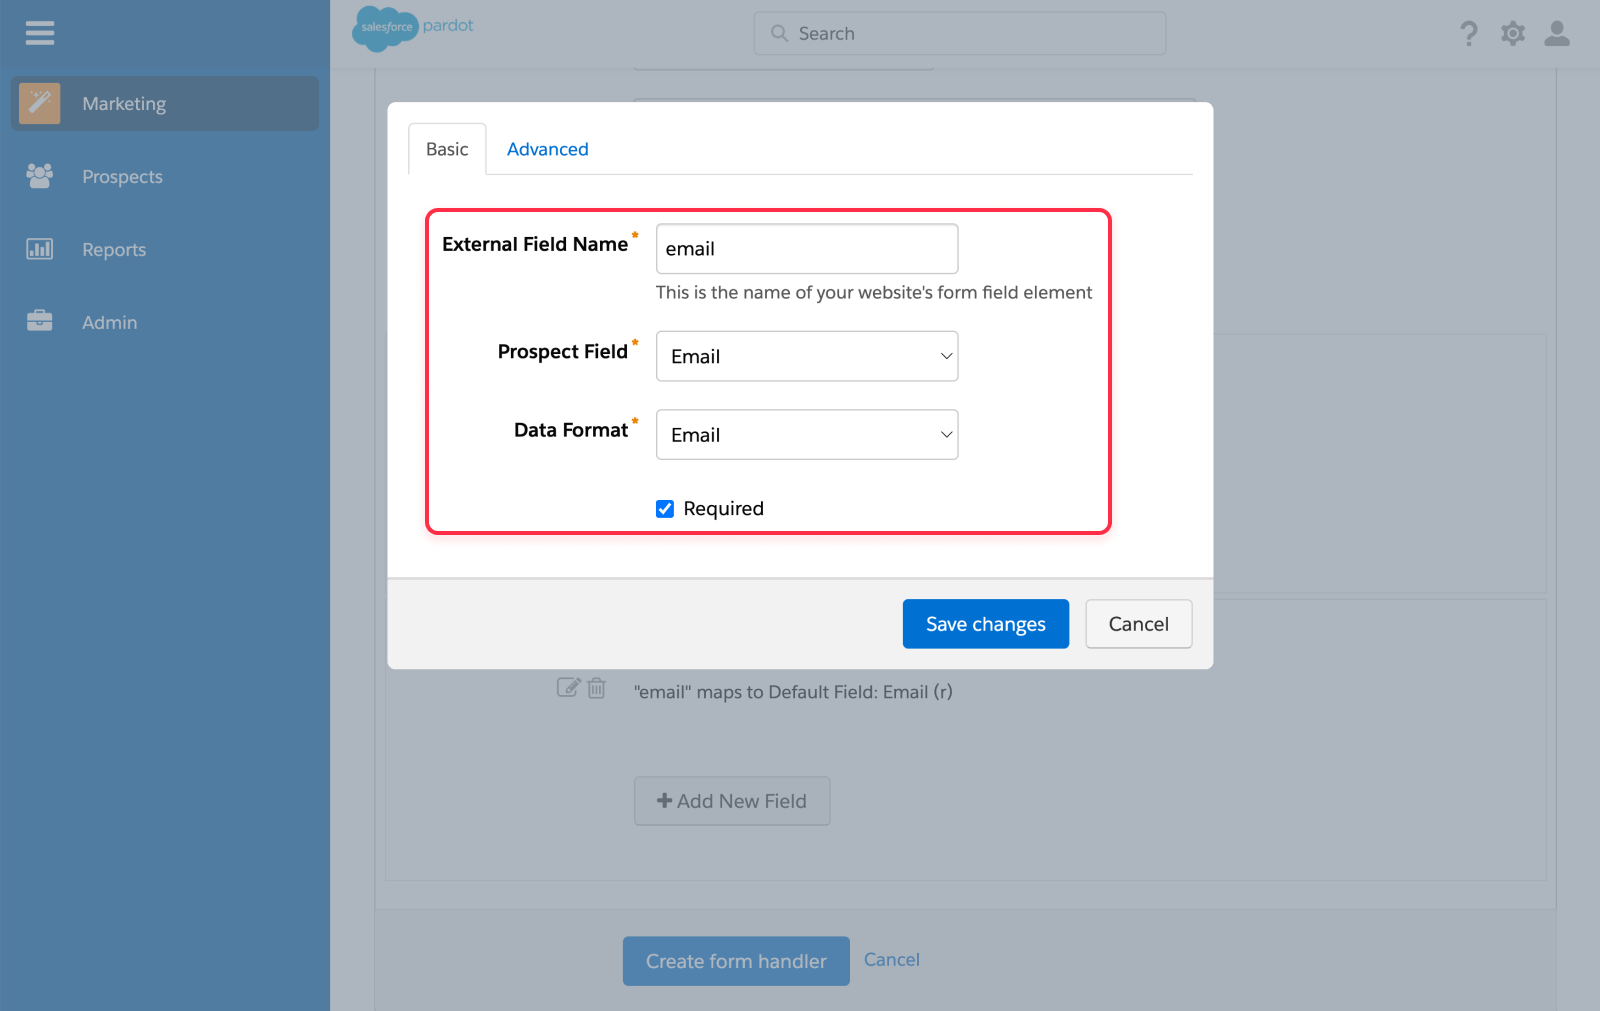
The External Field Name is the text that the input should have on the Webflow form, so it is properly mapped out. It’s important to keep in mind this is ⚠️ case-sensitive.
The Prospect Field is the field where you are going to send the External Field Name submission data. So if the External Field Name is ‘First Name’, the Prospect Field should match that data variable in Salesforce. These don’t necessarily need to have the same name, just ensure they refer to the same, otherwise, the data is going to be messed up.
The Data Format is the setting to choose the type of data that is going to be sent through this field. For example, if you are asking for ‘Years in business’ and you want them to write a number, this setting should be under the Number option. Please keep in mind the Data Format you choose needs to be the same on the Webflow form.
The Required check is just to set the form handler form field to be mandatory or not. Please keep in mind the Required option you choose should be the same on the Webflow form as well, otherwise it is not going to work properly.
6. Once you are done with all the steps above, its the moment to click Create form handler.
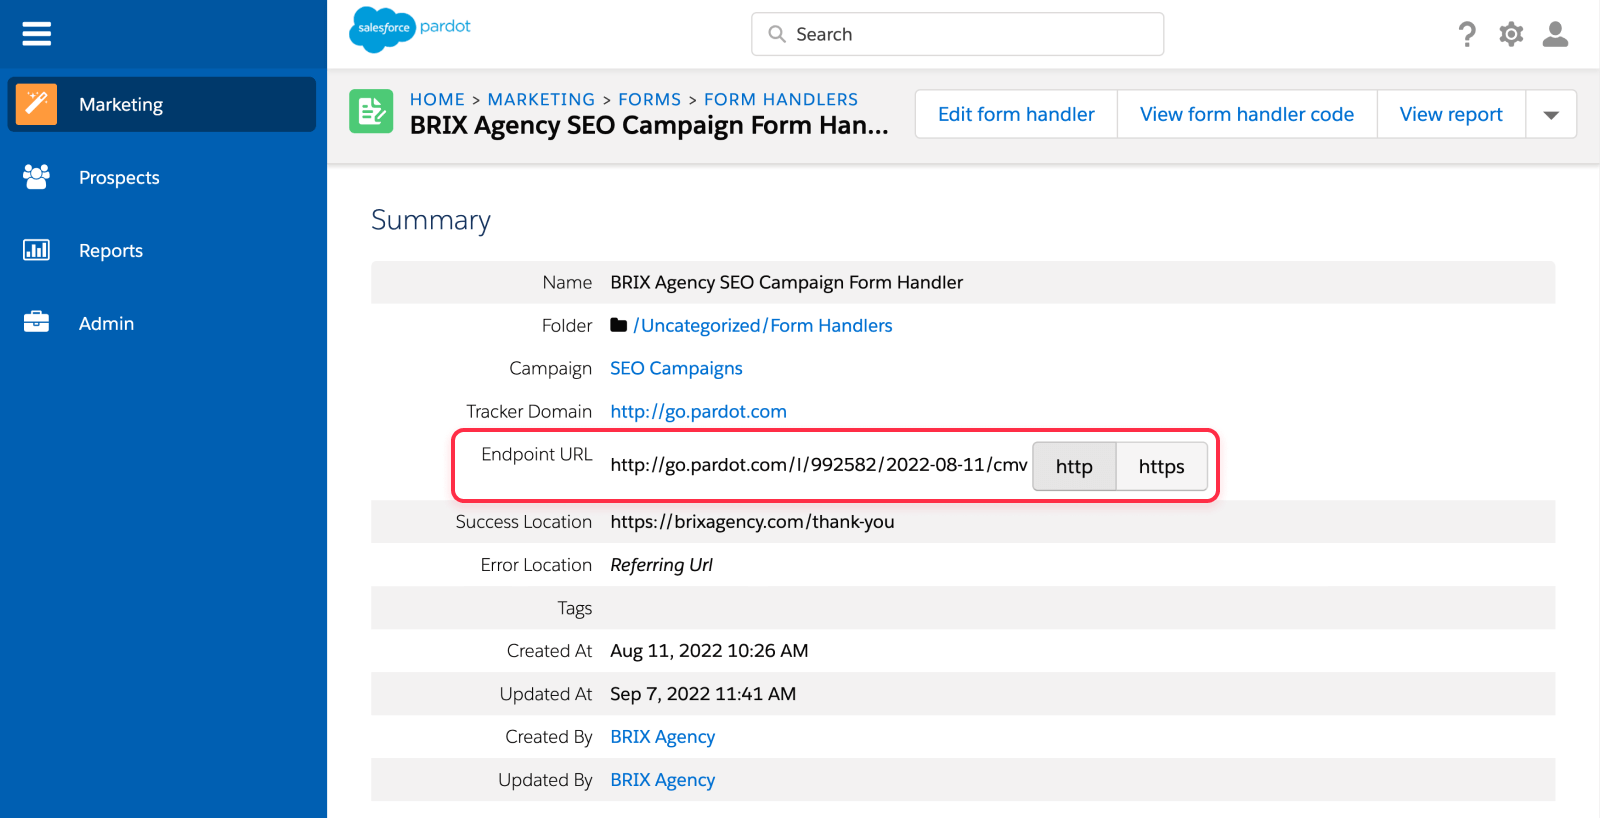
7. After you create your form handler, you are going to be redirected to the Summary page with all your form handler information.
8. Copy the Endpoint URL, as this is the form handler URL you are going to use. Please keep in mind you should use the HTTPs version unless you need to use HTTP for any particular reason (We can’t think of any 🤔).
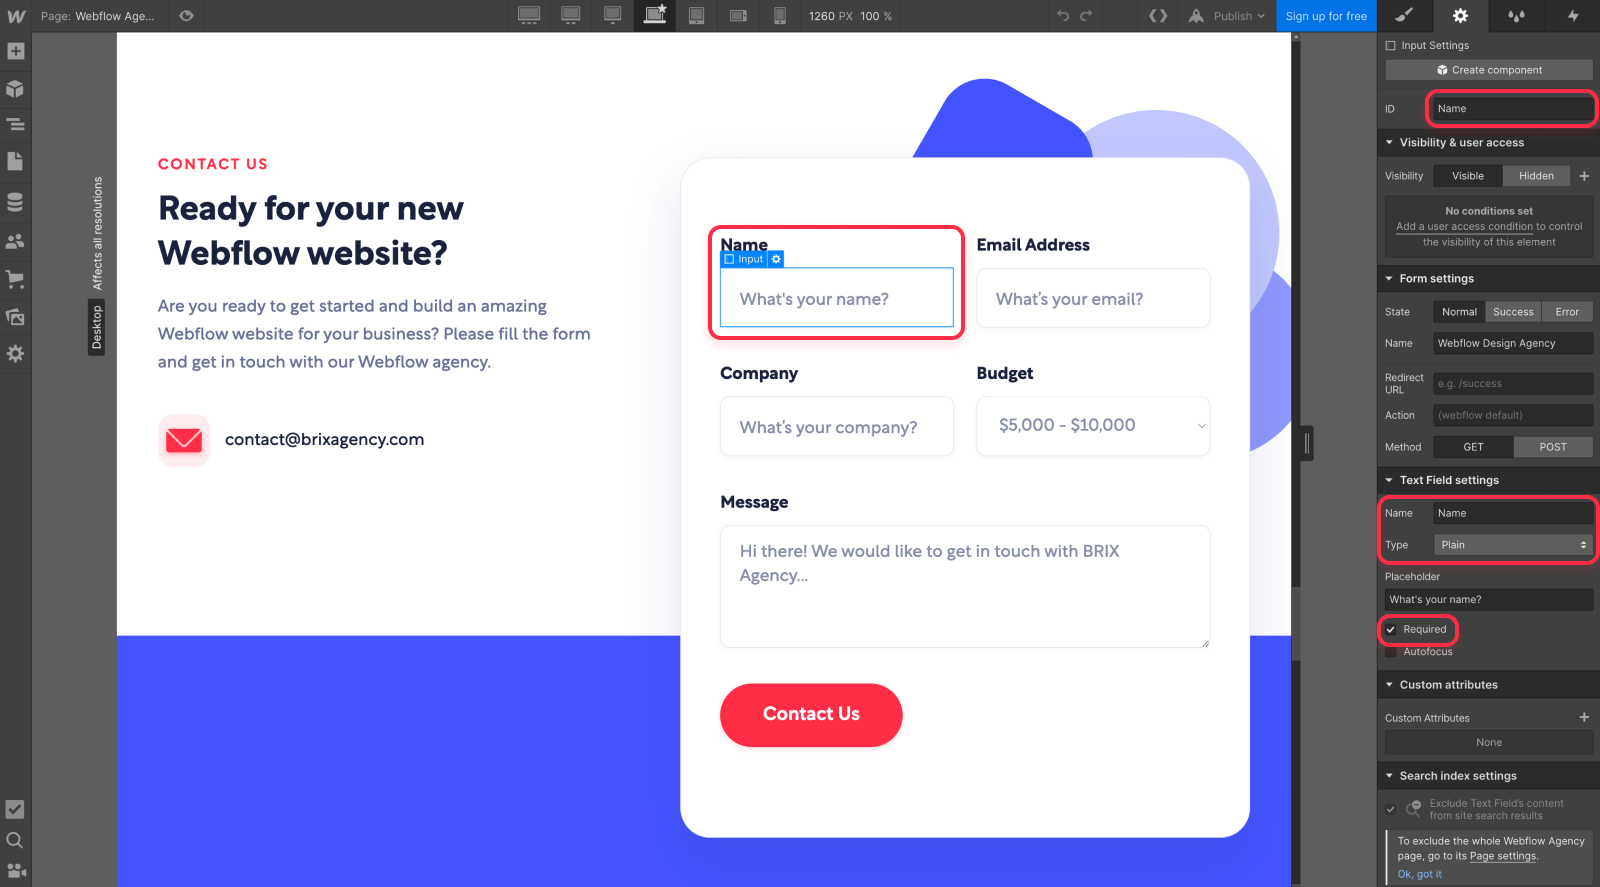
9. Go into your Webflow website (on the Webflow Designer), and manually map out all the field names of the Webflow form to match the ones of your form handler.
To ensure your forms always work great and the data is mapped out properly, you should ensure the Name, Type, ID and Required toggle match exactly.
The only two elements that don’t need to match are the Field Label and the Field Placeholder, these can be anything else you want.
Please also make sure to not repeat any External Field Name, meaning you can’t have two fields using the same one.
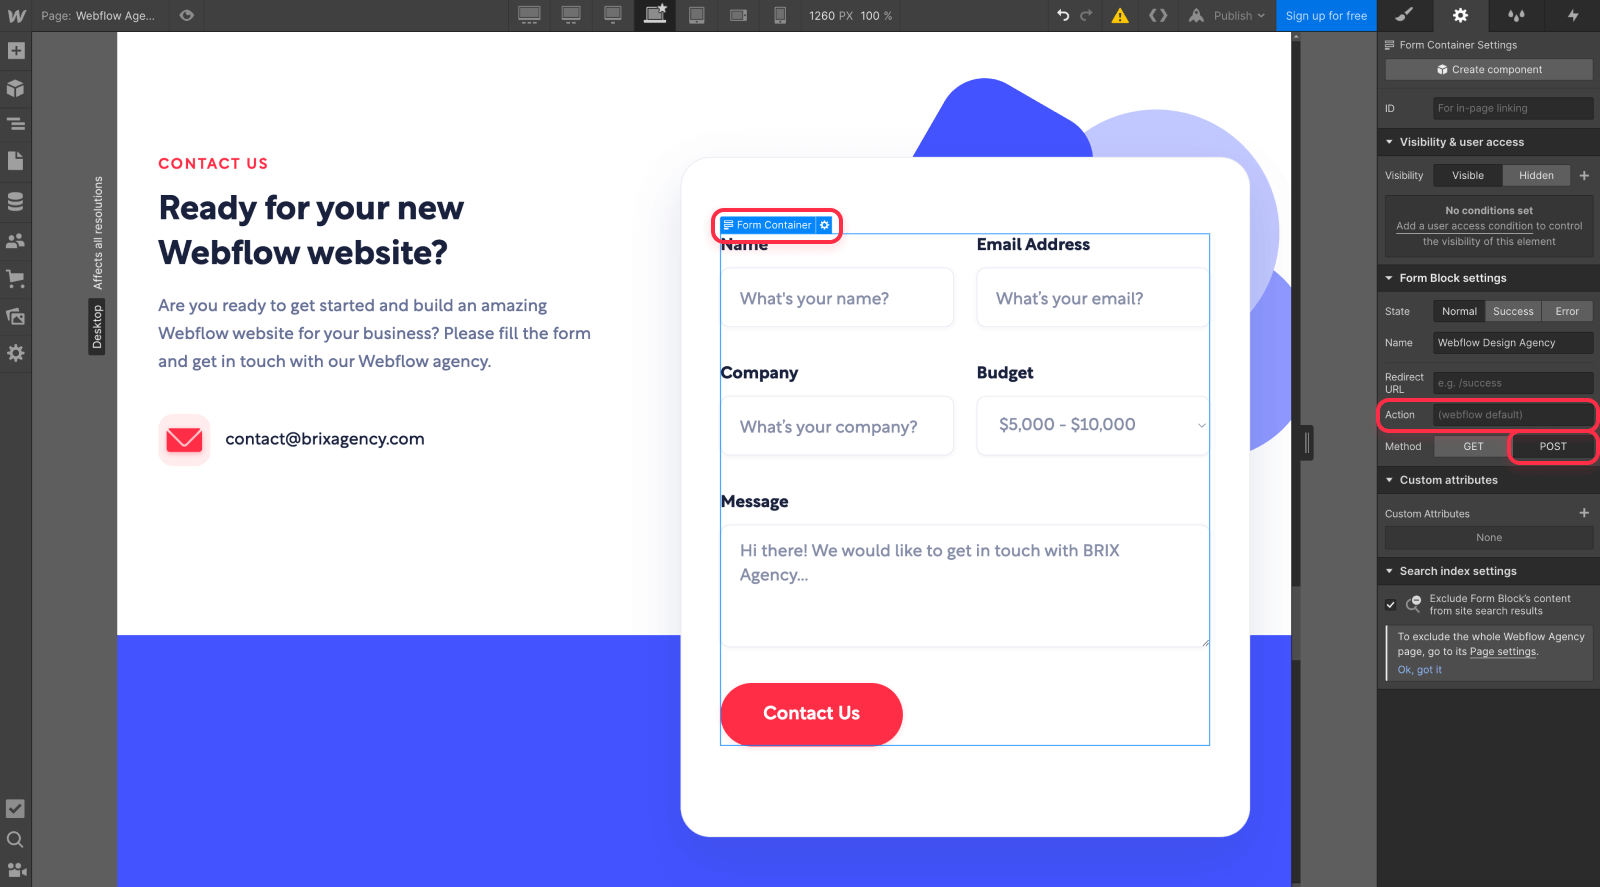
10. Finally, the only remaining step is to select your Webflow form, and paste your Endpoint URL in the Action field. After that, just click POST on the Method selection.
And that is all, you made it 🎉! It may feel complicated the first time you are connecting your Webflow form to Salesforce using a form handler, however, after doing it a couple of times, you will feel like a fish to water.
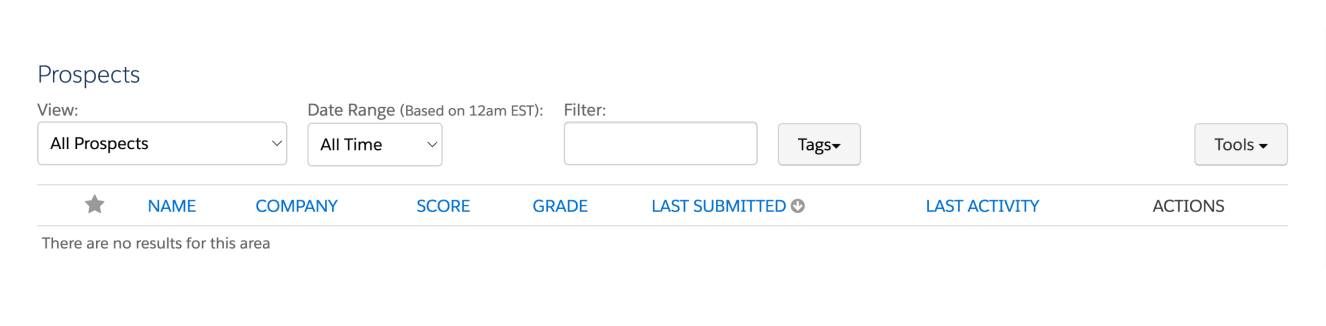
We recommend you test out your form and see if the data is sending and mapping out properly in Salesforce. You can scroll down to the bottom of the Summary page for the Form Handler you created in Salesforce Pardot, and if the form handler was connected properly, you should see the leads in the Prospects section.
If everything is working properly ✅, just repeat the process on any other forms you want to connect, and you are done. If something is not working as intended, we recommend you to check out the steps one more time, as even a different capital or lowercase letter can make the form handler to not work properly.
On the other hand, if you prefer to get some help connecting your Webflow forms to Salesforce from our certified Webflow Agency, please feel free to reach out by clicking the button below. Our team will be happy to assist you.