

HubSpot is one of the favorite CRM of many users working on Sales and Marketing (and honestly, it’s our favorite CRM too 🧡).
Because of this, one of the most common requests we get when we design and develop Webflow websites is to connect the Webflow forms to HubSpot, so all the website leads are automatically added to a HubSpot Workflow, List, and/or Sequence without any manual data entry work.
After building 200+ Webflow websites, we are pretty used to connecting Webflow to HubSpot, however, for a first-time Webflow user, it can definitely be tricky considering that there are multiple ways of connecting them, and each of them has pros and cons.
But here we come to the rescue! In this article, we will explain to you the step-by-step process to connect your Webflow forms to HubSpot.
As mentioned, there are 4 different ways of integrating HubSpot and Webflow, so we will explain each of the four below. We are ranking them from worst to best, so if you are looking for the best method, options 3 and 4 are the way to go, however, these have specific requirements so we would suggest reading all to see which one works best for you.
Below you can click on the jump links to go to your preferred approach:
1. Embed your HubSpot form in Webflow
2. Connect your Webflow form to HubSpot via Zapier
3. Embed your HubSpot form in Webflow as raw HTML
4. Connect Webflow and HubSpot natively using Webflow Enterprise
Let’s start with the first one.
1. Embed your HubSpot form in Webflow

This is probably our least favorite method of getting a HubSpot form working on Webflow because it lacks the option to customize the form to match your brand design.
Chances are, you already tried this and that’s why you arrived at this article looking for a different method 😅. If that is the case, feel free to skip to Option 2, if not, continue reading, as even if this method is not the best one, it is 100% free and pretty easy, so it can still be useful for a lot of people.
The steps are the following:
1. Go to HubSpot Dashboard
2. Navigate to Marketing > Lead Capture > Forms
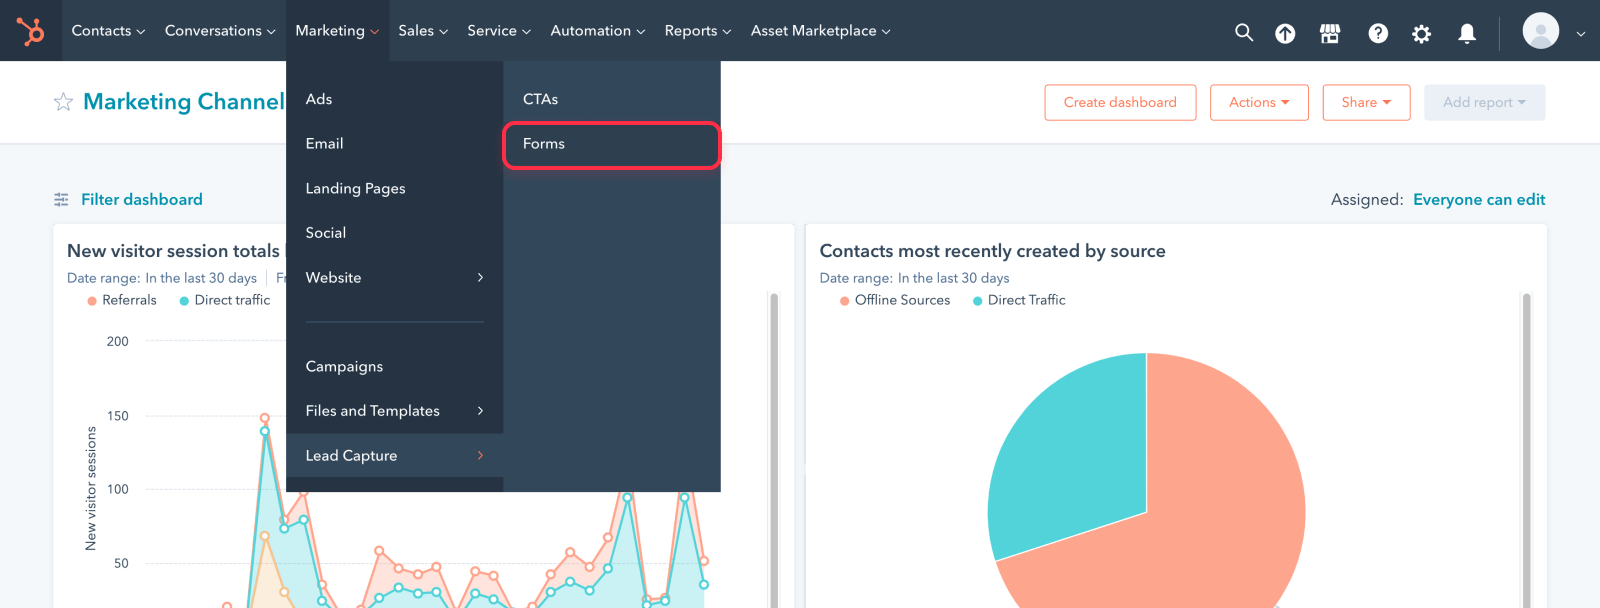
3. Click Create Form to start creating your new form
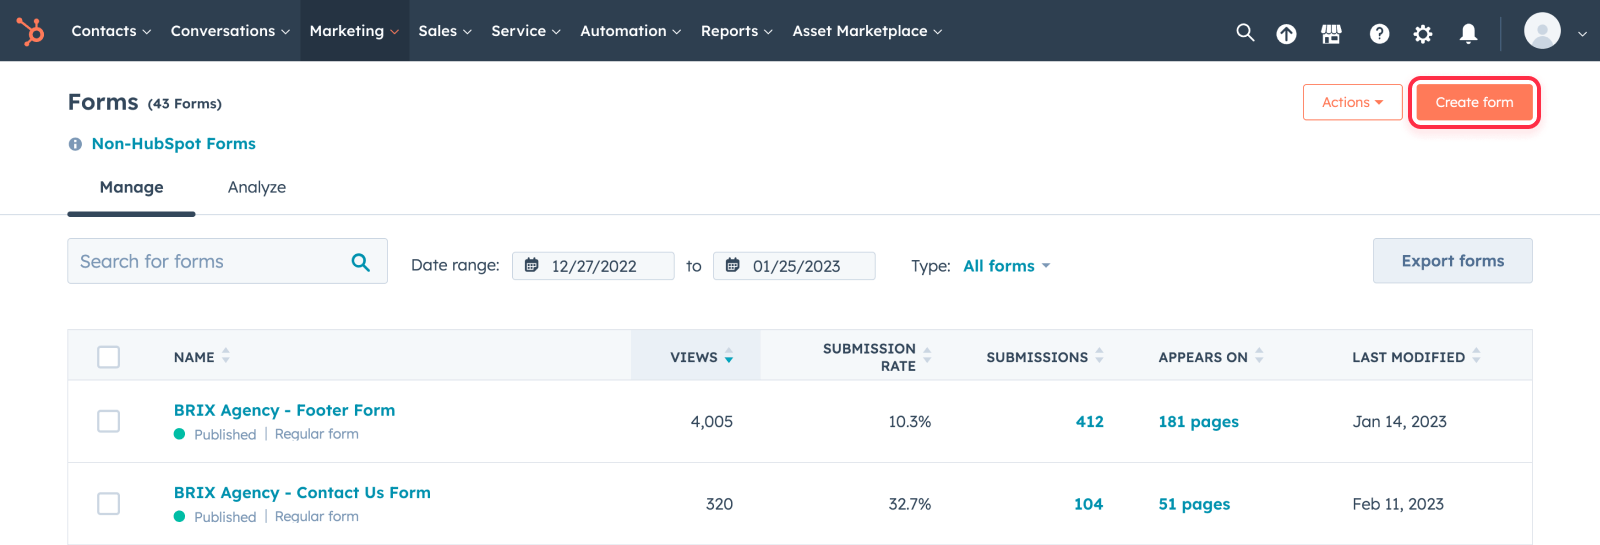
4. Select the Embedded form option

5. Add all the form fields you need
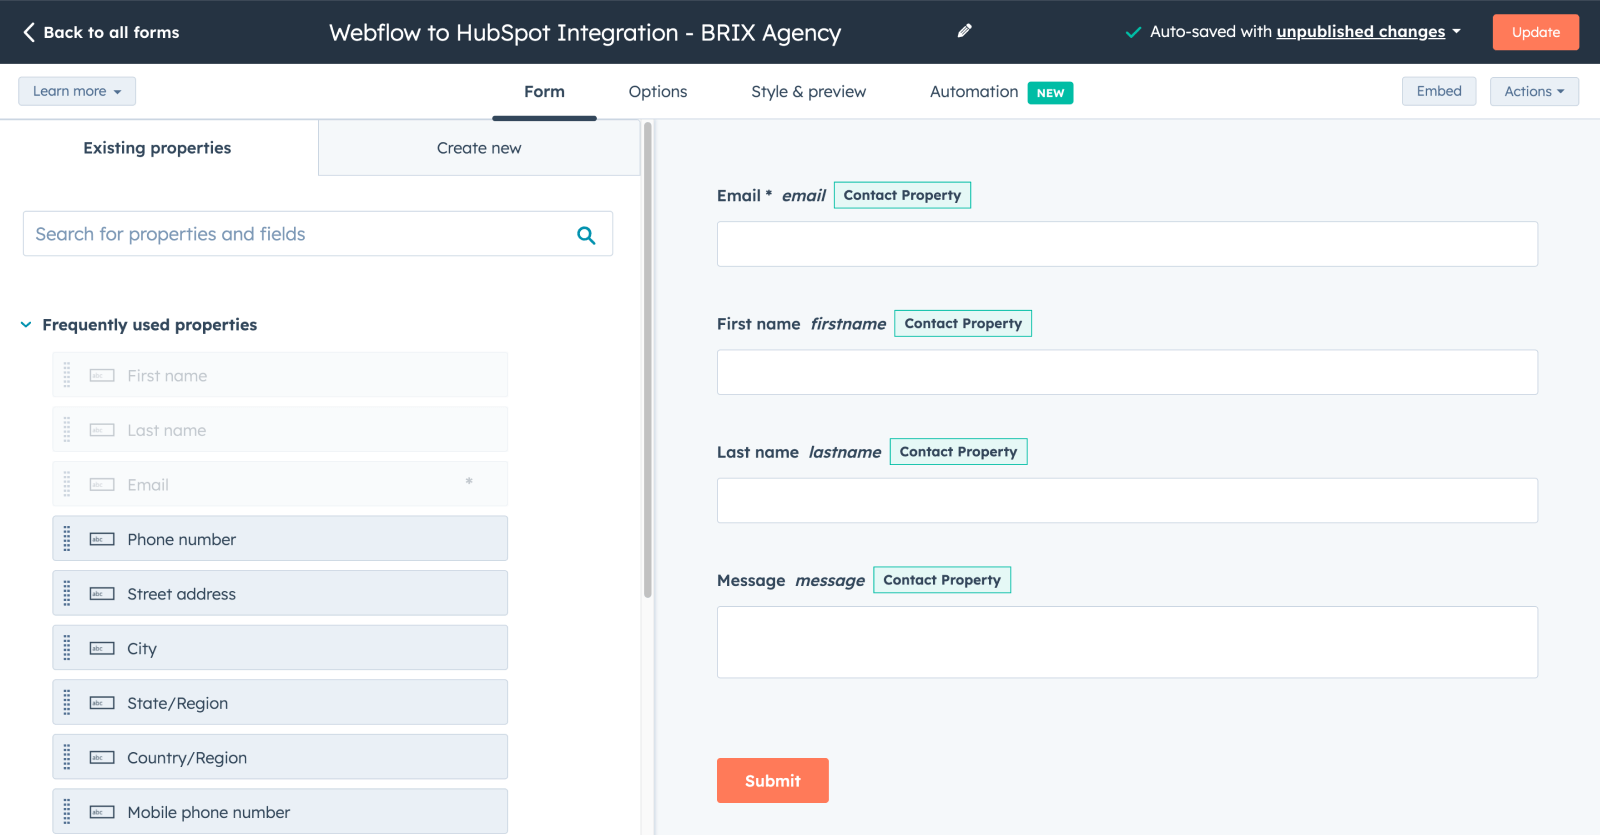
6. Customize the styling of your form to your design preference using the left sidebar
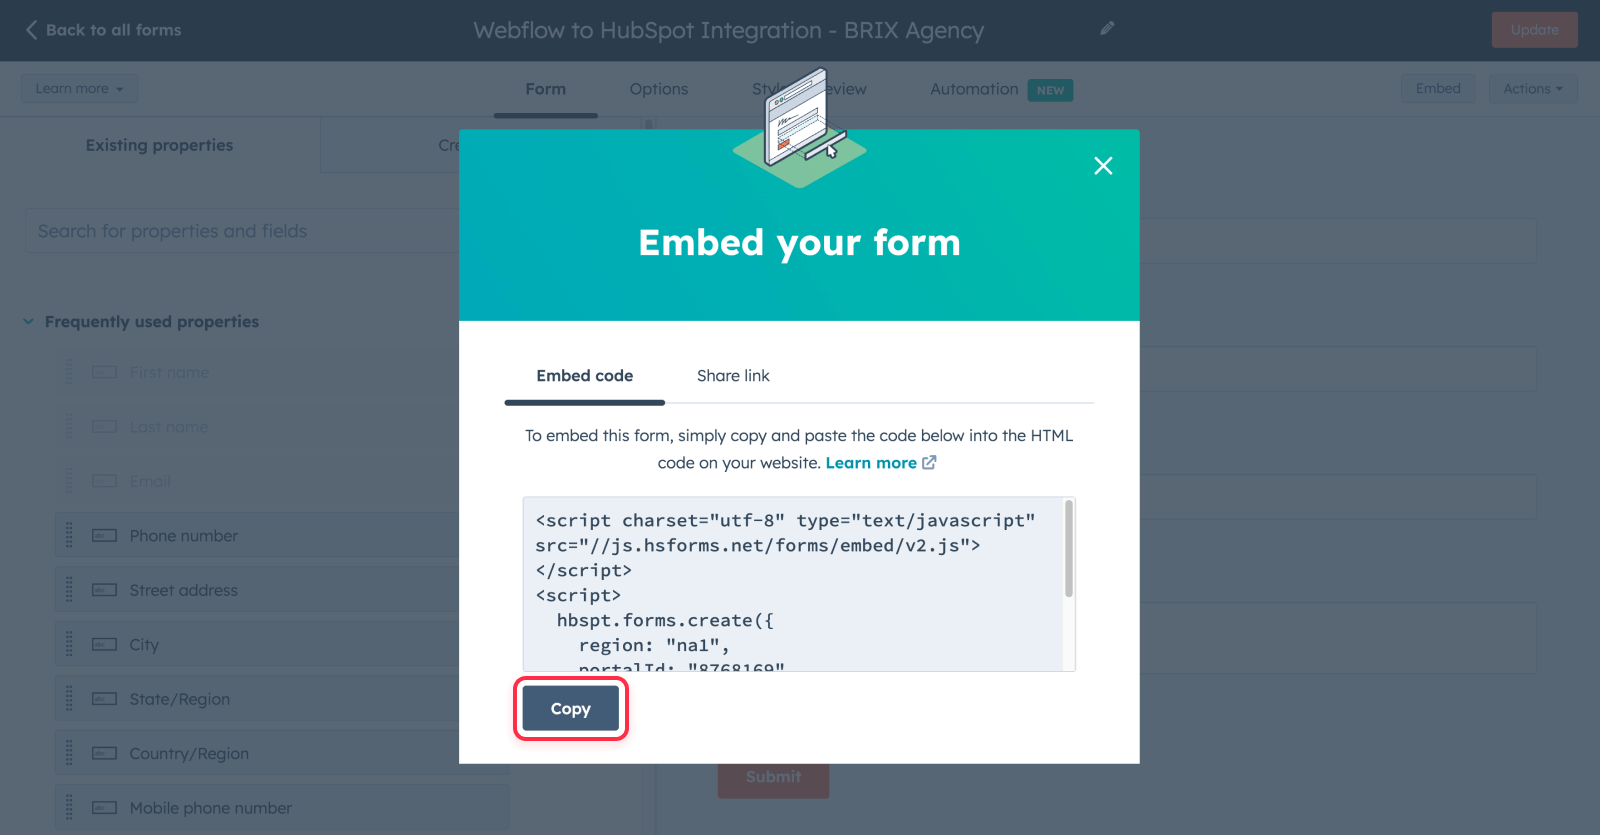
7. Once you are done, click the Embed button on the top right
Once you clicked Embed, copy the code as you are going to use it in the next step.
8. Go to the Webflow Designer and drag-and-drop the Embed element to wherever you want to add your form
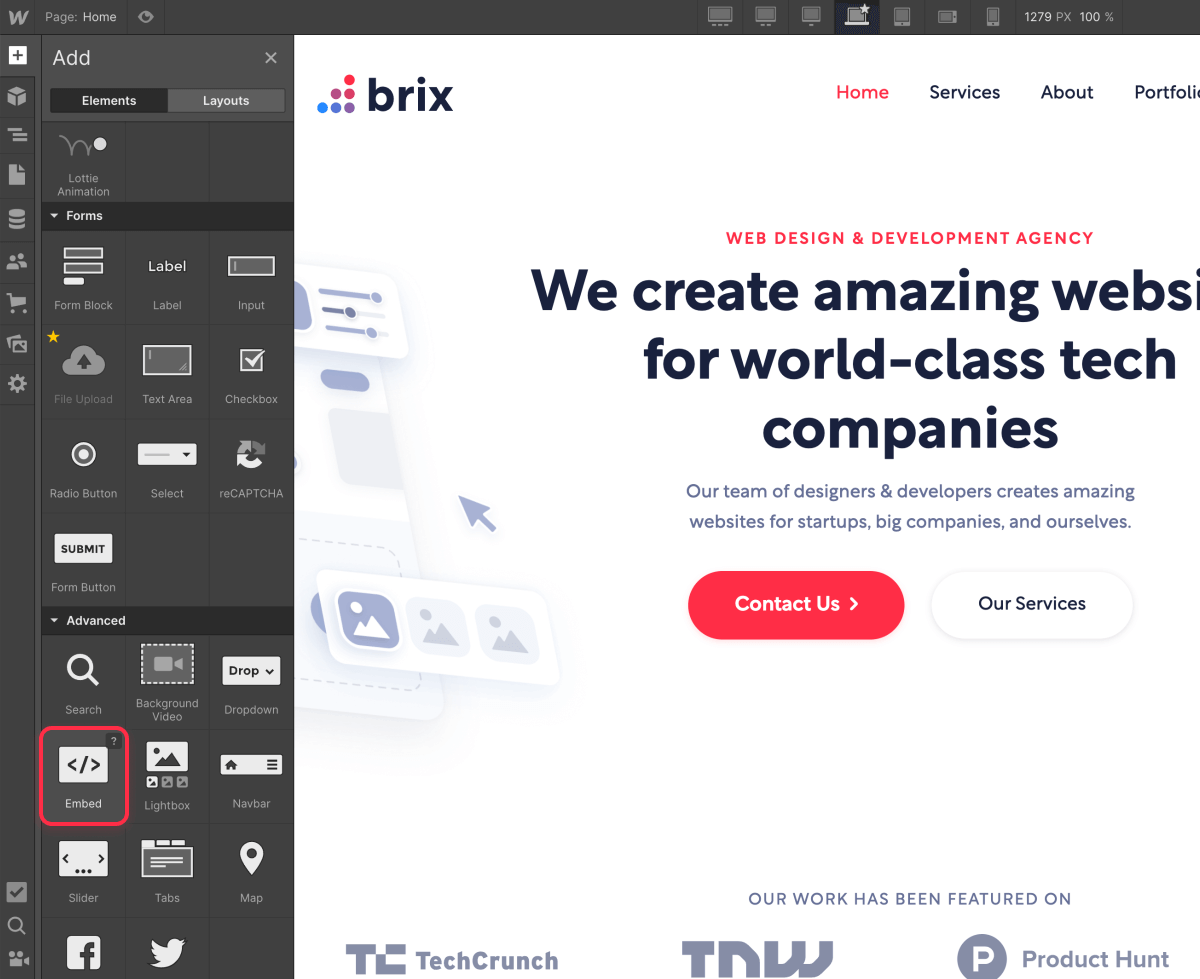
9. Publish your Webflow website, and you are done!
Once you publish your Webflow website, the HubSpot form will load and all the leads you receive will be automatically added to HubSpot.
The form is going to work perfectly, however, the main downside of this method is that the styling options that HubSpot offers for their forms are very limited, and if your marketing website has an unique and custom design, it’s likely most users will notice the form looks out of place.
Let’s continue with Option 2.
2. Connect your Webflow form to HubSpot via Zapier
Your second option is to connect your Webflow forms to HubSpot using the most popular third-party automation software: Zapier.
Zapier has done an amazing marketing job and it's very well known nowadays, but in case you haven't heard about it yet, basically, Zapier is a software that connects services in between to automate actions (in this case: Every time you receive a form submission, it send that data to HubSpot).
The only downside of going with this approach is that Zapier charges by the number of tasks executed monthly, so if your form receives thousands of submissions every month, it is likely going to get pricey 💰.
The process of integrating Webflow and HubSpot through Zapier is very easy, you just need to follow next steps:
1. Create a Zapier account
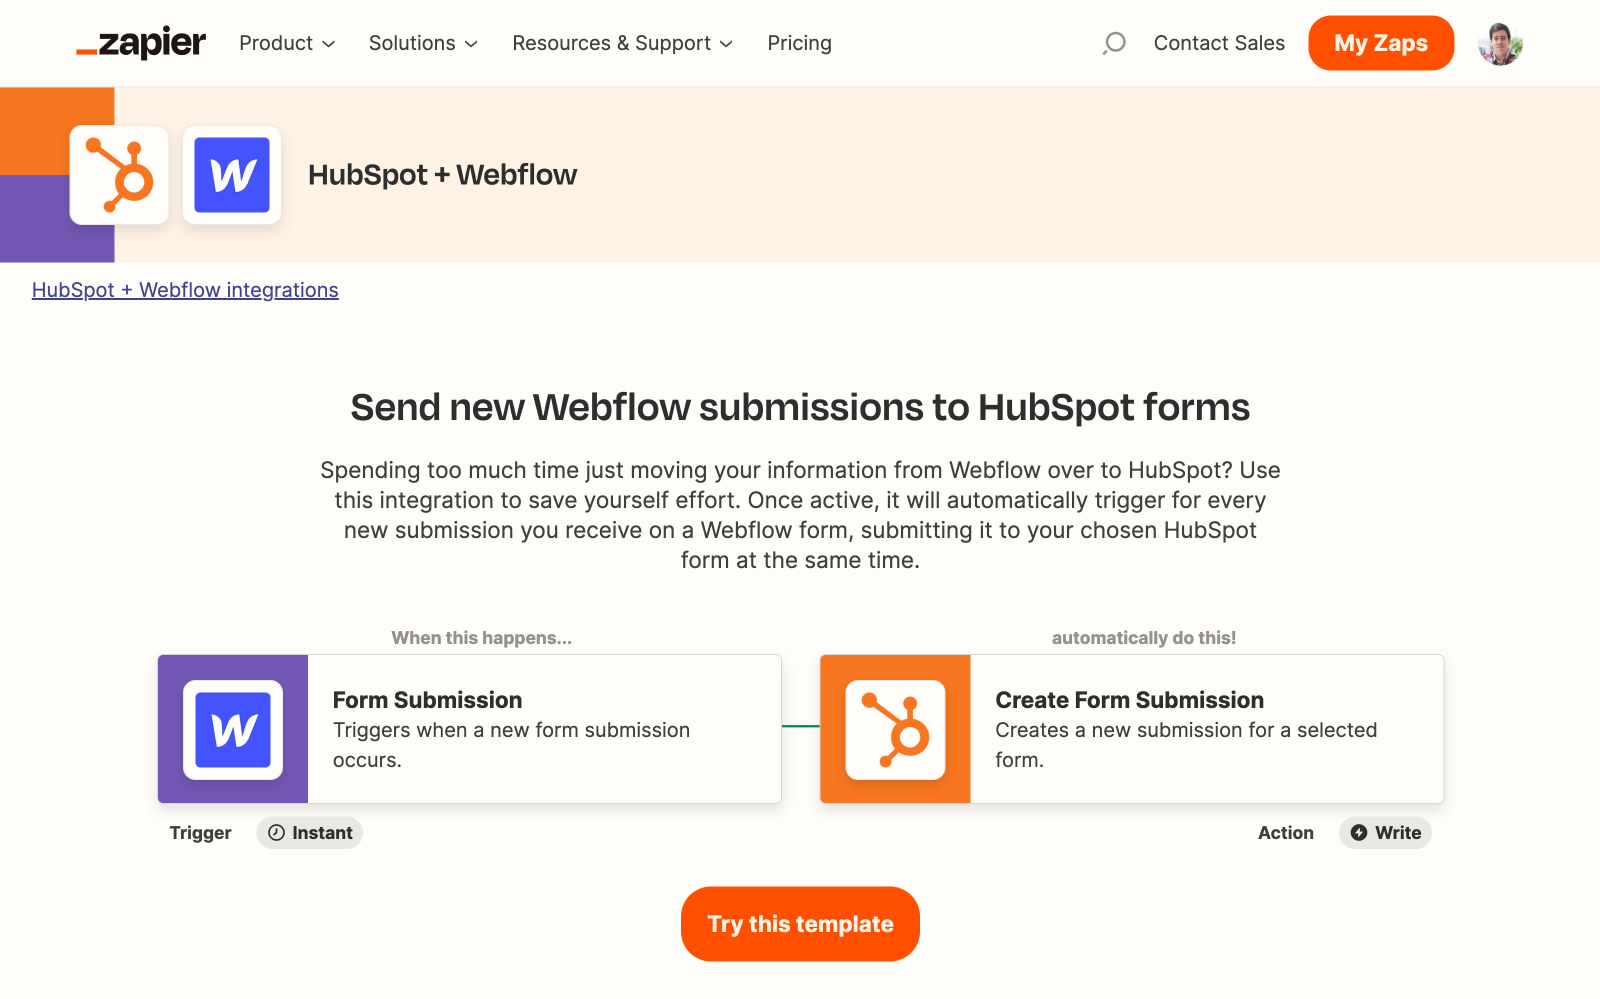
2. Use the ‘Send new Webflow submission to HubSpot forms’ Zapier template
3. Connect your Webflow and HubSpot account to Zapier
4. Configure the Steps of the Zap
5. Publish your new Zap and you are done!
Troubleshooting tip ⚠️: In the case that Zapier is unable to detect your Webflow form, the solution is pretty simple: Publish your Webflow site and then submit a test entry on your new form.
Once you finish those simple five steps, your Webflow form will be successfully connected to HubSpot, and you will be all set. Just repeat the process with all the forms you want to connect, and you will be done.
3. Embed your HubSpot form in Webflow as raw HTML

Option 3 is our favorite method of connecting Webflow to HubSpot ⭐, and we have successfully implemented it dozens of times for many of our clients.
The only 2 downsides of this method are the following:
- It requires basic web development knowledge, so if you don’t have any HTML/CSS experience, it may be hard to execute
- You need to be on HubSpot Marketing or CMS Hub plan (Professional or Enterprise), which starts at $340/mo
Also than that, this 3rd option works perfectly well both from a reliability perspective (It doesn’t require a third-party service dependency like using Zapier) and also from a tracking perspective (As it is a HubSpot form after all, not a Webflow form, it has all the tracking features that it would have inside HubSpot).
The process to create and embed this form is the following:
1. Go to HubSpot Dashboard
2. Navigate to Marketing > Lead Capture > Forms
3. Click Create Form to start creating your new form
4. Select the Embedded form option
5. Add all the form fields you need
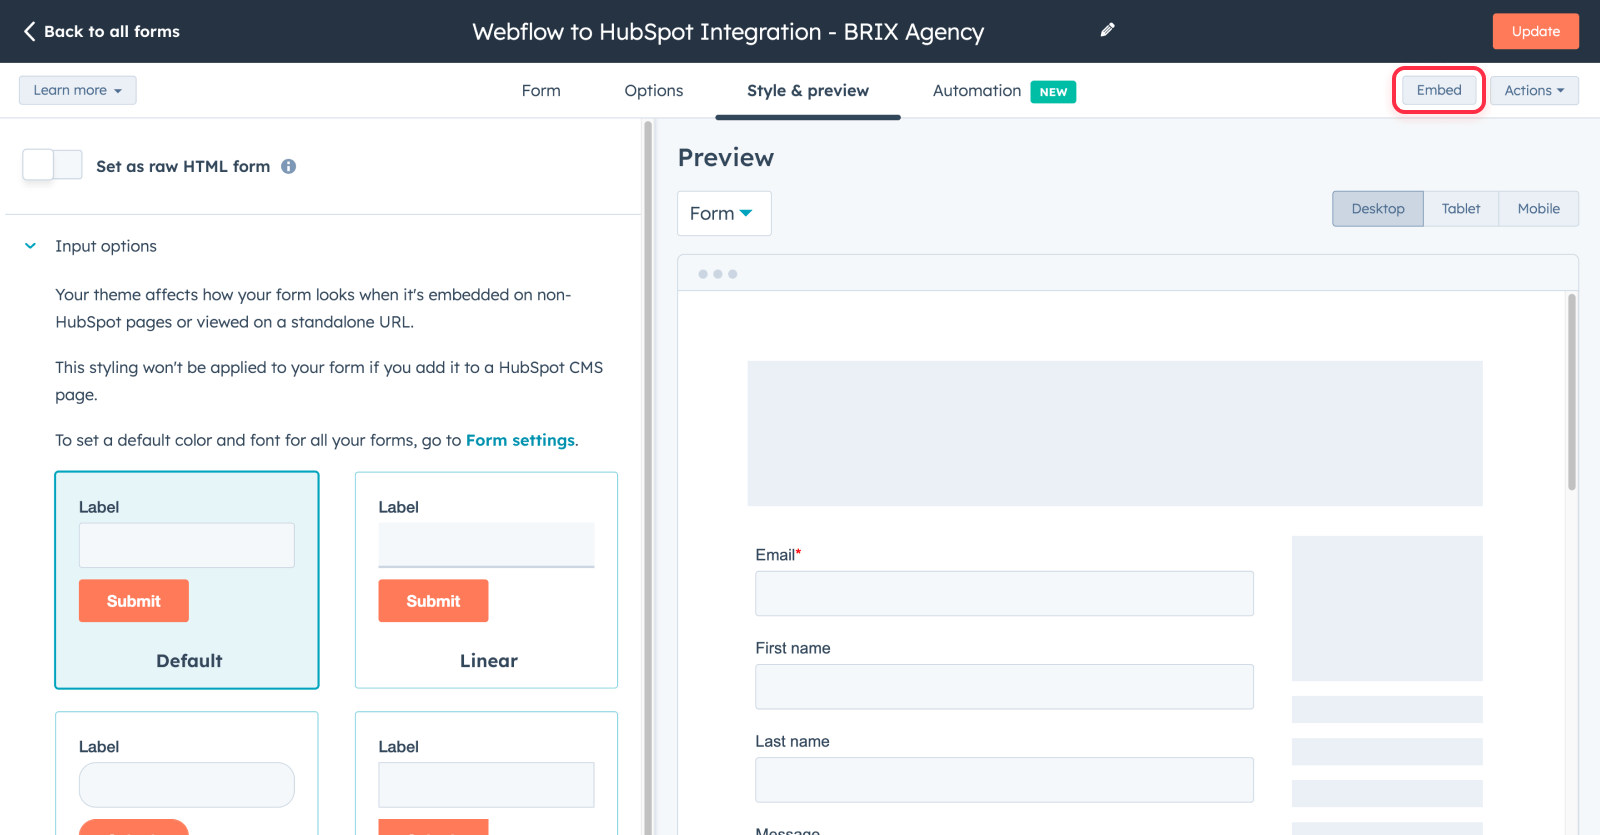
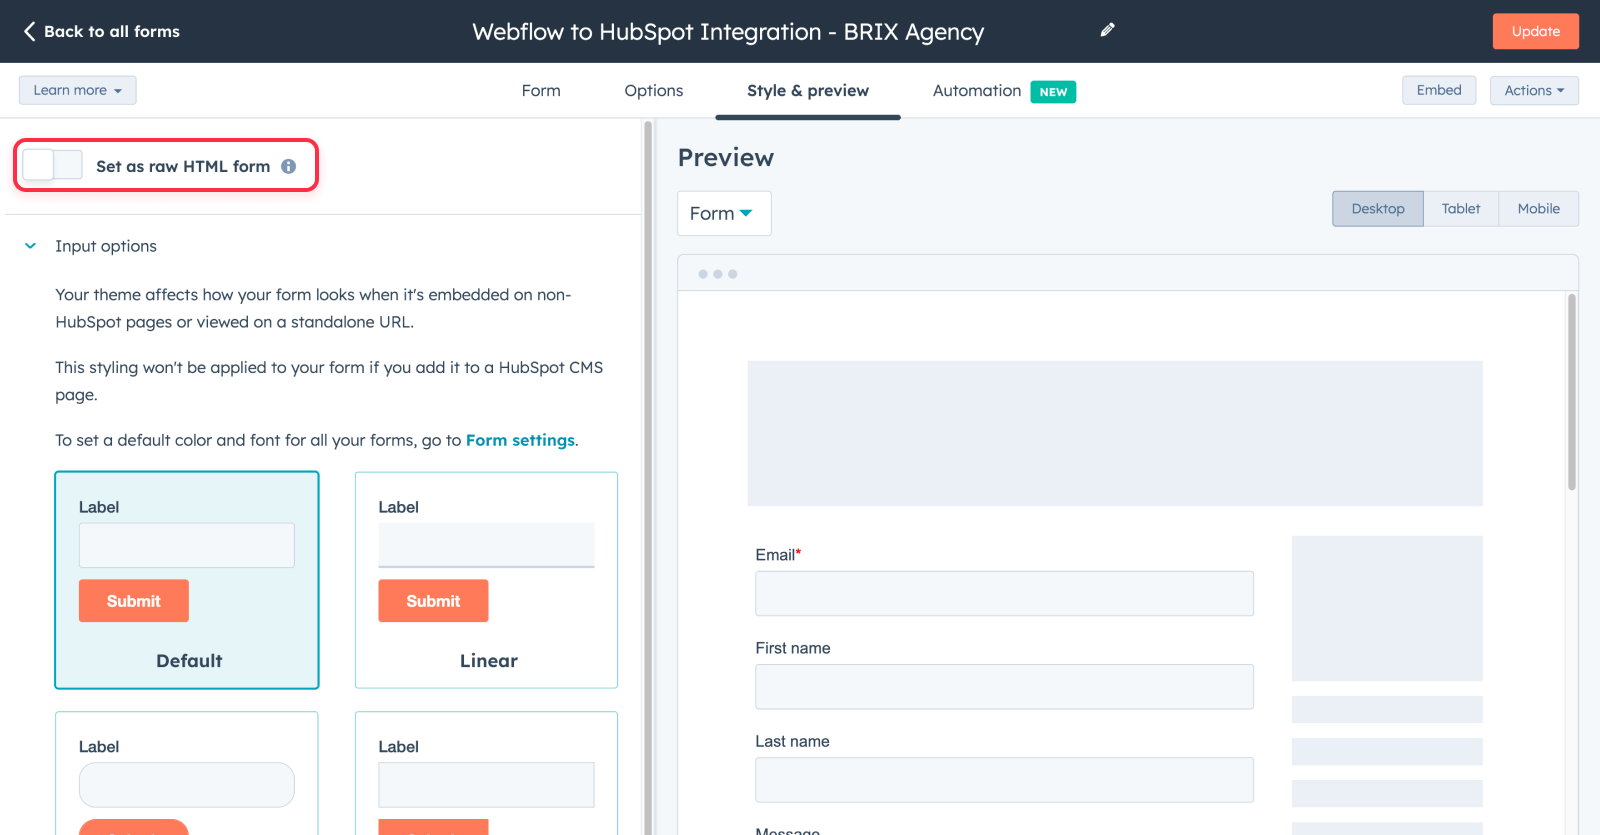
6. Go to the Style & preview tab
7. Toggle Set as raw HTML form
8. Once you are done, click the Embed button on the top right
Once you clicked Embed, copy the code as you are going to use it in the next step.
9. Go to the Webflow Designer and drag-and-drop the Embed element to wherever you want to add your form
10. By default, the form is going to be unstyled, meaning that the form won’t have any colors, fonts, or just any style at all.
While the form by default will look ugly, by having an unstyled form, you have the ability to add custom CSS to make it look however you want 👌🏻.
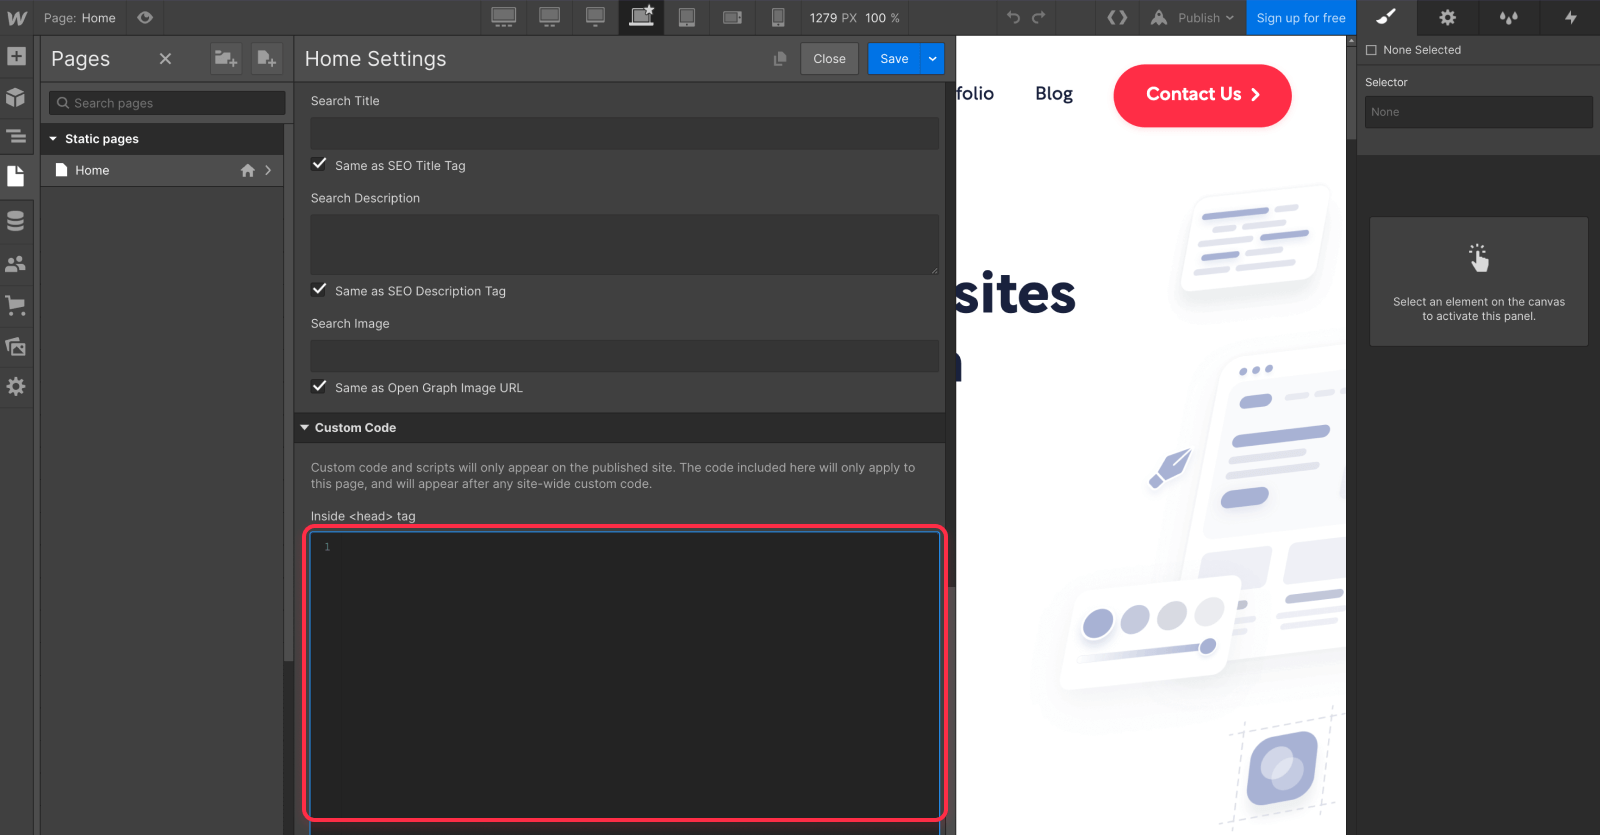
11. Add your CSS code in the Page Settings where you are going to add your form.
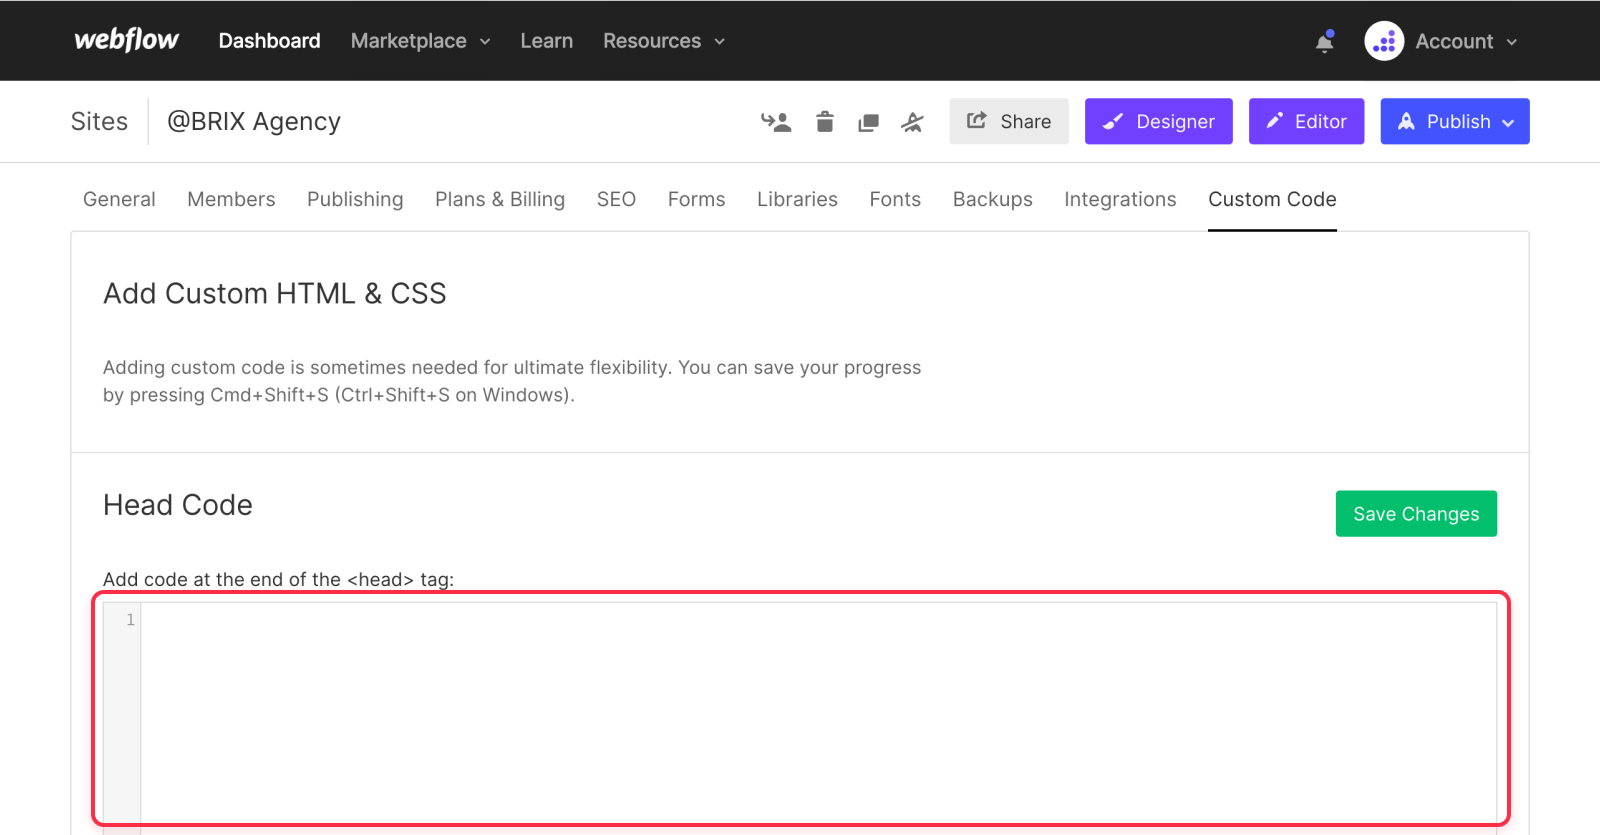
Or if you are going to add the form in multiple places (or have multiple forms), you can add the CSS code in the global Custom Code tab in the Project Settings.
12. Publish your Webflow website, and you are done!
If you have a web developer in-house (or a freelance web developer you can trust), doing the CSS should be a piece of cake. If you don’t, you can always get in touch with our Webflow Agency here. Our team of Webflow Experts will be happy to help you out.
We have an amazing team of Webflow Experts ready to help you out, just send us a message!
Get in touch4. Connect Webflow and HubSpot natively using Webflow Enterprise

Last but not least, we have Option 4 to connect your Webflow website to HubSpot CRM: Webflow Enterprise. Webflow Enterprise is a premium Webflow plan designed to meet the needs of mid to large businesses.
It offers some unique features that are not available in the standard Webflow plan, and one of those features is the Webflow to HubSpot forms mapping.
This option is one of the most straightforward way of connecting Webflow to HubSpot, however, as its name implies, Webflow Enterprise is tailored for enterprises with a certain size and budget, so it is definitely not suitable for small businesses or solo entrepreneurs.
If you are a mid to large-size business, Webflow Enterprise may be the way to go for you, as also than the HubSpot form mapping functionality, it includes many more features that can make it valuable for you and your team.
If you are interested in getting a quote for your Webflow Enterprise plan, we invite you to get in touch with our team of Webflow Enterprise Partners, and we will be happy to help you schedule a call with one of the Webflow Enterprise Partners.
And that is all for the moment 🙌🏻! We hope you enjoyed this article, and we hope you have your forms now connected without any issues.
If on the other hand something is not working in your Webflow <> HubSpot integration, or you just need a hand to set it up for all your website forms, feel free to get in touch with our Webflow Agency. Our team will be happy to hear from you.
Our team of Webflow Designers and Developers will be happy to help you out to connect your Webflow forms to HubSpot.
Get in touch


Join readers commenting on this post!