In today's digital landscape, businesses often find themselves using multiple platforms to create and manage their online presence. Two popular choices are Webflow for website design and HubSpot for marketing automation and customer relationship management — but how can you seamlessly integrate these platforms on the same domain?
In this article, we will explain two ways to do this: using subdomains and using a reverse proxy through Cloudflare Workers. We'll go through the steps for each method and discuss their pros and cons.
Why integrate Webflow and HubSpot?
Before we dive into the methods, let's briefly discuss why you might want to use both Webflow and HubSpot:
- Webflow offers powerful design capabilities and flexibility for creating stunning websites.
- HubSpot provides robust marketing automation, CRM, and analytics tools.
By combining these platforms, you can create a visually appealing website with Webflow while taking advantage of HubSpot's marketing and sales features.

Method 1: Using subdomains (Simple approach)
The easiest way to use Webflow and HubSpot together is by setting up separate subdomains for each platform. This method is straightforward and doesn't require any complex configuration.
Steps to set up subdomains:
Choose your subdomains:
- Main website (Webflow): www.domain.com or domain.com
- HubSpot content: info.domain.com, blog.domain.com or any other relevant subdomain
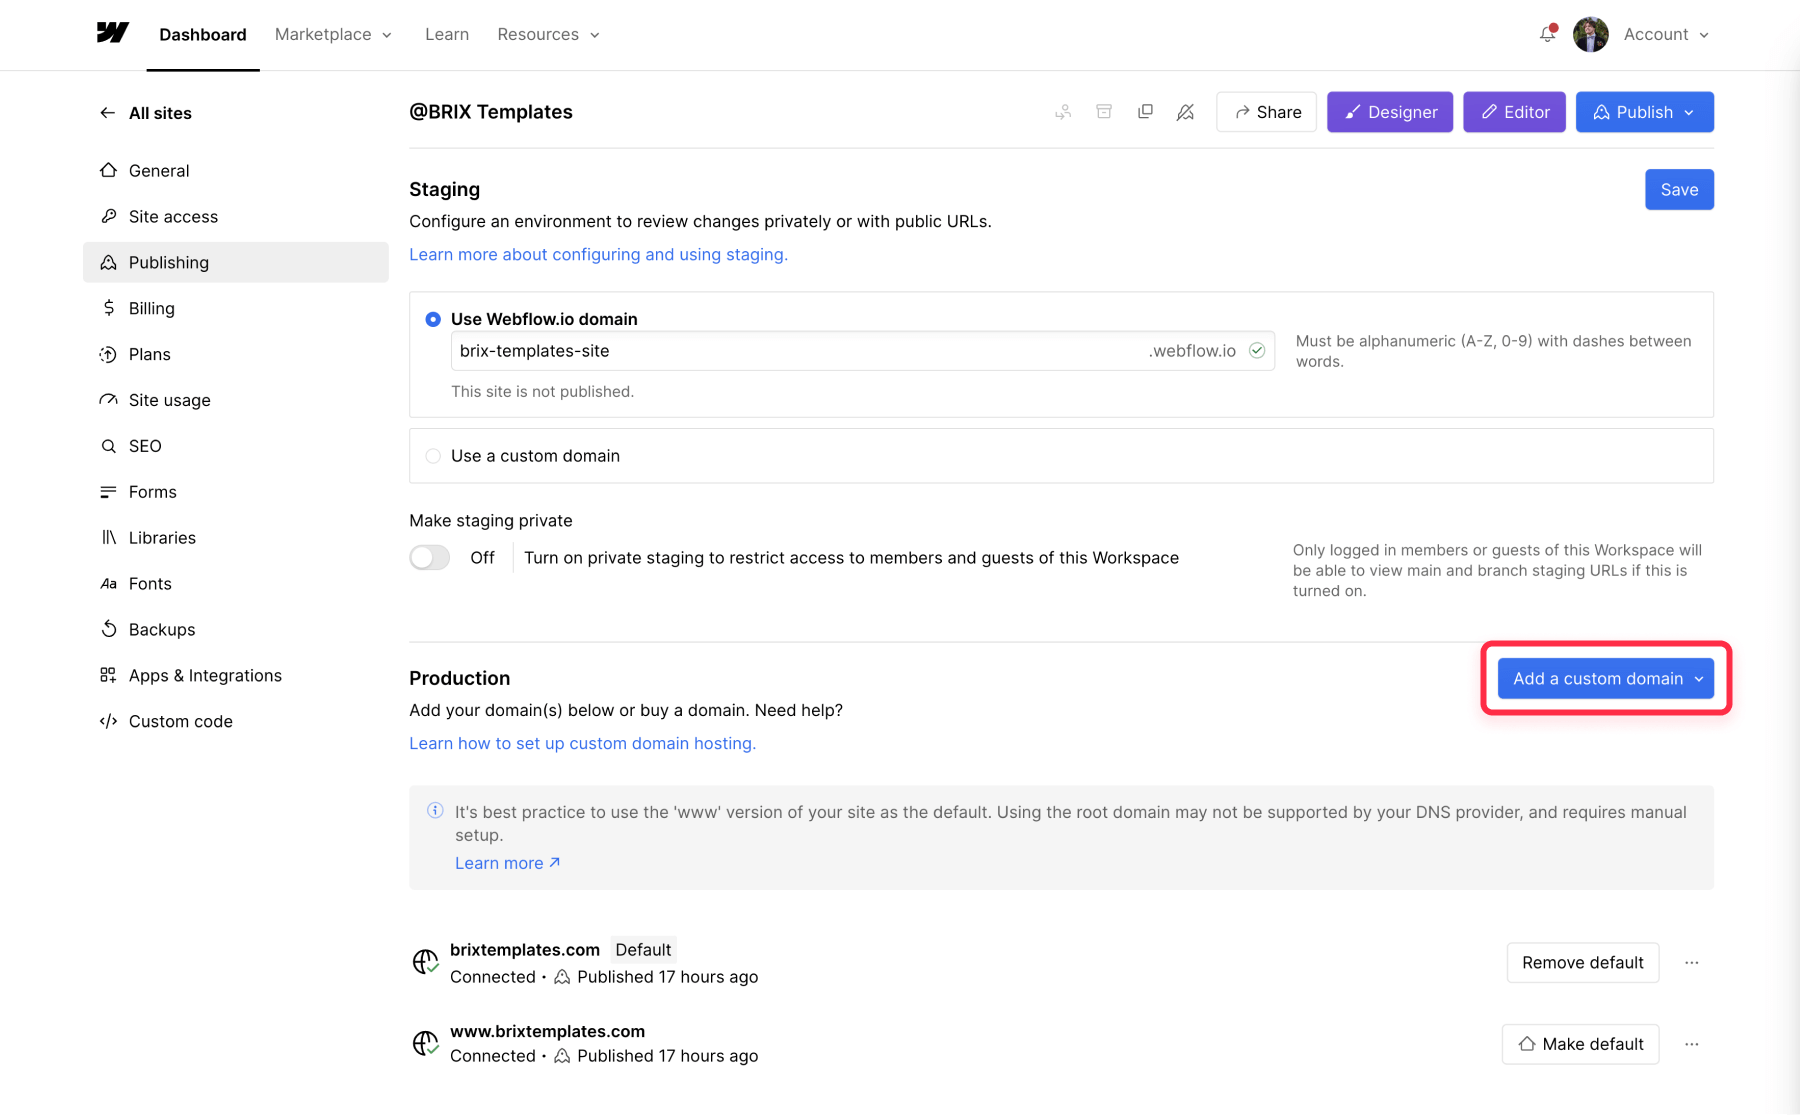
Set up Webflow:
- Log in to your Webflow account
- Go to your project settings
- Navigate to the "Publishing" tab
- Add your custom domain (e.g., domain.com)
- Follow Webflow's instructions to update your DNS settings
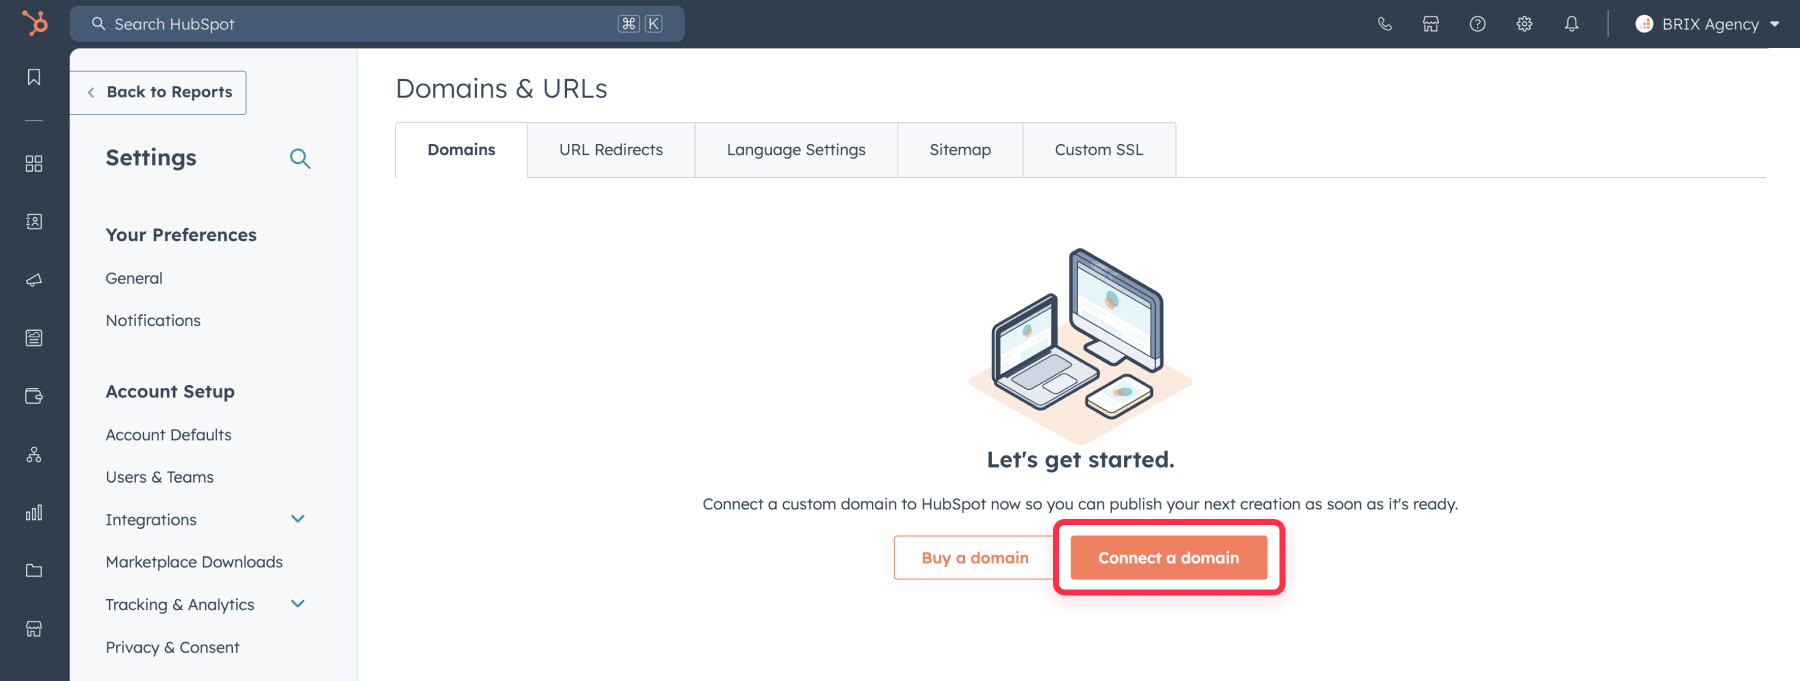
Set up HubSpot:
- Log in to your HubSpot account
- Go to Settings > Tools > Content > Domains & URLs
- Click "Connect a domain"
- Enter your chosen subdomain (e.g., blog.domain.com)
- Follow HubSpot's instructions to update your DNS settings
Update your DNS records:
- Log in to your domain registrar or DNS provider
- Add the necessary CNAME records for both Webflow and HubSpot
- Wait for the DNS changes to propagate (this can take up to 48 hours, but in most cases takes only ~5 minutes)
Advantages of the subdomain approach:
- Simple to set up
- Clear separation between Webflow and HubSpot content
- No need for additional tools or services
Disadvantages:
- SEO authority is split between subdomains
- Users may notice they're on different platforms

Method 2: Using a reverse proxy (Advanced approach)
For a more seamless integration, you can use a reverse proxy to serve both Webflow and HubSpot content from the same domain. This method requires a more technical setup but offers better SEO benefits and a more unified user experience.
What is a reverse proxy?
A reverse proxy acts as an intermediary between the user's browser and your web servers. It receives requests from users and forwards them to the appropriate backend server (in this case, either Webflow or HubSpot), then returns the response to the user (all of this is a fraction of a second).
Steps to set up a reverse proxy using Cloudflare Workers:
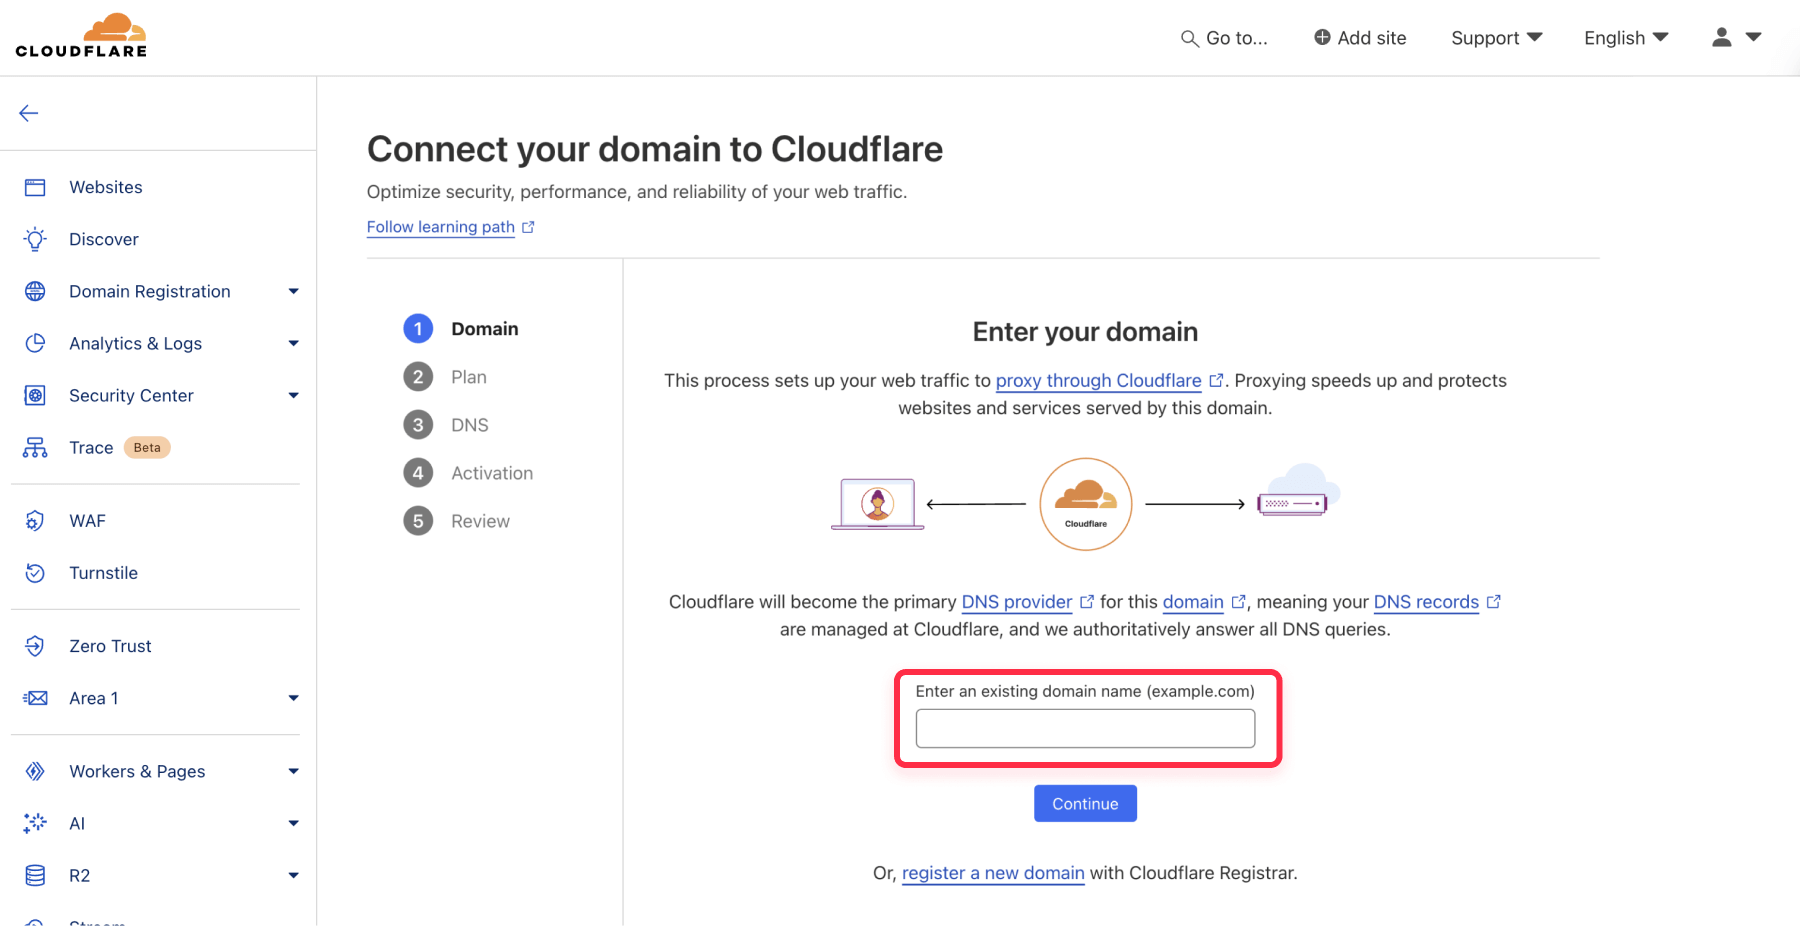
Create a Cloudflare account:
- Go to Cloudflare.com and sign up for an account
- Add your domain to Cloudflare
- Update your domain's nameservers to point to Cloudflare
Set up your Webflow and HubSpot sites:
- Configure your Webflow site with its default .webflow.io domain
- Set up your HubSpot content on a subdomain (e.g., blog.domain.com)
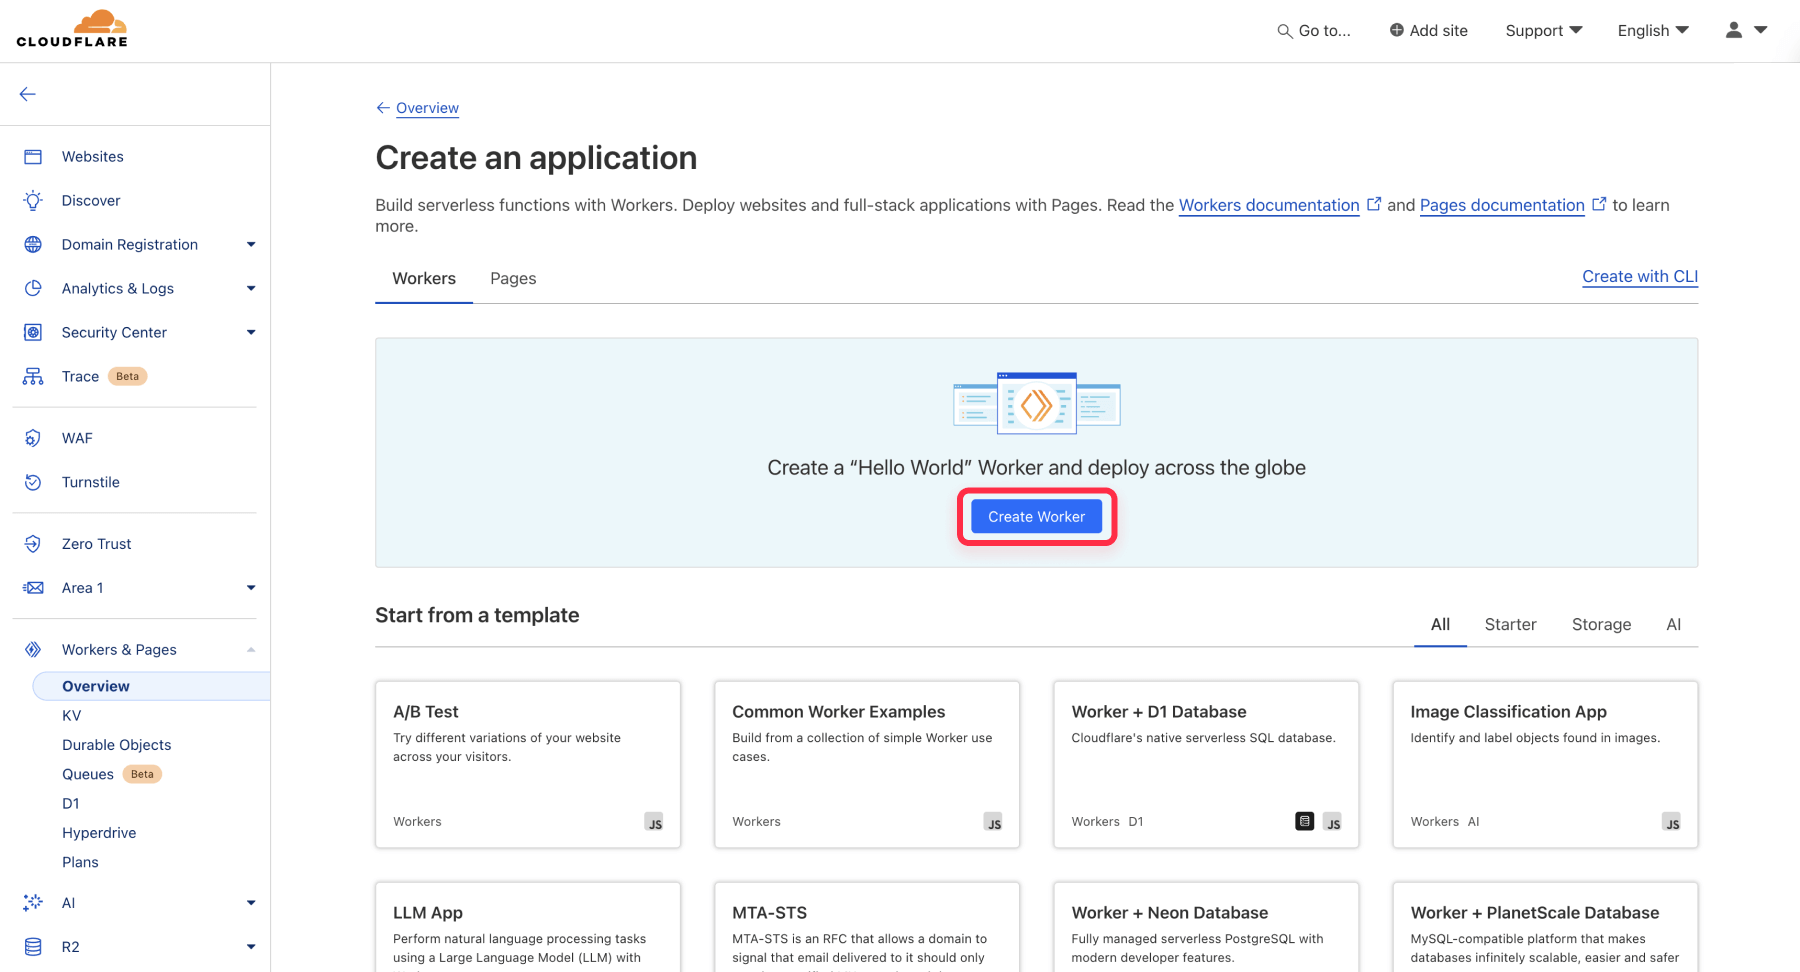
Create a Cloudflare Worker:
- In your Cloudflare dashboard, go to the "Workers" section
- Click "Create a Worker"
- Give your worker a name (e.g., "webflow-hubspot-proxy")
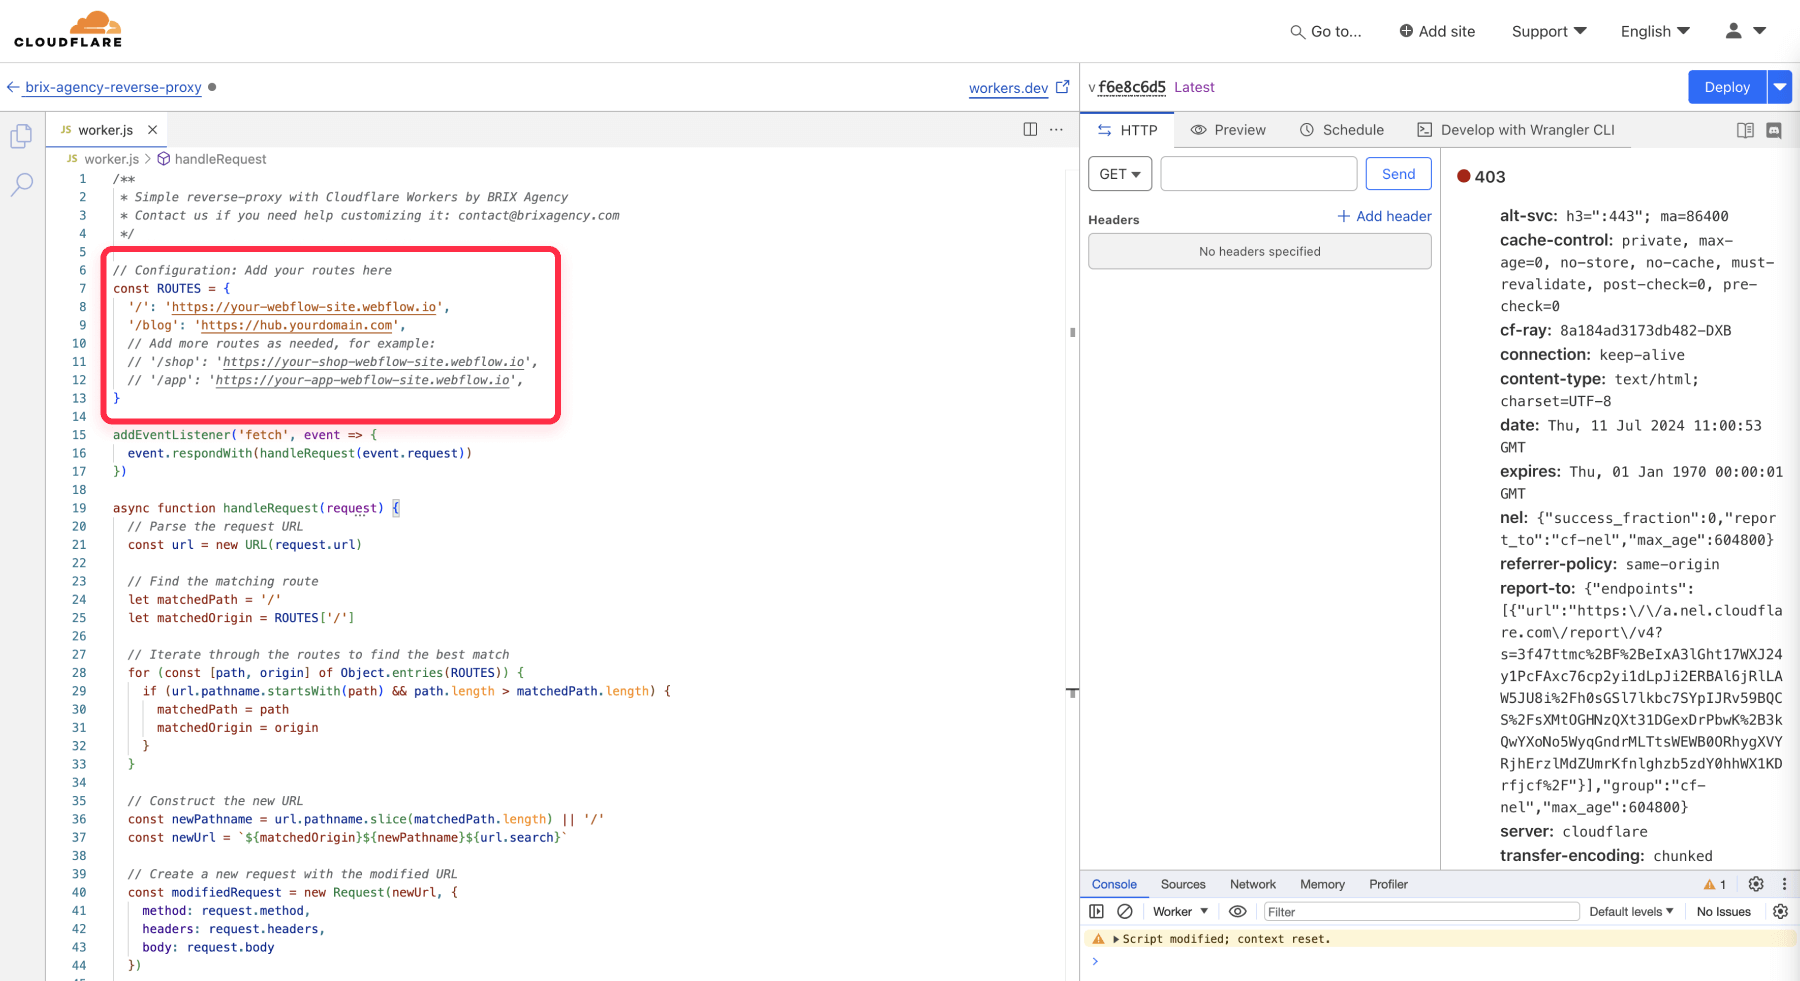
Add the reverse proxy code:
- In the worker editor, replace the default code with the following:
/**
 * Simple reverse-proxy with Cloudflare Workers by BRIX Agency
 * Contact us if you need help customizing it: contact@brixagency.com
 */

// Configuration: Add your routes here
const ROUTES = {
  '/': 'https://your-webflow-site.webflow.io',
  '/blog': 'https://hub.yourdomain.com',
  // Add more routes as needed, for example:
  // '/shop': 'https://your-shop-webflow-site.webflow.io',
  // '/app': 'https://your-app-webflow-site.webflow.io',
}

addEventListener('fetch', event => {
  event.respondWith(handleRequest(event.request))
})

async function handleRequest(request) {
  // Parse the request URL
  const url = new URL(request.url)

  // Find the matching route
  let matchedPath = '/'
  let matchedOrigin = ROUTES['/']

  // Iterate through the routes to find the best match
  for (const [path, origin] of Object.entries(ROUTES)) {
    if (url.pathname.startsWith(path) && path.length > matchedPath.length) {
      matchedPath = path
      matchedOrigin = origin
    }
  }

  // Construct the new URL
  const newPathname = url.pathname.slice(matchedPath.length) || '/'
  const newUrl = `${matchedOrigin}${newPathname}${url.search}`

  // Create a new request with the modified URL
  const modifiedRequest = new Request(newUrl, {
    method: request.method,
    headers: request.headers,
    body: request.body
  })

  // Forward the modified request
  let response = await fetch(modifiedRequest)

  // Clone the response so that we can modify headers
  response = new Response(response.body, response)

  // Remove the Webflow-specific headers
  response.headers.delete('X-Powered-By')
  response.headers.delete('X-Generator')

  // Add our own header
  response.headers.set('X-Proxied-By', 'Cloudflare Workers')

  return response
}
Configure the routes:
- Update the URLs to match your Webflow and HubSpot sites
- Add additional routes as needed (e.g., /resources, /videos, etc.)
Save and deploy the worker:
- Click "Save and Deploy" to activate your worker
Connect the worker to a domain:
- Go to your Cloudflare dashboard
- Navigate to the "Workers" section
- Click on "Triggers"
- Type your domain (e.g., domain.com)
- Click "Save" and it will be live!
Advantages of the reverse proxy approach:
- All content appears on the same domain
- Better SEO as all pages contribute to the same domain authority
- Includes 100,000 requests per day in the free plan
- Seamless user experience
Disadvantages:
- More complex setup
- May incur small additional costs for high-traffic sites
Additional notes and extra suggestions
Before we wrap up, let's explore some ways to enhance the integration between Webflow and HubSpot even more.
- Add HubSpot tracking to Webflow: By implementing HubSpot's tracking code on your Webflow site, you can significantly expand your analytics capabilities. This integration allows HubSpot to collect data not just from HubSpot-hosted pages, but from your entire Webflow site as well. Resulting in a more complete picture of user behavior, traffic patterns, and engagement across your entire web presence.
- Use HubSpot forms in Webflow: HubSpot forms are a powerful tool for lead generation and data collection, automatically recording all submissions in the HubSpot CRM. Instead of using Webflow's native forms, consider integrating HubSpot forms into your Webflow site. There are two main ways to achieve this:
- Webflow App Integration: HubSpot offers a Webflow app that allows you to easily add HubSpot forms to your Webflow site. This method is straightforward and suitable for most users.
- Custom HubSpot Forms Plugin: If you're looking for a more advanced plugin that supports all the form capabilities on HubSpot, we have created one for our enterprise clients. This plugin allows for greater customization and seamless integration with your Webflow design. If you're interested in this option, you can get in touch with us for more information.
Conclusion
Both methods of integrating Webflow and HubSpot have their pros and cons. The subdomain approach is simpler and easier to set up, making it ideal for small businesses or those with limited technical resources. The reverse proxy method, while more complex, offers better SEO benefits and a more unified user experience, making it suitable for larger businesses or those with specific SEO requirements.
Whichever method you choose, integrating Webflow and HubSpot allows you to leverage the strengths of both platforms, creating a powerful and flexible web presence for your business.
If you've tried these methods and hit roadblocks, don't worry. We specialize in Webflow and have extensive HubSpot experience, so our team can handle the technical details, ensuring a smooth integration. Contact us for personalized assistance with your Webflow-HubSpot setup.