In today's fast-paced business world, efficiency is key. One area where this is particularly important is in managing job postings across different platforms. If you're using Greenhouse as your HR management software and Webflow for your website, you'll want to ensure these two platforms work seamlessly together. This integration can save you time and effort by eliminating the need for double data entry and ensuring your job postings are always up-to-date.
In this article, we'll explore three methods to integrate Greenhouse with Webflow, each with its own advantages and complexity levels. Whether you're looking for a quick solution or a more customized approach, you'll find an option that suits your needs.
Method 1: Using Greenhouse job board embed
The simplest method to integrate Greenhouse with Webflow is by using Greenhouse's embed functionality. This method is easy to implement, free, and requires minimal technical knowledge.

Greenhouse provides an embed code that allows you to display your job board directly on your Webflow site. It's similar to embedding a YouTube video on your webpage.
Advantages
- Easy to implement
- Free to use
- Minimal technical knowledge required
- Automatically updates when you make changes in Greenhouse
Disadvantages
- Limited customization options
- May not match your website's design out-of-the-box
Implementation steps
- Navigate to Configure > Job Boards & Posts in Greenhouse Recruiting.
- Click "Create a Job Board" if you haven't already set one up.
- Fill in the required fields, including Company Name and Description.
- Upload your logo and set a Logo Link (optional).
- Configure additional settings as needed (e.g., application confirmation, filters).
- Click "Create" to finalize your job board.
- On the Job Boards page, toggle the status to "Live" to publish the URL.

- Look for an "embed" or "iframe" option to get the embed code for your Webflow site.
- Log in to your Webflow account.
- Open the project where you want to add the job board.
- Navigate to the page where you want to display the job listings.
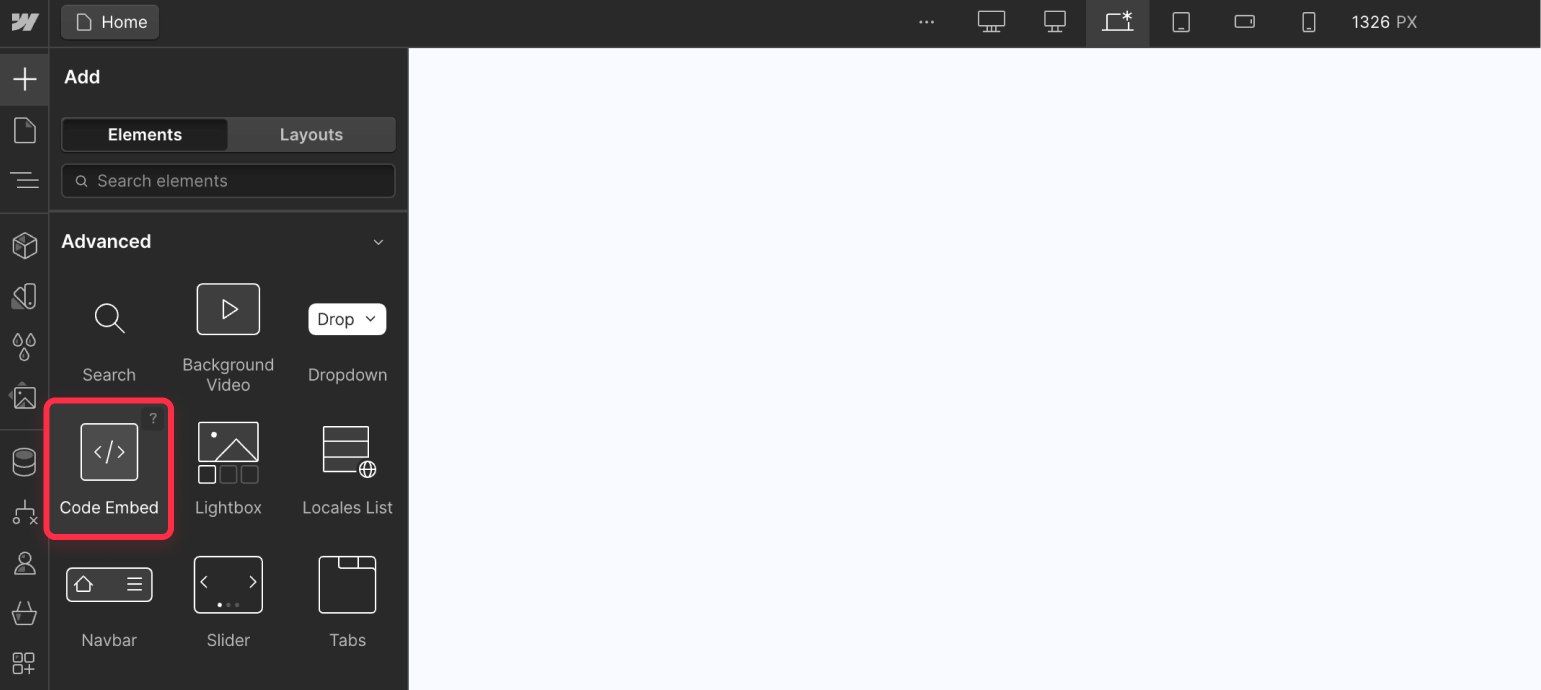
- Add a "Code Embed" element to your page.
- Paste the Greenhouse iframe code into the Code Embed element.
- Publish your Webflow site to see the changes live.
Customizing the iframe
While the iframe method is simple, it might not match your website's design initially. However, Greenhouse offers the ability to customize the job board's appearance using CSS.
To do this:
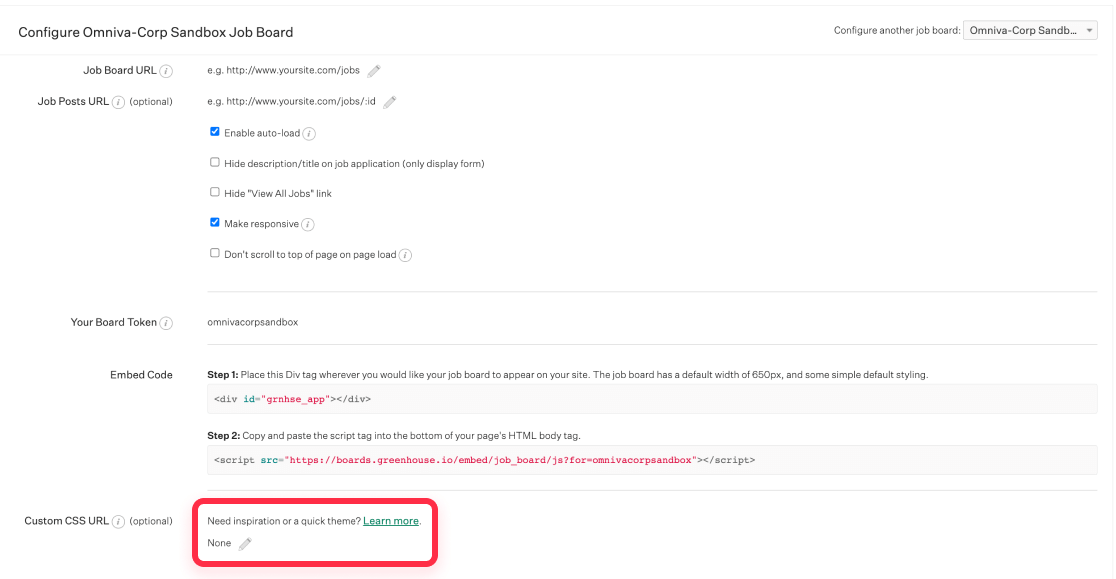
- Access your Greenhouse account and navigate to the Dev Center.
- Click on "Configuring Your Job Board" under the Dev Center options.
- Scroll down to locate the "Custom CSS URL" section.
- Click the pencil (Edit) icon next to the CSS URL field.
- If you have your CSS hosted online, enter its URL in the provided field.
- Alternatively, use the "Choose File" button to upload a local CSS file.
- After entering the URL or selecting a file, click the "Save" button.
- Your custom styles will now be applied to your Greenhouse job board.
Please keep in mind that if you want your CSS to completely match your current website brand, you will require at least basic HTML/CSS knowledge (or hiring a web developer).
Method 2: Using Greenhouse API in Webflow
For those seeking more control and customization, using the Greenhouse API is an excellent option. This method allows for complete customization of the job board's appearance and functionality.

The Greenhouse API (Application Programming Interface) allows you to fetch job data from Greenhouse and display it on your Webflow site in any way you choose.
Advantages
- Complete customization of appearance and functionality
- Ability to add advanced features like real-time filtering and search
- Seamless integration with your site's design
- No ongoing maintenance costs
Disadvantages
- Requires significant technical knowledge
- More complex to implement initially
Implementation steps
- Sign up for a Greenhouse API key.
- Create a new custom code element in Webflow.
- Write JavaScript code to fetch data from the Greenhouse API.
- Parse the received data and create HTML elements to display job listings.
- Style the created elements to match your site's design.
Advanced features
With the API method, you can implement advanced features like:
- Real-time filtering by department
- Filtering by location
- Live search functionality
These features require more complex JavaScript implementation but can greatly enhance the user experience of your job board.
If you're not comfortable with advanced JavaScript programming, it's advisable to work with a Webflow agency that has experience with Greenhouse API integration (like us!) — They can create a custom solution tailored to your specific needs.
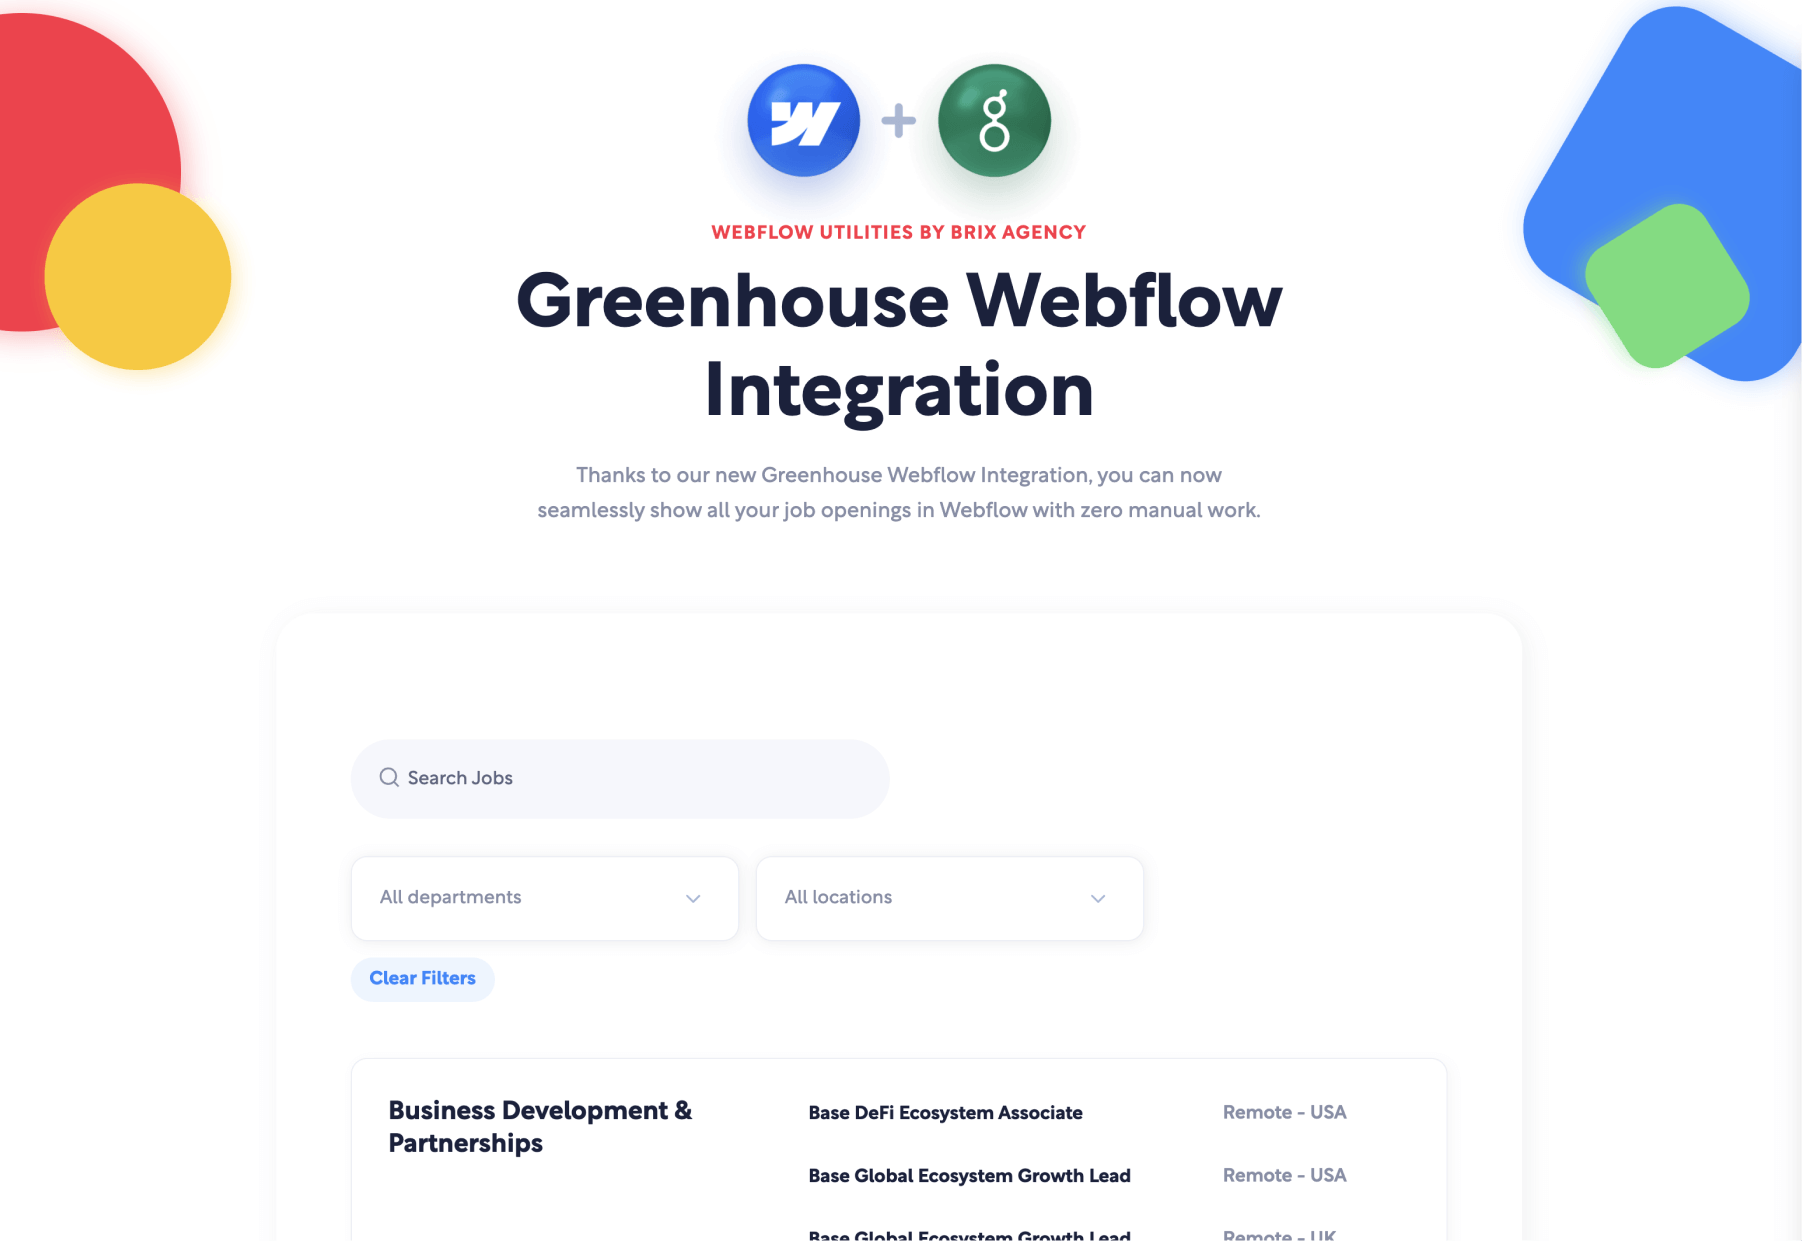
At BRIX Agency, we have extensive experience with Greenhouse and have built a custom integration that takes advantage of many of those features. Feel free to preview it here.
Method 3: Utilizing Webflow CMS for your Greenhouse job openings
The third method involves using Webflow's built-in Content Management System (CMS) to store and display job listings.

You create a custom CMS collection in Webflow to store job data, then manually or automatically populate this collection with data from Greenhouse.
Advantages
- Complete control over the layout and design
- Ability to use all Webflow features and interactions
- Can create complex layouts and integrate with other Webflow functionalities
Disadvantages
- Requires manual data entry or additional automation to keep data synced with Greenhouse
Implementation steps
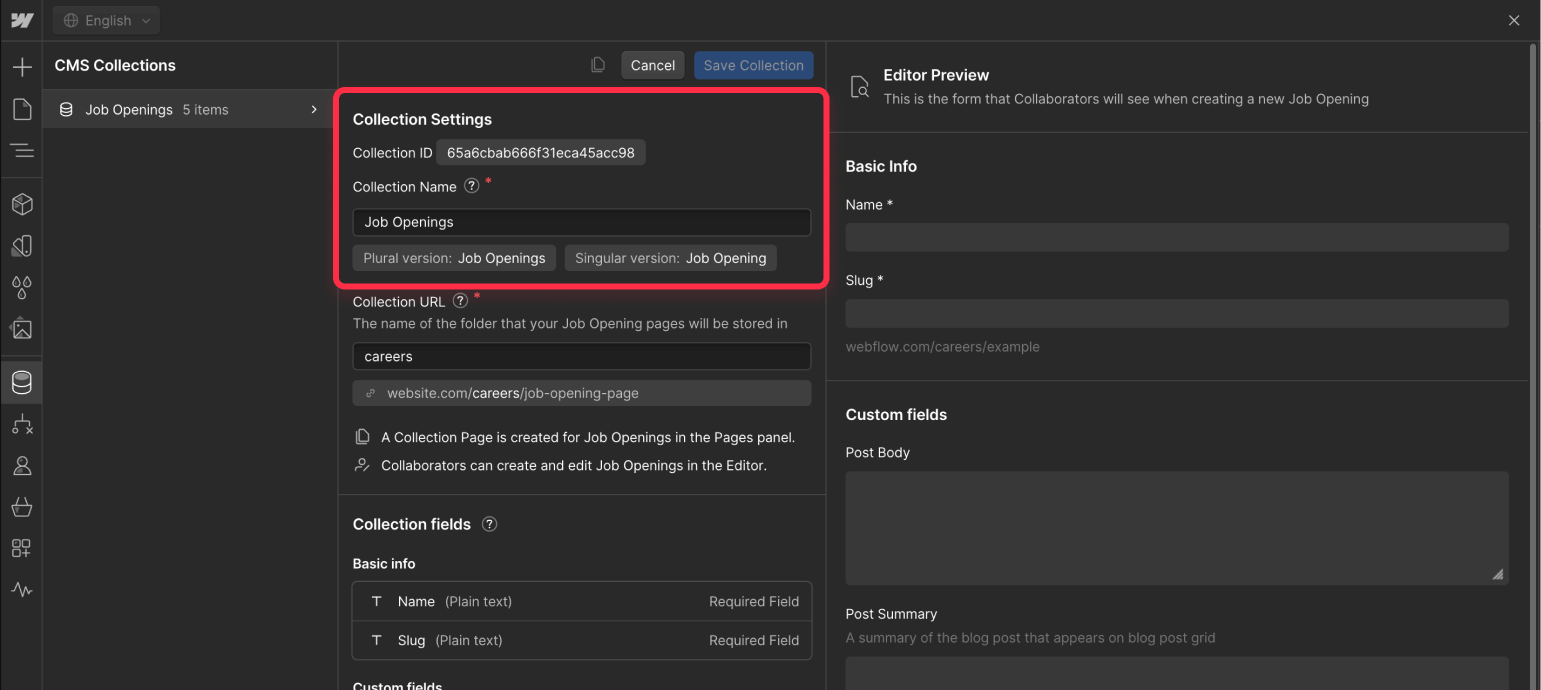
- In Webflow, create a new CMS collection called "Job Openings".
- Add fields to the collection that match the data you want to display (e.g., job title, description, location, salary).
- Create a new page in Webflow to display your job listings.
- Add a Collection List element to the page and connect it to your "Job Openings" collection.
- Design the layout of individual job listings using Webflow's design tools.
- Manually (or automatically) populate your CMS with job data from Greenhouse.
Automating data transfer from Greenhouse to Webflow
To keep your Webflow CMS in sync with Greenhouse, you can use automation tools like Zapier, Make, or n8n. Here's the basic workflow you must create:
- Set up a Zap in Zapier that triggers when a new job is posted in Greenhouse.
- Configure the Zap to create a new item in your Webflow CMS collection with the job details.
- Set up similar Zaps for updating and deleting job listings.
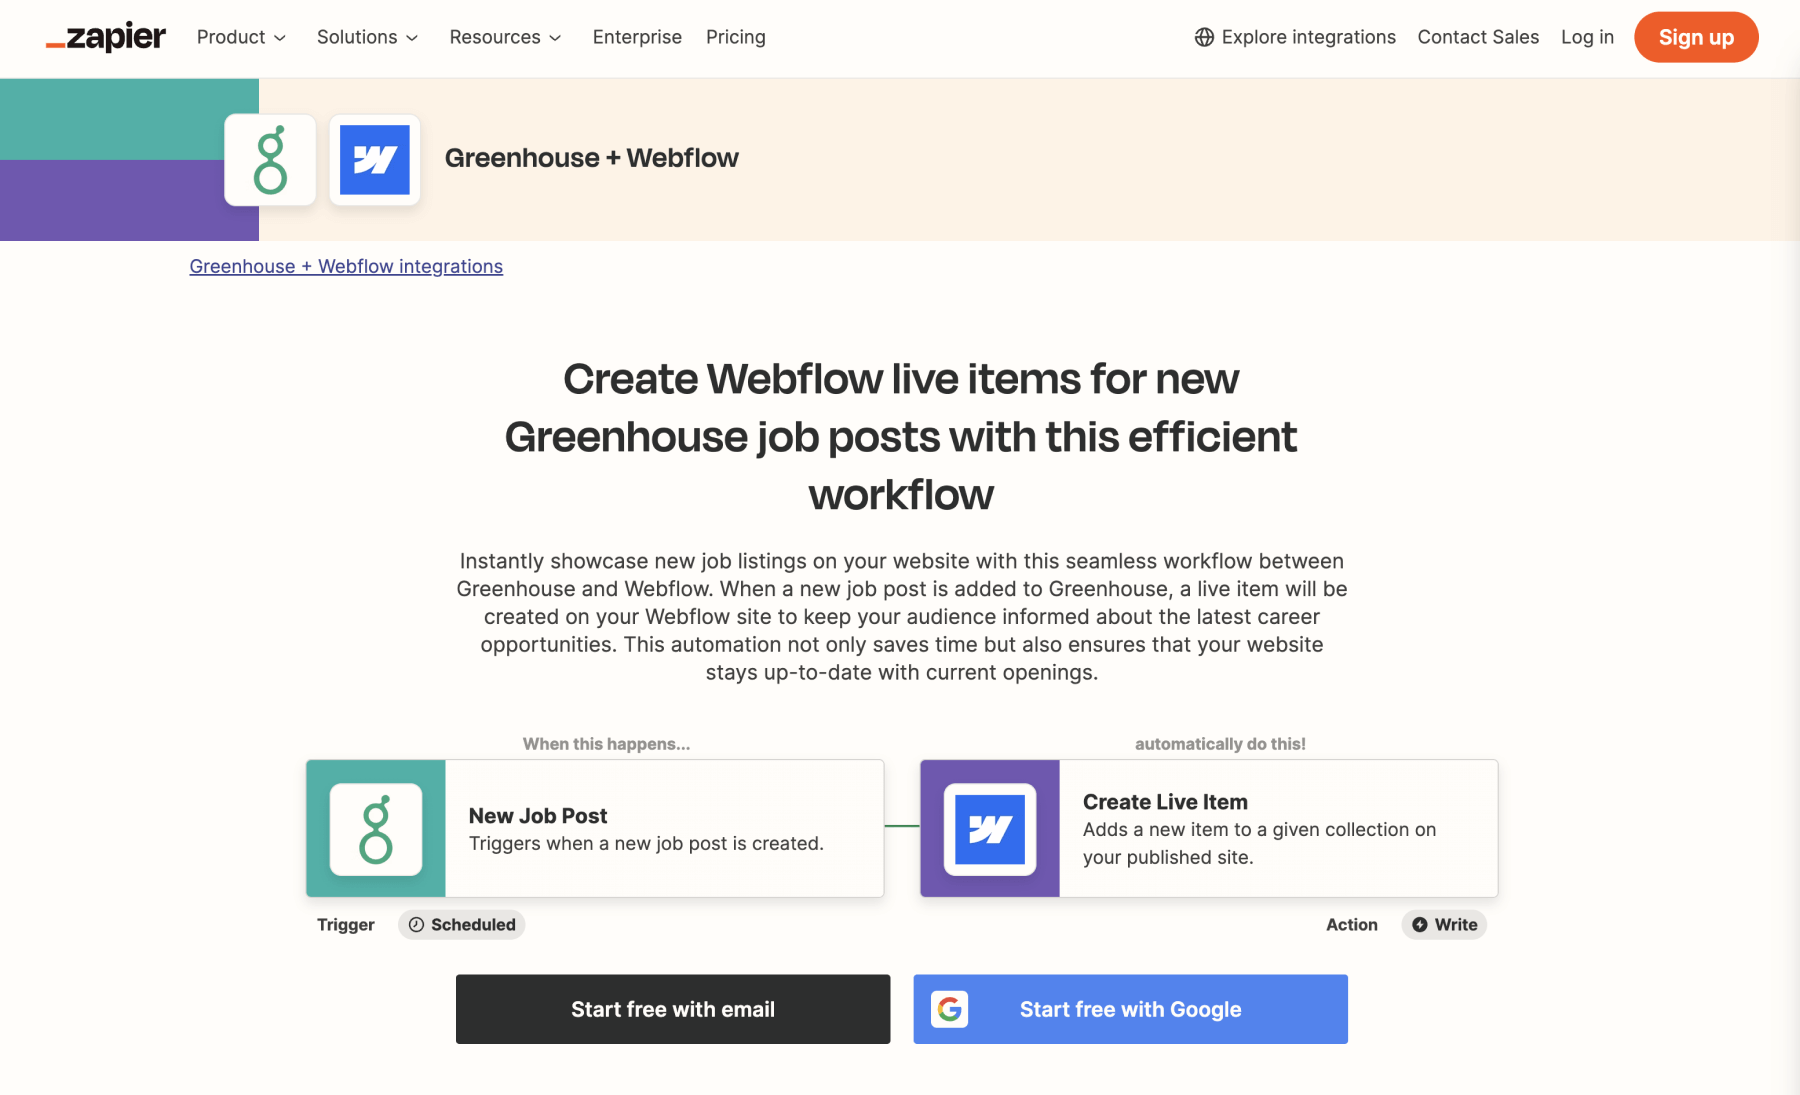
Keep in mind that going with this option would require having a paid subscription for Zapier (or any other automation service you would like to use). But don't worry, it's worth it for all the time it will help you save!
Conclusion
Each of these methods has its own strengths and is suitable for different scenarios:
- The iframe method is best for quick implementation with minimal technical requirements.
- The API method offers the most flexibility and customization but requires more technical expertise.
- The Webflow CMS method provides a good balance of customization and ease of use, especially when combined with automation tools.
Choose the method that best fits your technical capabilities and specific needs. Remember, you can always start with a simpler method and upgrade to a more complex solution as your needs evolve. Integrating Greenhouse with Webflow can significantly streamline your job posting process, ensuring that your careers page always reflects the most up-to-date opportunities in your organization.
Need help integrating Greenhouse with your Webflow site? Contact our Webflow agency team today! We're experienced Webflow developers who have integrated Greenhouse countless times — Let's make your careers page shine!


