In today's interconnected digital world, there may be instances where you need to restrict access to your Webflow site from specific countries. This article will guide you through the process of implementing geo-blocking using Cloudflare, a powerful solution that works seamlessly with Webflow.
Why geo-block?
Before we dive into the how-to, let's explore some common reasons why you might want to geo-block certain countries:
- Regulatory compliance: Your company may be subject to regulations that prohibit serving content or conducting business with certain countries.
- Spam prevention: If you're receiving an overwhelming amount of spam or malicious traffic from a particular country, geo-blocking can help mitigate this issue.
- Legal requirements: Some countries have specific legal requirements for online businesses. If you're not prepared to meet these requirements, geo-blocking can help you avoid potential legal issues.
- Content licensing: If you have content that's only licensed for specific regions, geo-blocking can help ensure you're not violating licensing agreements.
- Targeted marketing: You may want to focus your online presence on specific geographic markets, excluding others, to streamline your marketing efforts.
- Fraud prevention: If you've noticed patterns of fraudulent activity from certain regions, geo-blocking can be an effective preventive measure.
These are just a few examples of why businesses might choose to implement geo-blocking. Now, let's move on to the implementation process.
Implementing geo-blocking with Cloudflare
We'll be using Cloudflare for geo-blocking as it's an industry leader in this field. Cloudflare offers advanced blocking features, and even better, its free plan is very generous and covers most needs.

The process of geo-blocking your Webflow site involves two main phases:
- Configuring your domain with Cloudflare
- Setting up geo-blocking rules
Following these steps will set up your Webflow site behind Cloudflare's proxy, preparing it for geo-blocking implementation.
Let's go through each phase step by step.
Phase 1: Configuring your domain with Cloudflare
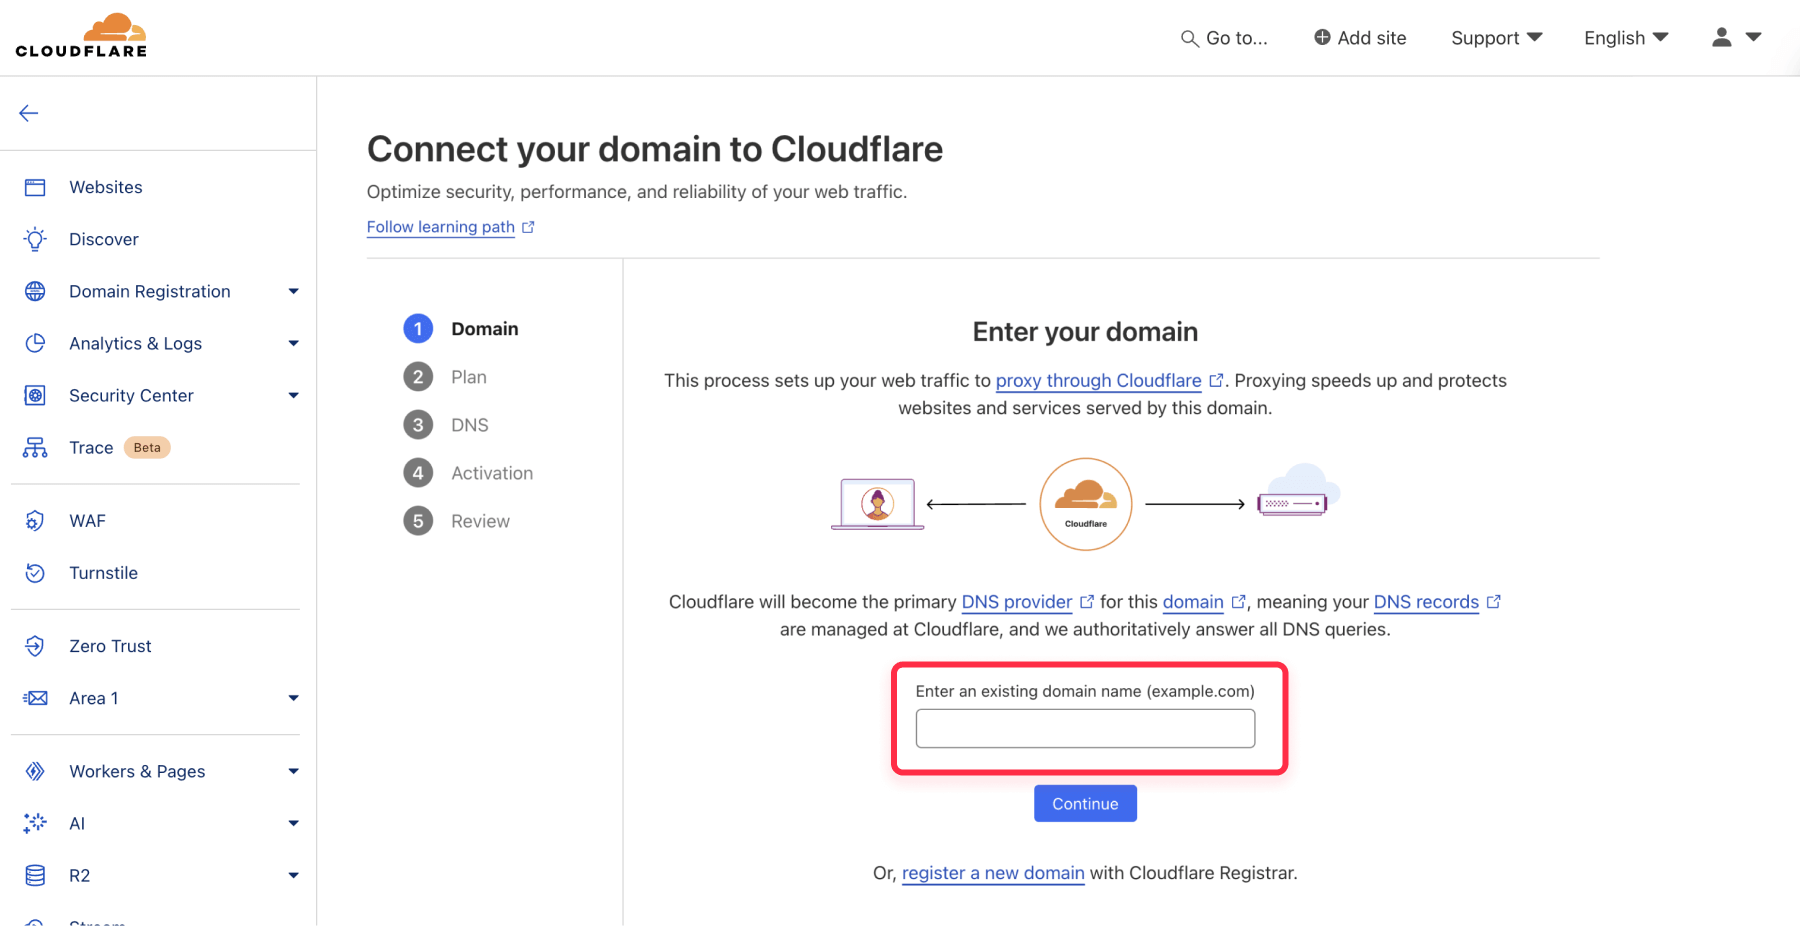
Create a Cloudflare account
- Go to cloudflare.com and sign up for an account
- Add your domain to Cloudflare
- Choose the free plan (sufficient for most use cases)
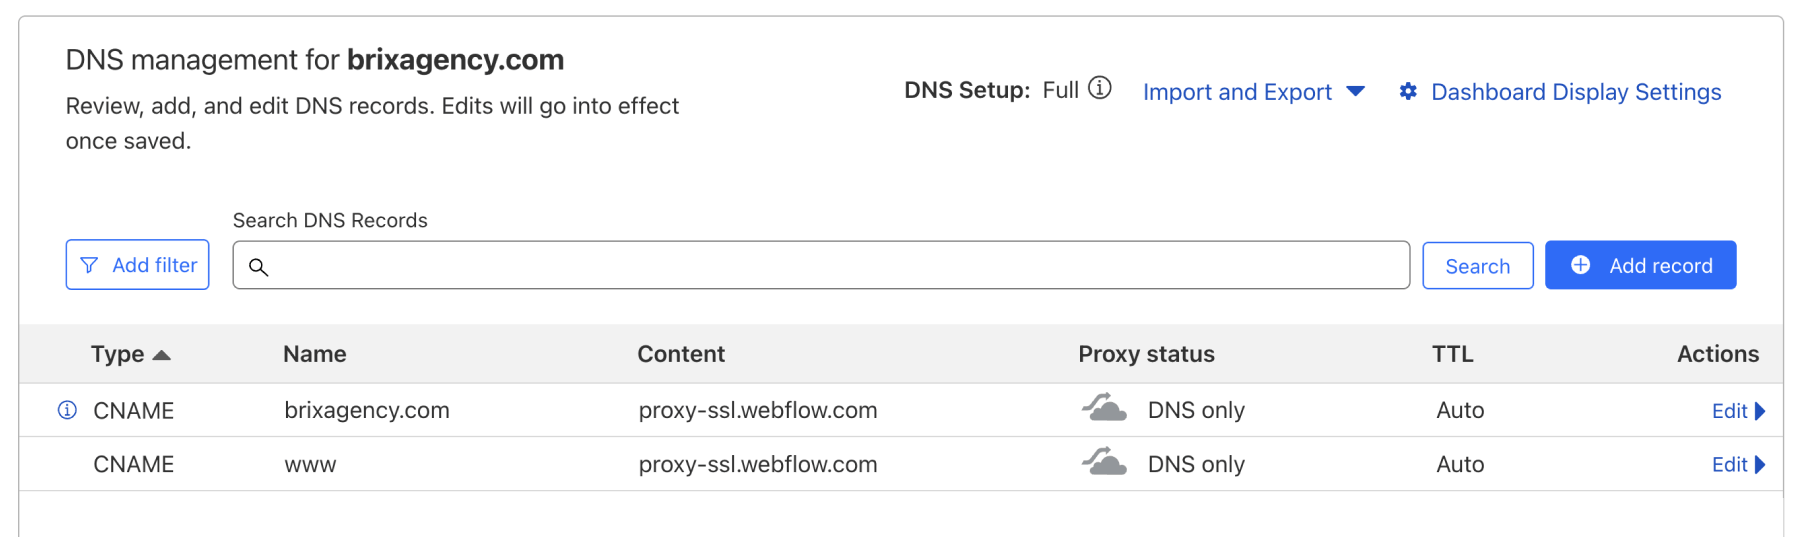
Configure DNS settings
- Cloudflare will automatically fetch your existing DNS records
- Review the fetched records to ensure accuracy
- Important: Uncheck the proxy option (orange cloud icon) for all records initially. We're doing this because otherwise the server will give an error, but we will reactivate it again later.
Update nameservers
- Cloudflare will provide you with new nameservers
- Log in to your domain registrar (e.g., GoDaddy, Google Domains, etc)
- Update your domain's nameservers to those provided by Cloudflare
Configure SSL in Cloudflare
- In your Cloudflare dashboard, go to the SSL/TLS section
- Set the SSL mode to "Full (strict)"
- This ensures end-to-end encryption between visitors and your Webflow server
Create a page rule for SSL compatibility
- In Cloudflare, go to the Page Rules section
- Create a new rule with the following settings:
- Pattern:
*yourdomain.com/.well-known/acme-challenge/* - Setting: SSL (Off)
- Pattern:
- This allows Webflow to perform SSL certificate renewal without conflicts
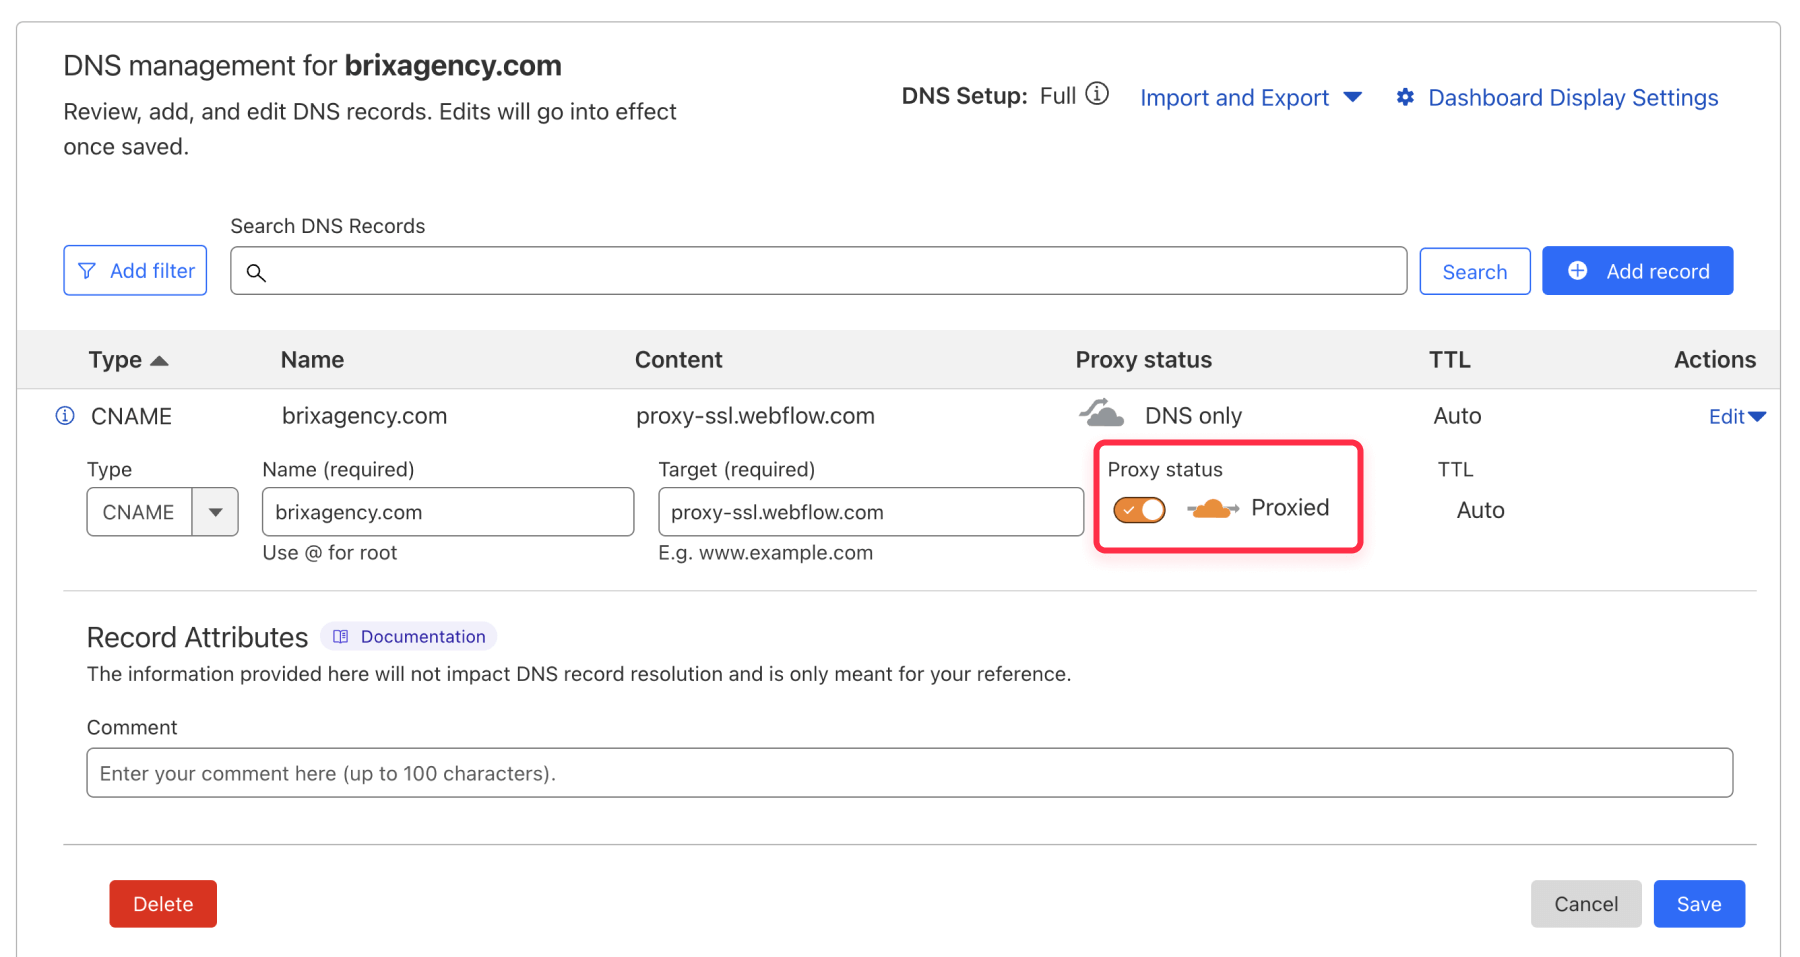
Enable Cloudflare proxy
- Return to the DNS settings in Cloudflare
- Enable the proxy option (turn the cloud icon orange) for your domain's A and CNAME records
Verify setup
- Wait for DNS changes to propagate (can take up to 24 hours, but in most cases you will only take around ~15 minutes)
- Visit your website to ensure it's loading correctly through Cloudflare. You can use https://www.ssl.org/ to verify this. If the server information shows Cloudflare, the process is complete.
Now that we've set up Cloudflare as a proxy for our Webflow site, we can continue setting up the blocking rules.
Phase 2: Setting up geo-blocking rules
Now that your domain is configured with Cloudflare, you can easily set up geo-blocking rules. Here's how:
Access the firewall settings.
- Log in to your Cloudflare account
- Select your domain
- Go to the "Security" section
- Click on "WAF" (Web Application Firewall)
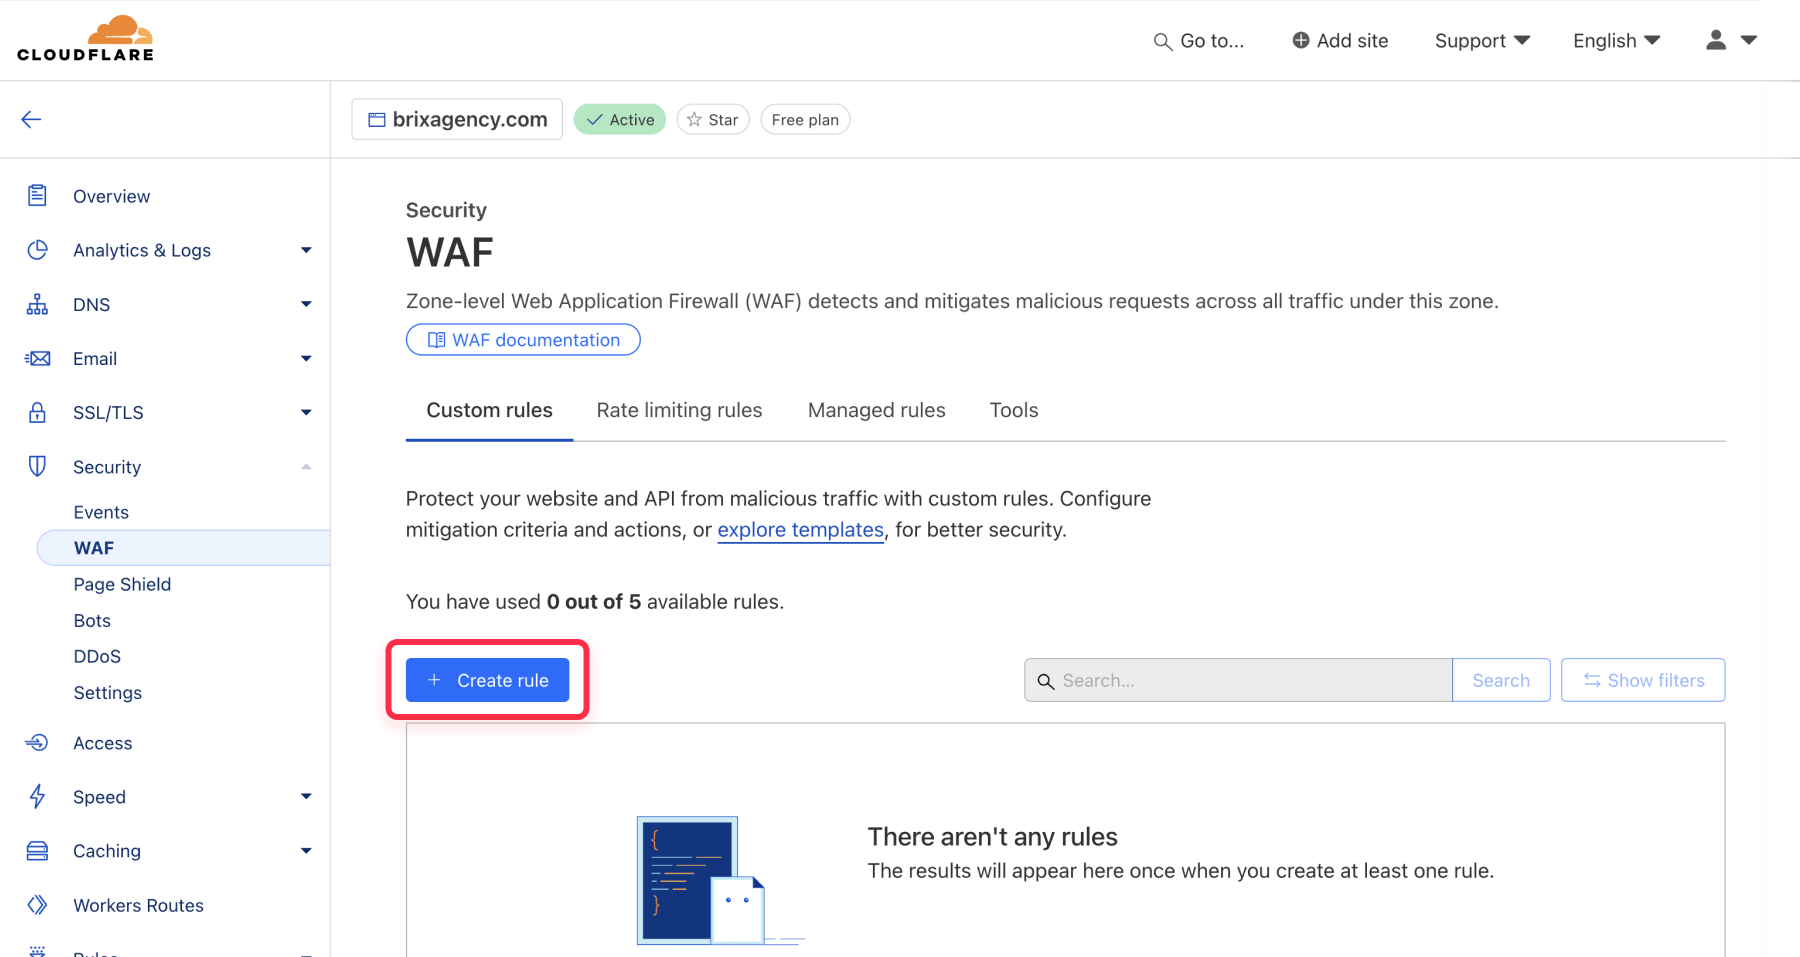
Create a new rule
- Click on "Create Rule"
- Give your rule a descriptive name (e.g., "Block Russia")
Configure the rule
- In the "If incoming requests match..." section:
- Field: Select "Country"
- Operator: Choose "Equals"
- Value: Select the country you want to block (e.g., "Russian Federation")
- You can also select other criteria to filter, like Continent, IP address range, and many more. Feel free to explore and use the one you need the most.
- You can add AND or OR operators to add more filters to the same rule, making your blocking more comprehensive. For example, you could create a rule that blocks traffic from a specific country only if it's also coming from a particular IP range.
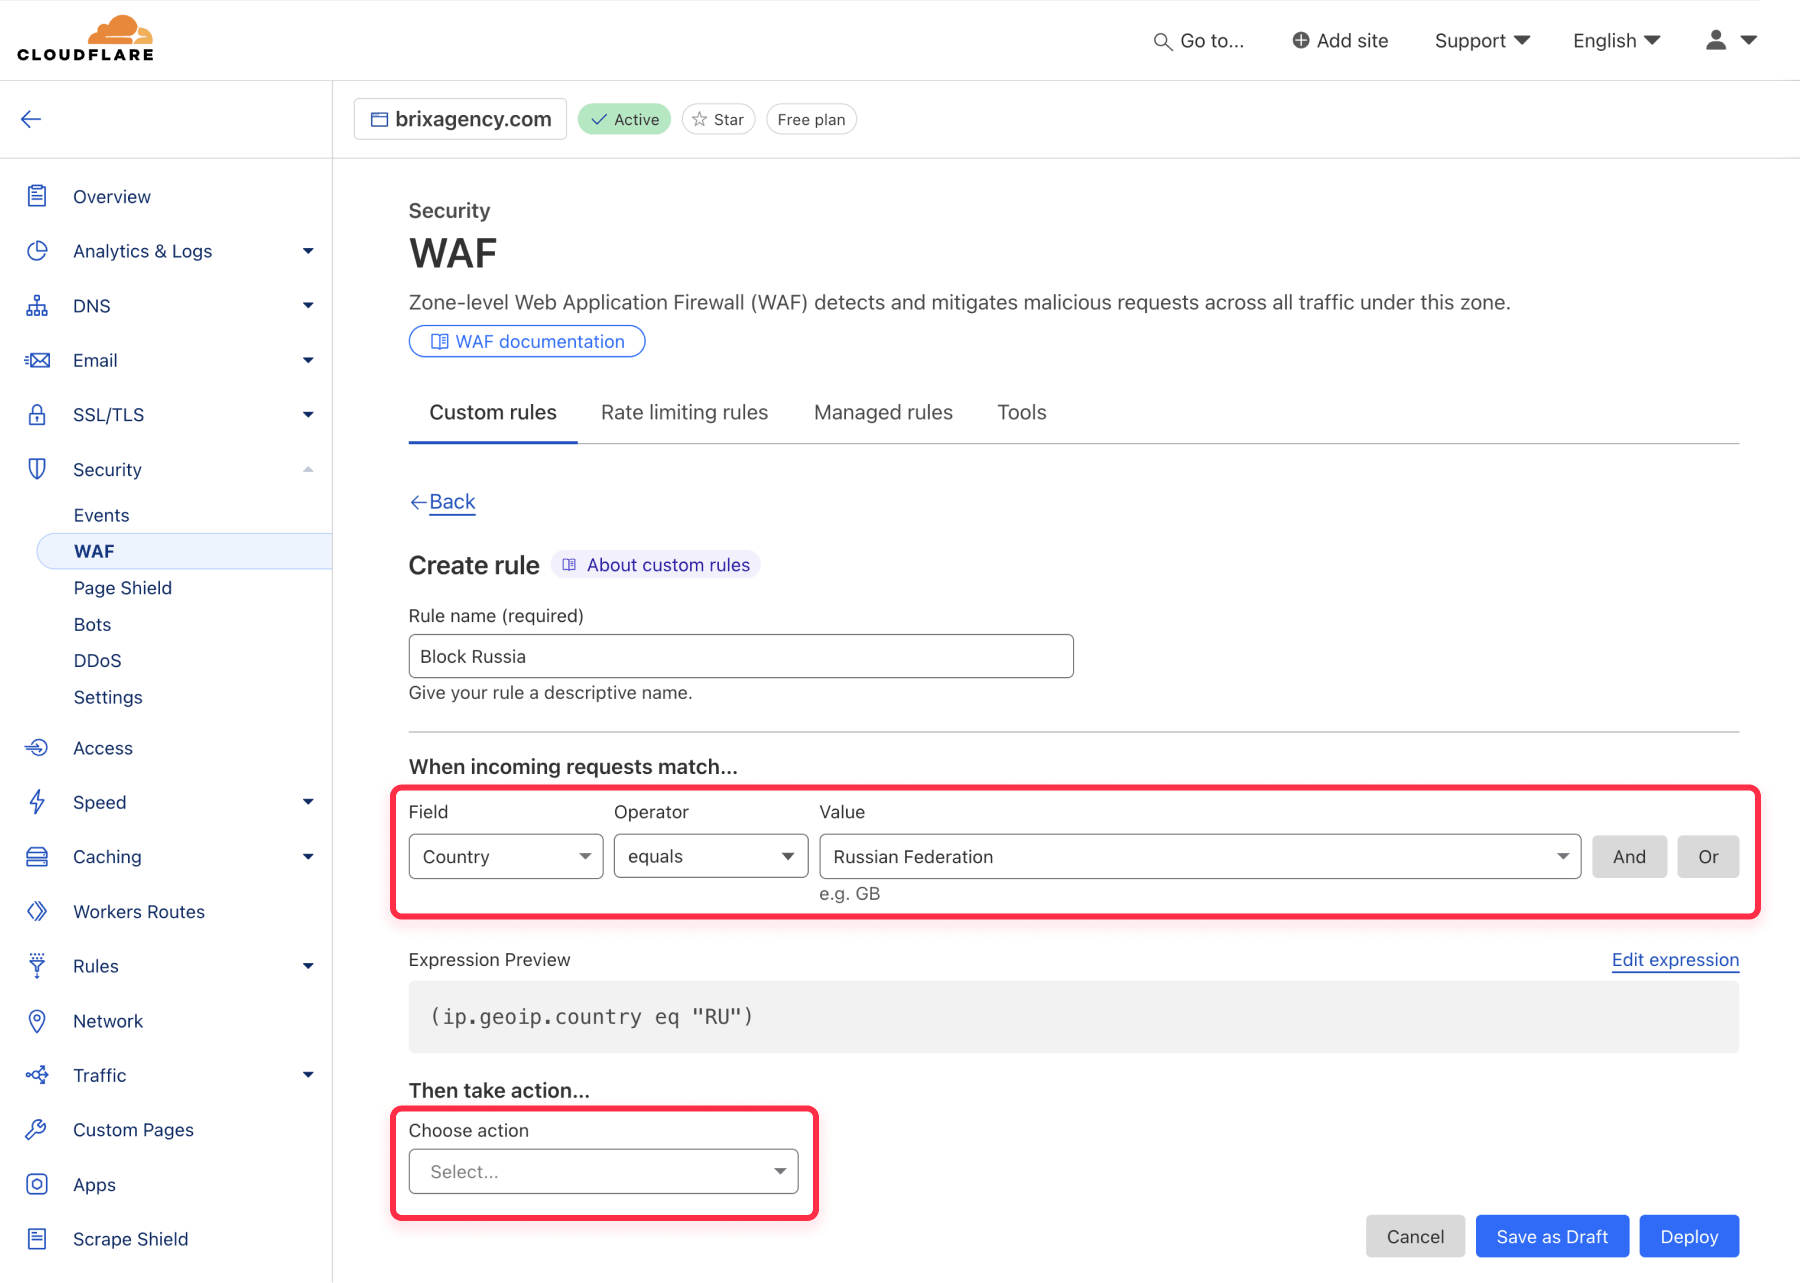
Set the action
- Once you are happy with your blocking criteria, select your Block action.
Deploy the rule
- Review your rule settings
- Click "Deploy" to activate the rule
Monitor and adjust
- Use Cloudflare's analytics to monitor the effectiveness of your rule
- Adjust as necessary based on the results
Remember, with the free Cloudflare plan, you can create up to 5 rules. This is sufficient for most use cases. If you need more, you can upgrade to the Pro plan ($25/month), which allows up to 20 rules.
Advanced rule configuration
Cloudflare's WAF allows for complex rule configurations. You can:
- Use multiple conditions with AND/OR operators
- Block by continent instead of individual countries
- Filter by single IP addresses or ranges
- Combine various criteria for more specific targeting
Conclusion
Geo-blocking can be a powerful tool for managing access to your Webflow site. By leveraging Cloudflare's robust infrastructure, you can implement sophisticated geo-blocking rules quickly and often at no cost. Whether you're aiming to comply with regulations, prevent spam, or focus on specific markets, this method provides an effective solution.
If you need help with more complex configurations or have specific geo-blocking requirements, don't hesitate to reach out to our dedicated Webflow agency. We can provide tailored solutions for unique needs, such as blocking specific IP ranges or whitelisting certain IPs while maintaining overall geo-blocking strategies.