In today's digital landscape, engaging website visitors and preventing them from leaving your site quickly is very important. Implementing an exit-intent popup, made popular by tools like OptinMonster, is one efficient way to achieve this. This article will guide you through the process of adding exit-intent functionality to your Webflow popup, helping you capture potential leads and reduce bounce rates.
What is exit-intent?
Exit-intent is a smart feature that detects when a user is about to leave your website. It works by tracking the user's mouse movements and triggering a popup when the cursor moves towards the top of the browser window, typically indicating an attempt to close the tab or navigate away from the page.
This technology has been widely used for over a decade and has proven to be an effective way to:
- Capture email addresses
- Offer last-minute promotions
- Showcase important information
- Reduce cart abandonment rates
Now, let's dive into how you can implement this powerful tool on your Webflow site.
Step-by-step guide to implementing exit-intent in Webflow popups
Step 1: Create your popup
Before we begin with the exit-intent functionality, you need to have a popup ready in Webflow. If you haven't created one yet, you have two options:
- Design your own popup from scratch, tailoring it to your specific needs and brand style.
- Clone our free 4 popup components Webflow cloneable (over 2,900 users have already cloned it) and customize your favorite to fit your requirements.
Whichever method you choose, ensure that your popup is visually appealing and contains a compelling offer or message to engage users who are about to leave your site.
Step 2: Place the popup on your page
Once your popup is ready, you need to add it to the page where you want the exit-intent functionality to work. Here's how:
- If you want the exit-intent popup to appear on a specific page, add it to that page in Webflow.
- For site-wide implementation, add the popup as a Webflow component on all pages.
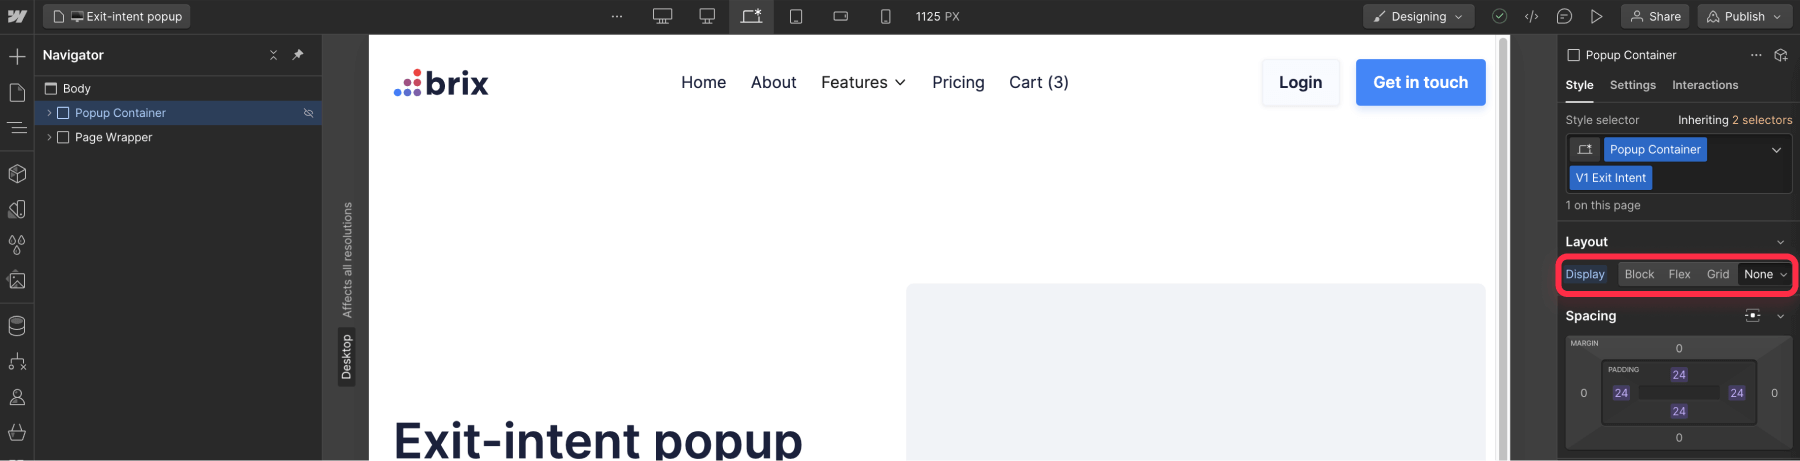
To ensure that the popup remains hidden until the exit-intent function triggers it, set its initial display property to "none" after placing it.
Step 3: Add an ID to your popup
To target your popup with JavaScript, you need to give it a unique identifier. Follow these steps:
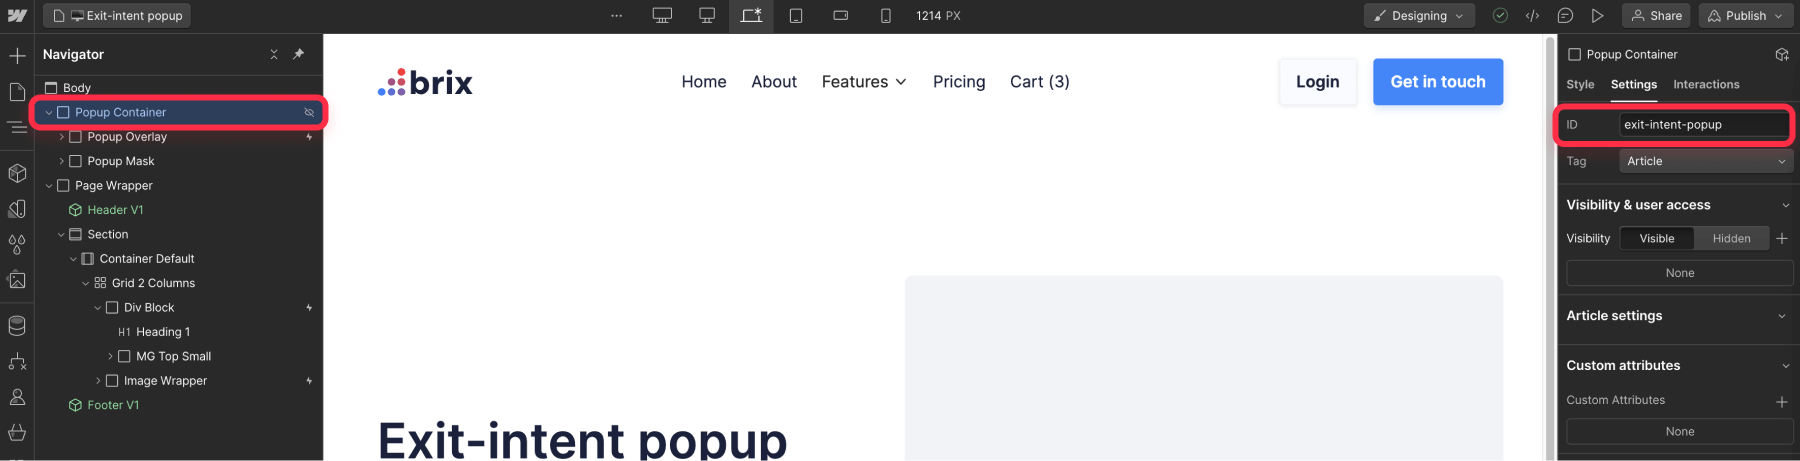
- Select the entire popup element in Webflow, including the background overlay.
- In the element settings, add the following custom ID: exit-intent-popup.
This ID will be crucial for our JavaScript code to identify and manipulate the popup.
Step 4: Add the exit-intent JavaScript code.
Now, we'll add the JavaScript code that detects when the user is about to leave the page and triggers the popup. Here's how to do it:
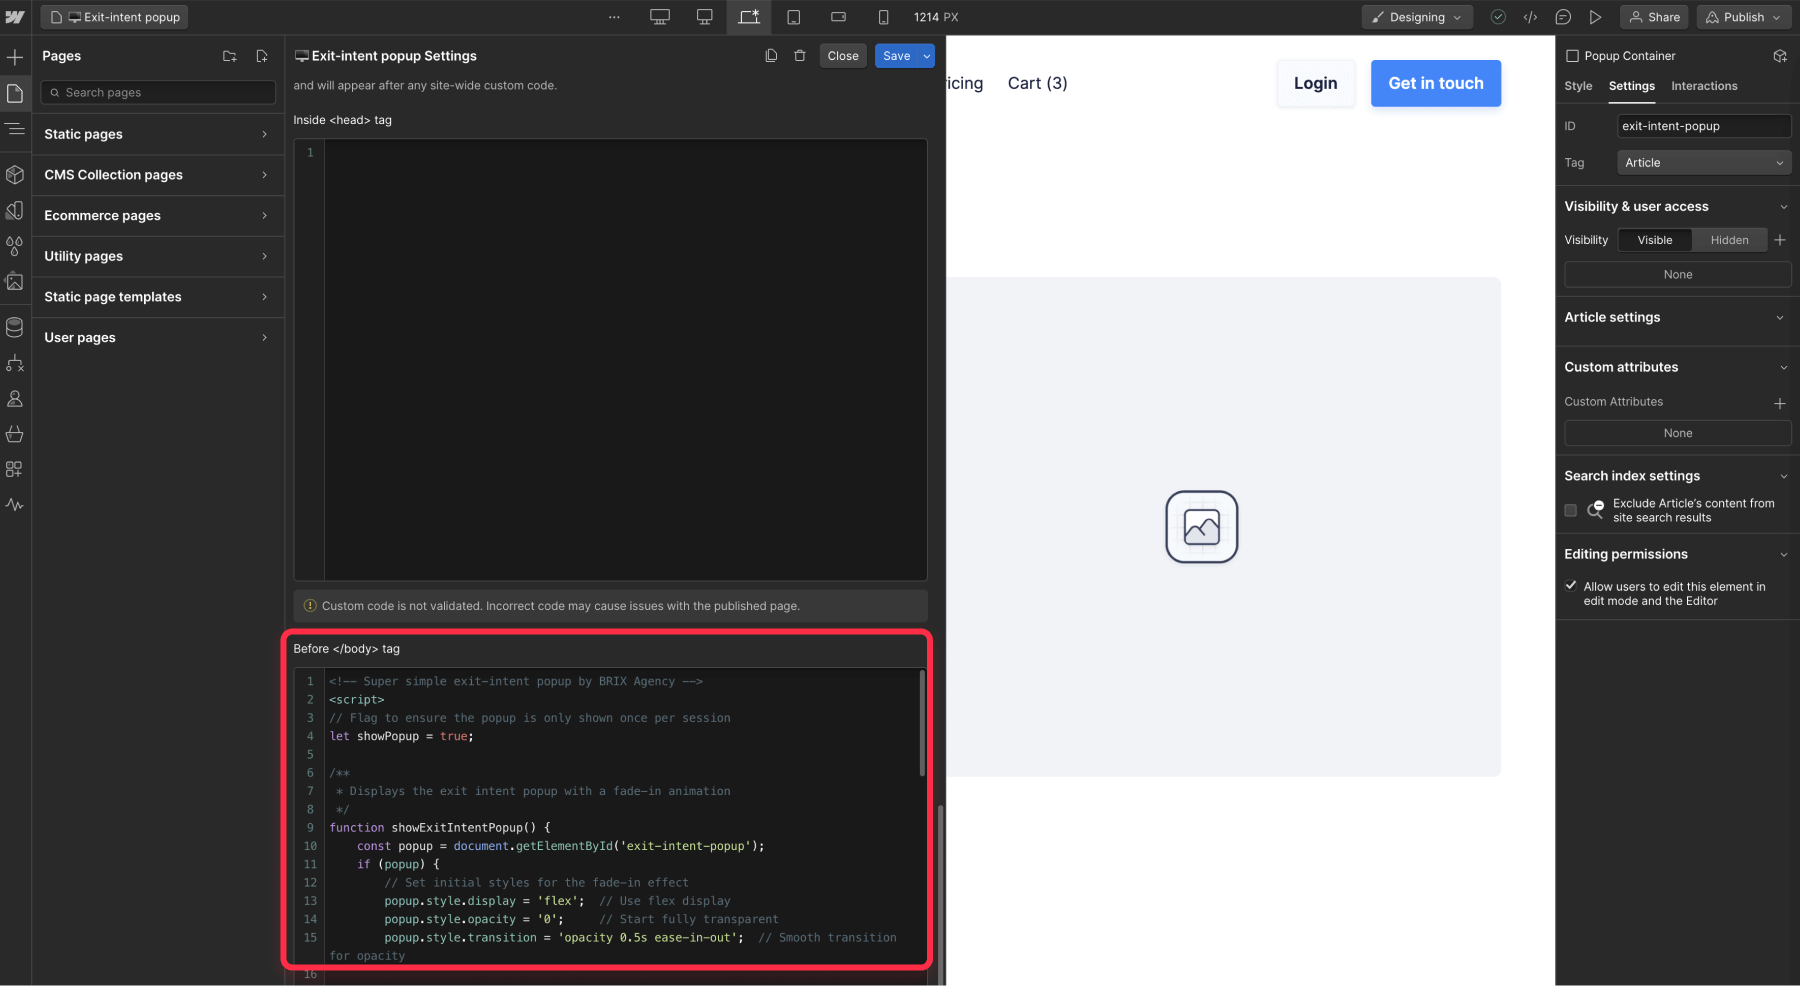
- In Webflow, go to the page settings where you want to implement the exit-intent (or go to Project Settings > Custom Code for site-wide implementation).
- Add the following code to the "Before </body> tag" section:
<!-- Super simple exit-intent popup by BRIX Agency -->
<script>
// Flag to ensure the popup is only shown once per session
let showPopup = true;

/**
 * Displays the exit intent popup with a fade-in animation
 */
function showExitIntentPopup() {
    const popup = document.getElementById('exit-intent-popup');
    if (popup) {
        // Set initial styles for the fade-in effect
        popup.style.display = 'flex';  // Use flex display
        popup.style.opacity = '0';     // Start fully transparent
        popup.style.transition = 'opacity 0.5s ease-in-out';  // Smooth transition for opacity

        // Force a browser reflow to ensure the initial styles are applied
        void popup.offsetWidth;

        // Trigger the fade-in by setting opacity to 1
        popup.style.opacity = '1';

        // Hook for external frequency control (if exists)
        if (typeof window.updatePopupShownState === 'function') {
            window.updatePopupShownState();
        }
    }
}

/**
 * Closes the popup with a fade-out effect
 */
function closePopup() {
    const popup = document.getElementById('exit-intent-popup');
    if (popup) {
        // Start the fade-out effect
        popup.style.opacity = '0';

        // Wait for the fade-out animation to complete before hiding the popup
        setTimeout(() => {
            popup.style.display = 'none';
        }, 500); // 500ms matches the transition duration
    }
}

/**
 * Handles the mouseout event to detect when the cursor leaves the viewport
 * @param {MouseEvent} e - The mouseout event object
 */
function handleMouseOut(e) {
    // Check if the cursor has moved outside the top of the viewport
    if (!e.relatedTarget && e.clientY < 0) {
        // Check if we can show the popup (frequency control or once per session)
        if (showPopup && (typeof window.canShowPopup !== 'function' || window.canShowPopup())) {
            showExitIntentPopup();
            showPopup = false;  // Prevent the popup from showing again in this session
        }
    }
}

/**
 * Adds the exit intent event listener to the document
 */
function addExitIntent() {
    document.addEventListener('mouseout', handleMouseOut);
}

// Initialize the exit intent functionality when the DOM is fully loaded
document.addEventListener('DOMContentLoaded', function() {
    addExitIntent();
});
</script>
Let's break down this code to understand how it works:
- The code sets up an event listener that activates when the user's mouse leaves the browser window.
- It specifically checks if the mouse has moved above the top edge of the viewport, which usually indicates the user is about to close the tab or navigate away.
- When this movement is detected, the code changes the display property of our popup from 'none' to 'block', making it visible to the user.
- To prevent the popup from appearing multiple times in a single session, a flag is used to ensure it only shows once per page load.
- The entire functionality is initialized when the page finishes loading, ensuring all elements are in place before the exit-intent detection begins.
Step 5: Publish and test
After adding the code:
- Save your changes in Webflow.
- Publish your site to make the changes live.
- Test the functionality by visiting your page and moving your mouse cursor quickly to the top of the browser window, as if you're about to close the tab or type a new URL.
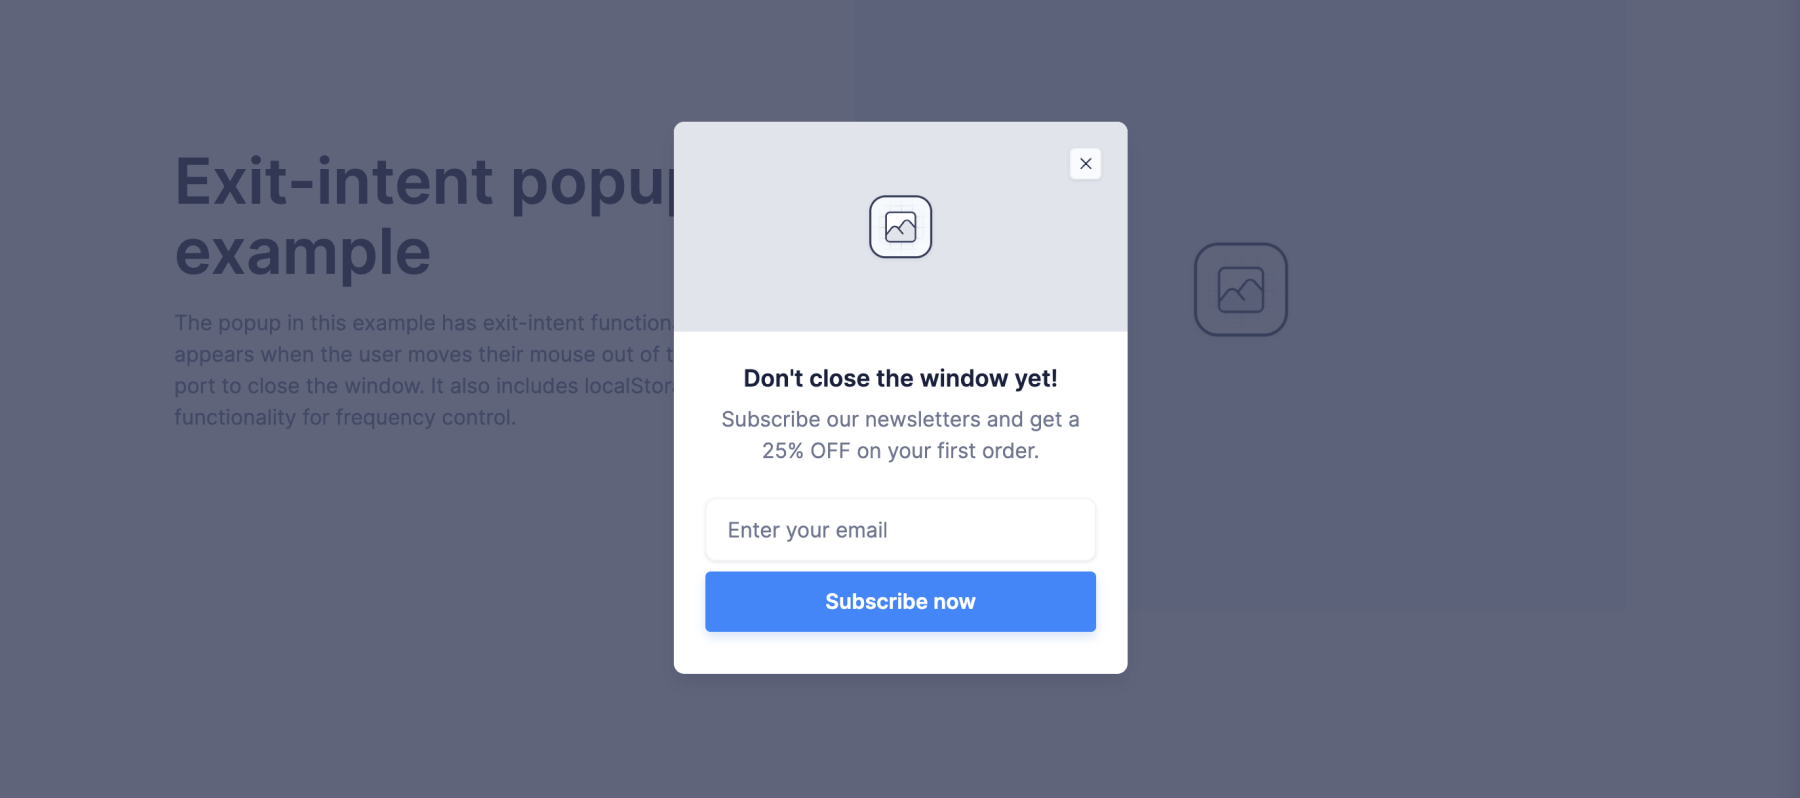
If everything is set up correctly, you should see your popup appear when you attempt to leave the page. Here is a quick example of this tutorial implementation for you to take a look!
Advanced considerations for your Webflow exit-intent popup
While the basic exit-intent functionality is now in place, there are some additional factors to consider for a better user experience:
Frequency control
Showing the exit-intent popup every time a user moves their mouse out of the viewport can be intrusive, especially for returning visitors. To address this, you can implement a system to limit how often the popup appears. Here are two common methods:
- Cookies: Set a cookie when the popup is shown and check for its existence before displaying the popup again.
- Local Storage: Similar to cookies, but using the browser's local storage API.
Both methods allow you to set a timeframe (e.g., 7 days) during which the popup won't reappear for that user.
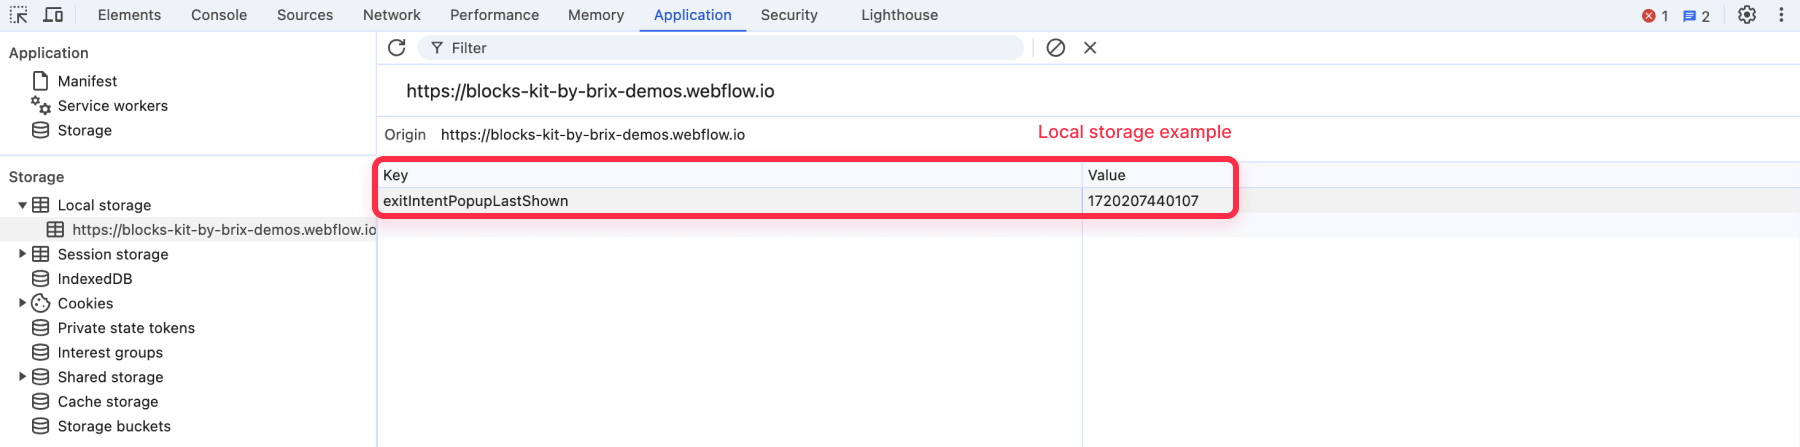
Here's a basic example of how you might implement this using local storage:
<!-- Simple local storage frequency control for exit-intent popup by BRIX Agency -->
<script>
/**
 * Checks if the popup can be shown based on the last shown timestamp
 * @returns {boolean} True if the popup can be shown, false otherwise
 */
window.canShowPopup = function() {
    const lastShown = localStorage.getItem('exitIntentPopupLastShown');
    const now = new Date().getTime();

    // Check if the popup was shown in the last 7 days
    return !lastShown || now - parseInt(lastShown) > 7 * 24 * 60 * 60 * 1000;
};

/**
 * Updates the last shown timestamp in local storage
 */
window.updatePopupShownState = function() {
    const now = new Date().getTime();
    localStorage.setItem('exitIntentPopupLastShown', now.toString());
};
</script>
This code checks if the popup has been shown in the last 7 days before displaying it again. You can adjust the time period by changing the number of milliseconds in the comparison.
Mobile compatibility
The mouse-based exit-intent detection we've implemented works well for desktop users but isn't suitable for mobile devices. For a comprehensive solution, you might want to consider alternative triggers for mobile users, such as:
- Time-based triggers (e.g., show after 30 seconds)
- Scroll depth triggers (e.g., show when the user has scrolled 70% of the page)
- Inactivity triggers (e.g., show after 10 seconds of no interaction)
Implementing these would require additional JavaScript code and possibly the use of mobile-specific event listeners.
Conclusion
Adding exit-intent functionality to your Webflow popup can significantly enhance your ability to engage users who are about to leave your site. By following this guide, you've learned how to implement a basic exit-intent popup and considered some advanced techniques for improving its effectiveness.
Remember, while exit-intent popups can be powerful tools, it's important to use them judiciously. Ensure that your popup offers genuine value to the user, whether it's a special offer, important information, or a compelling reason to stay on your site.
If you need help creating more complex popups or implementing any other advanced functionality in Webflow, feel free to get in touch with our Webflow development agency. We can provide expert assistance in developing custom solutions tailored to your specific needs.